|
|
Post by argentbadger on May 28, 2020 6:52:17 GMT
I’ve been a long-time admirer of the Circle Orboros faction in Hordes / Warmachine, but somehow never really picked up the miniatures. I was finally inspired to make a start on the army as I have a bit more painting time than usual. Sadly, actual games are hard to come by at the moment but Joe leapt to my rescue once again to let me know of the Wartable system. We hooked up via Discord and got our WarmaHordes on for an evening. Game 1 – Invasion (scenario 4) vs Joe’s Mercenaries conflictchamber.com/?c8201b_-2amXmNmKmRmVmVmV545imSmF5qmj5wmj5wCircle [Theme] The Devourer's Host [Morvahna 1] Morvahna the Autumnblade [+28] - Brennos the Elderhorn [15] - Ghetorix [19] - Tharn Blood Shaman [4] Gallows Grove [0(2)] Gallows Grove [0(2)] Gallows Grove [0(2)] Tharn Ravager Shaman [4] Tharn Ravager White Mane [0(5)] Bríghid & Caul [7] Tharn Bloodtrackers (max) [15] - Nuala the Huntress [4] Tharn Ravagers (max) [15] - Tharn Ravager Chieftain [0(5)] Tharn Ravagers (max) [15] - Tharn Ravager Chieftain [5] There is nothing too clever in here. I like Tharn and Morvanha so I just put them together until the points fitted. An earlier draft had the Gatorman Boil Master instead of the Gallow’s Groves (and a few other things shuffled, of course) but I decided that probably Morvanha wanted to stay at arm’s length from the other side more than Brighid and Caul wanted corpse tokens. conflictchamber.com/?c6201b_-20oHnV7jpkppoRprpz1hchchpvlLMercenaries [Theme] The Irregulars [Fiona 1] Fiona the Black [+27] - Blockader [33] Anastasia di Bray [3] Boomhowler, Solo Artist [0(6)] Harlowe Holdemhigh [0(5)] Hermit of Henge Hold [0(5)] Widget, Tinker Extraordinaire [3] Asphyxious the Sanctified [14] - Stalker [8] Kayazy Eliminators [5] Kayazy Eliminators [5] Artificer Prime Nemo [18] - Toro [13] Joe told me that he wanted to play with the cool new Warcasters, Asphyxious4 and Nemo4 since he bought them recently and hadn’t really had the opportunity to do much with them. Double Eliminators under Fiona sounds quite horrible (and the pink unit are designated as Cultists) but I suppose I should be grateful for the lack of Archons. Joe wins the roll-off and chooses to move first. I pick the side with the houses so that Joe has to use forests to hide behind and I some of my things can see through them. Bloodtrackers Prey the Stalker; Brighid and Caul choose the Blockader. 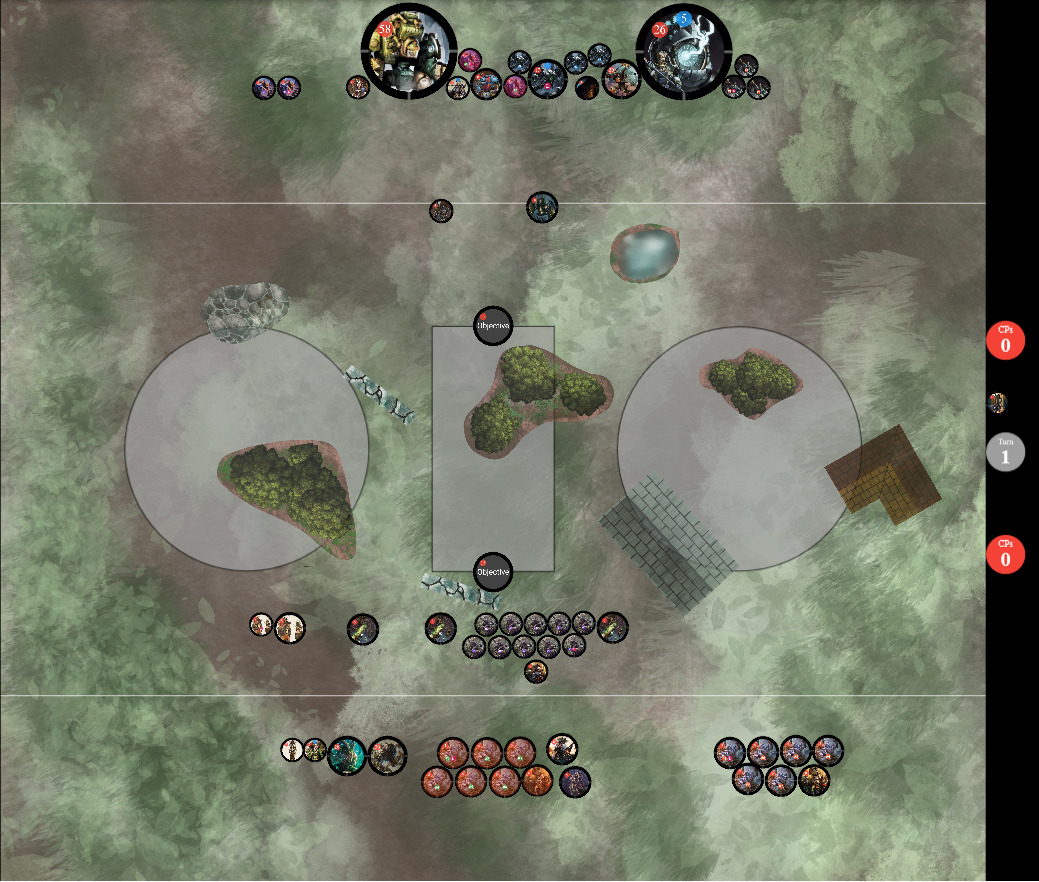 Turn 1: Mercenaries Nemo puts Lightning Shroud on the Toro and magics a Steelhead Ironhead out of somewhere; the latter then Cranes the Toro forward a little. Boomhowler gives Reposition to Asphyxious’s unit who then puts down a couple of Caustic Mists to mess with my line of sight (not that I have much in the way of ranged options).  Turn 1: Circle Everyone runs forward at pretty much top speed. On the left I hang back behind the forest so as not to give up an easy charge to the Blockader. In the centre the Bloodtrackers receive Restoration and spread out to get in the way a little. Both units of Ravagers offer up a couple of their number in case Joe wants to take a chance on triggering Vengeance. Morvanha also casts Harvest.  Turn 2: Mercenaries Fiona allocates two to the Blockader, Asphyxious allocates one to the Stalker and Nemo upkeeps Lightning Shroud. Asphyxious, his servitors and the Stalker kill off a few Bloodtrackers. The Eliminators on the left get charges on Caul due to my sloppy positioning but fortunately one of them misses so the big chap survives. Fiona moves right up and uses her Feat, covering most of the board (how I hate that Feat!) then kills a Bloodtracker with Soulfire blast damage off a Ravager. The Ravager survives due to Tough so the Blockader smashes him into the ground like a tent peg.  Turn 2: Circle Morvanha upkeeps both spells and returns three Bloodtrackers. On the right, I see that I just need to clear a couple of Mechaniks to score the zone but sadly I forgot about the Toro’s countercharge. It splats the first Ravager and I rather pointlessly throw the rest of them at it; I probably would have been better keeping the unit back once it was evident that I was not going to be able to bring the Toro down. Brennos kills one of the Eliminators on the left by shuffling out of Fiona’s Feat and boosting an attack roll, then lands WINDS on the Blockader. I can’t think of any realistic way to clear the other Eliminator as it’s engaged, in a forest and under Fiona’s Feat. The Bloodtrackers move up into annoying positions in the hope that it’ll be awkward for Joe to untangle the Blockader, Stalker and Asphyxious and get them to do proper work. One of them throws her spear at Holdemhigh in the off-chance that I can roll a 6, but it doesn’t come off. I was going to use Morvanha to put Mortality onto Asphyxious but Joe reminds me that it’s not an upkeep and so will expire before it does anything. Instead she arcs Eruption at Holdemhigh but misses anyway. Neither of us score.  Turn 3: Mercenaries The Stalker and Blockader are both allocated two Focus, and Lightning Shroud is upkept by Nemo. Anastasia comes in on the right but can’t quite kill off my Chieftain; sadly (for me) Nemo picks him off later in the turn. The Eliminator on the left saunters away from Caul and clears the Bloodtracker in the Blockader’s way. Holdemhigh charges and clears the Bloodtracker standing in front of Asphyxious and Widget uses Ancillary to get the Stalker to clear itself. One of the Cultist Eliminators runs within arcing range of Ghetorix and eventually Fiona knocks off Spiny Growth with Chasten and applies Curse of Shadows. Fortunately the Blockader can’t actually see Ghetorix from his position so charges my Objective (easily wrecking it) and then knocks off about two thirds of my Warbeast’s boxes including crippling his body spiral. Asphyxious, his little servitors and the Stalker polish off all the Bloodtrackers including Nuala, and the Toro (which got powered up by Nemo’s Mechaniks) drops two of the Ravagers on the right. Joe scores a point for the Objective; 1 – 0.  Turn 3: Circle The Ravagers on the right hurt Nemo and the Toro a bit more. The Blood Shaman applies Mortality to the Blockader and Brighid and Caul knock more than half of it down. I am quite impressed. I try a cute trick to get Brennos to kill the Eliminator and Battle Wizard to heal Ghetorix with Rite of Spring. Sadly I can only land one of the three boosted attacks and Joe uses the Hermit to block it. Morvanha puts Mortality on Asphyxious by arcing it onto a Servitor who is conveniently facing the wrong way, then heals Ghetorix. The big Warpwolf easily, and rather pleasingly, wrecks the rest of the Blockader. My Ravager Shaman kills the nearest Eliminator by bouncing Chain Lightning through a Servitor. The central Ravagers kill Asphyxious and the Stalker (we assumed that the Stalker should go inert though I don’t think that Fiona could take control); the Chieftain uses the Overtake mini-Feat to get into Holdemhigh and kill him too. No scoring this round.  Turn 4: Mercenaries Fiona and Nemo upkeep their spells. Widget uses Ancillary on the Toro which misses a Ravager. The left Eliminator runs back towards Nemo and eventually gets cloned. Anastasia drops a Ravager on the right, Boomhowler shoots one a bit, Nemo Locomotions the Toro around and shoots another and the Toro clears a couple more after being powered up; notably the Toro takes out the central Ravager Chieftain. The surviving Cultist runs to position for arcing; Fiona kills Ghetorix with Chasten then takes a random Soulfire into Caul which kills both him and Brighid. Neither of us score; still 1 – 0 to Joe. Taking a look at the board state, and more importantly the time (already midnight; I am in danger of turning into a pumpkin), I decide to concede. My right side has collapsed completely and I think that I’m running out of anything with any hitting power anywhere else; eventually Nemo, the Toro and Fiona will pick me off. Circle lose by concession.  That was a lot of fun! Wartable is less good than playing face to face, but it is considerably better than not playing at all. The game took quite a long time but in fairness the faction is also new to me so I can hardly lay the blame all on the system. I don’t think that deathclock would be feasible on Wartable but it is a good way to get a few games in for familiarity. I suppose that, for those who are worried about using only miniatures that they actually own (i.e. clearly neither Joe nor me!), Wartable offers the opportunity to play with the whole faction. The game itself was highly enjoyable. Joe is a great teacher and knows my stuff much better than I do. Many of my mistakes were probably down to not recognising the tools I have available, though my positioning was pretty weak in general. Throwing the whole Ravager unit at the Toro in Fiona’s Feat turn was a bit of a waste, and I struggled to get the auras from the Ravager Shaman and Whitemane to be relevant. On the left, I needlessly gave an opportunity for the Eliminators to kill Caul, and only luck kept him alive. I think that this was a bit of poor match for Morvanha in that there were not many living or undead models for Harvest or her Feat; indeed I didn’t even use her Feat at all. Things I learned: - One Bloodtracker (or whatever Restoration target) needs to stay way back and remain safe. I should have recognised that the Stalker in particular could get deep and pick out Nuala.
- Mortality really enables an increase in work rate and I need to get better at understanding how much I need to commit to get the job done.
- Three Gallow’s Groves is probably too many. Next time I will probably shuffle things around to have the Gatorman Boil Master instead and run maybe only a single Grove.
|
|
|
|
Post by Dev Null on May 28, 2020 8:36:50 GMT
Thanks for the report! I've often thought of writing batreps, but only for the games that I lose; I think that those are the ones that you get the most out of dissecting afterwards, and that you might learn the most from others' comments on. (That said, I've never played Morv, so I don't have any real feedback for you...)
|
|
|
|
Post by argentbadger on Jun 1, 2020 8:17:47 GMT
Thanks Dev Null! I highly recommend writing battle reports for two main reasons. Firstly, and as you point out, they let you revisit the events of the game and force you to analyse what caused the game results; it's too easy in the heat of the moment to just put it onto bad dice or whatever. Secondly: Content for the Content God! The Warmahordes community needs all the content it can get, not only to share information learned across the player base but also to provide data for new or potential players. Joe and I had another free evening for a game. We went back and forth a few times to pick a suitable match-up for my Morvanha list as he felt that some of his ‘main’ lists were probably not a good fit to make this an entertaining game. In the end, he modified someone’s Haley3 list and off we went. Game 2 – Anarchy (scenario 5) vs Joe’s Cygnar conflictchamber.com/?c8201b_-2amXmNmKmRmVmVmV54jXmSmF5qmj5wmj5wCircle [Theme] The Devourer's Host [Morvahna 1] Morvahna the Autumnblade [+28] - Brennos the Elderhorn [15] - Ghetorix [19] - Tharn Blood Shaman [4] Gallows Grove [0(2)] Gallows Grove [0(2)] Gallows Grove [0(2)] Tharn Ravager Shaman [4] Boil Master & Spirit Cauldron [5] Bríghid & Caul [7] Tharn Bloodtrackers (max) [15] - Nuala the Huntress [4] Tharn Ravagers (max) [15] - Tharn Ravager Chieftain [0(5)] Tharn Ravagers (max) [15] - Tharn Ravager Chieftain [0(5)] I made a slight change here, removing the Tharn Whitemane in favour of the Spirit Cauldron. With all the potential corpse token users in my list, I felt that this could be more useful than Veteran Leader (though indeed, that is pretty sweet). Everything is just the same as last time. conflictchamber.com/?c1201b_-1NeS9G9Aak7jaj9cpqoWadpvlLCygnar [Theme] Storm Division [Haley 3] Major Prime Victoria Haley [+25] - Ironclad [12] - Thorn [13] - Squire [0(5)] Anastasia di Bray [3] Journeyman Warcaster [0(4)] - Firefly [8] Sir Dreyfus the Storm Knight [0(5)] Order of Illumination Resolutes (max) [13] Storm Lances (max) [20] Artificer Prime Nemo [18] - Toro [13] I’m not sure that Joe had any firm plans for this list except thinking that maybe it wouldn’t overrun me too hard, while also including some living models for me to Harvest. He did remove Ragman and a Nomad in favour of a Toro and Anastasia Di Bray. Ragman is certainly not needed here as I’m not really packing a lot of armour. Joe wins the roll-off and chooses to move first again. I take the top side as the terrain looks a bit less annoying; note that we agreed that the burning clouds blocked line of sight. I put the Ravagers on each flank and hope to use repositioning Bloodtrackers plus Brighid and Caul to mess with the forest in the centre while camping on the flag inside my trench. Bloodtrackers Prey the Resolutes; Brighid and Caul pick Nemo.  Turn 1: Cygnar Haley puts Tactical Supremacy on herself and summons both of her echoes. Nemo creates a Gun Mage Captain Adept from somewhere and the Journeyman casts Arcane Shield on the Resolutes.  Turn 1: Circle I run up and stay outside threat ranges on the flanks. In the centre, I just dive right in with the Bloodtrackers and hope for the best. The Spirit Cauldron creates a few corpses and fills up Caul’s supply. Brighid and Caul mill about near the flag which is probably a mistake; I should have put them behind the forest and forced Joe to react to them. Morvanha puts Restoration on the Bloodtrackers and Harvest on herself.  Turn 2: Cygnar All spells are upkept and nothing is allocated. Nemo gets Eyeless sight from the objective. Haley Past and Haley Prime send Chain Blasts into the Bloodtrackers, killing a couple, and Haley Prime also puts up Temporal Distortion. The Resolutes and GMCA drop another couple of Bloodtrackers. Nemo zaps Caul down to a single box and kills a Grove. I had thought that Caul had Vengeance but it seems that I was mistaken. Sir Dreyfus turns out to be a bit more mobile than I had expected and kills another pair of Bloodtrackers. Over on the left, the Storm Lances zap a few Ravagers and reposition backwards.  Turn 2: Circle Morvahna takes a chance and returns 4 Bloodtrackers as well as upkeeping both spells; I’m hoping that I can Harvest enough Fury to stay safe. I need to move Caul out of the Blood Shaman’s way, Brighid shoots at a Resolute but fails to break armour. The Spirit Cauldron gives the Blood Shaman Puppet Master, but she fails to land Mortality on the Resolutes anyway. I send in a couple of Ravagers to ding up the Toro on the right; keeping the rest back a little so I don’t give away the whole unit. I also try to keep the Chieftain a bit further in from the board edge so it’s a little harder for Anastasia to murder him. The Bloodtrackers throw spears at Sir Dreyfus and the Resolutes but roll abysmally and do a couple of points of damage to a single Resolute after the dust has settled. Brennos kills a Storm Lance and the Ravagers on that side advance rather timidly. I do score my flag though; 1 – 0 to me.  Turn 3: Cygnar Again the Objective gives Eyeless Sight to Nemo; all spells are upkept and no Focus is Allocated. Anastasia ambushes in on the left. Nemo’s team of Mechaniks power him and the Toro up. Thorn stabs a Bloodtracker in melee to get some space. Haley Future Revives a Storm Lance; Haley Prime casts Temporal Distortion and then she and Haley Past kill a couple of Bloodtrackers with Chain Blasts. Nemo shoots Brighid; I shield guard it to Caul who dies then Nemo’s next shot kills Brighid anyway. He also casts Lightning Shroud on the Toro which kills both Ravagers. More Bloodtrackers are killed by Resolutes and they contest my flag. Anastasia hurts the Chieftain but her failure to kill him means that she’s in the middle of a big pile of Vengeance attacks. The Ironclad and Storm Lances kill a couple of Ravagers on the left, and Sir Dreyfus sits on Joe’s flag. 1 – 1.  Turn 3: Circle Ravager Vengeance attacks kill Anastasia and do a bit of damage to the Ironclad and Toro. Morvanha returns another 4 Bloodtrackers and upkeeps her spells. The Spirit Cauldron gives the Blood Shaman Puppet Master again and this time she lands Mortality on the Resolutes. Sadly, the Bloodtrackers are pretty useless even with Mortality and Prey and still only manage to drop a single Resolute between all their attacks. Brennos kills a Storm Lance and Battle Wizards his Ravaging Winds spell into Sir Dreyfus for no effect whatsoever. The left Ravagers drop the Ironclad, and one Storm Lance but leave another sitting on a couple of boxes. On the right, the Ravagers almost wreck the Toro but I get greedy and want to let the last one start an overtake chain through the Mechanics too. This means that I don’t buy an attack with the Chieftain even though he’s full of corpse tokens. And, of course, the last one misses his charge and fails to break armour on the bought attack, leaving the Toro on a couple of boxes. I send in Ghetorix to kill a Resolute without going into the forest hoping that it and Spiny Growth will suffice to keep him safe. This does at least clear my flag; 2 – 1 to me.  Turn 4: Cygnar All spells are upkept, two Focus allocated to the Firefly and Thorn, and Nemo gets Eyeless Sight again. Thorn stabs a couple of Bloodtrackers. Haley Feats. Haley Past Revives a Storm Lance and puts Ghost Walk on the Firefly. Haley Prime uses Repudiate to strip Spiny Growth off Ghetorix and recasts Temporal Distortion. Haley Past, the Firefly and Sir Dreyfus bang up Ghetorix really badly. On the right, one Mechanic repairs the Toro’s Cortex and the other gives it some Focus; the last supercharges Nemo as usual. The Toro kills a Ravager and the Resolutes kill another. The Squire trundles onto the flag. Joe realises that he can just get Nemo into the forest and able to see Ghetorix, so he guns my big beastie down. The Storm Lances on the left drop three Ravagers and a Grove with a handy electroleap; they put out a lot of attacks for such a small number of models. Joe scores his flag; 2 – 2.  Turn 4: Circle I take my Vengeance attacks but actually achieve almost nothing. Morvahna returns three Bloodtrackers and upkeeps her spells. The surviving couple of Ravagers plus their Shaman on the left clear the zone. Brennos moves up and boosts Ravaging Winds into Haley Past, boosting damage to kill her by sheer good fortune; the boosted blast also polishes off the last Storm Lance which is rather nice. On the right, things go less well as the Ravagers fail to achieve anything more than finally stripping the last couple of boxes off the Toro; they can’t even manage to hit the Mechaniks. I need to deal with Nemo, but it seems unlikely that I can really do it since most of my Bloodtrackers are engaged by the giant melee ranges on the Resolutes and Haley. In the end, the Spirit Cauldron puts Puppet Master on the Blood Shaman to land Mortality on Nemo, and Nuala uses her mini-feat to put Prey on him. Even with all that it’s nowhere near enough and I only take off about half of his boxes. I do at least score the left zone; 3 -2 to me.  Turn 5: Cygnar It’s time to finish this. Thorn and the Firefly get their full allocations and all spells are upkept. Thron strolls over and stabs Brennos like a champion, neatly taking about both mind and spirit with some truly heroic damage rolls. Nemo takes off, killing a few Bloodtrackers I’ve jammed in there with Spatial Vortex but missing Morvahna with both of his shots. Haley Prime casts Temporal Distortion and Haley Future stabs my Warlock to death in two swings, killing Brennos via transfers in the process. Even if that hadn’t worked, I think that Joe had plenty more attacks available to kill Morvanha with. Circle lose by assassination.  Another fun game of Warmachine with Joe. I really should have played this much better strategically. I knew at the start of the game that I would need to leverage the forest in the middle for repositioning Bloodtrackers and to deliver Brighid and Caul, but I was far too timid and gave Joe too much room to play with. The end result was that he dictated the line of play and not me. I also went the wrong way with the Ravagers. Instead of starting them on the outside and bringing them in, I ought to have started them closer to the centre and then fanned them into the zones only if Joe ceded them to me. In all, I didn’t get my attacks where I needed them. I also need to work out what I actually want to do with Morvanha; I’m not sure when to Feat in particular… and indeed I didn’t do it at all this game. Things I learned: - Feat earlier (i.e. at all) with Morvahna. I keep wanting to save her to activate late in the turn so that she might get additional fury via Harvest and therefore contribute further. But in fact what happens is that by the time she has enough fury to do anything interesting, anything that could benefit from her activation has already finished.
- If I’m going to be bringing back Bloodtrackers three or four at a time, I can probably afford to be a bit more aggressive jamming the front line with them. Possibly I need to activate them later in the turn and use them more as highly mobile jammers rather than worry about what they get done with their spears.
- Brighid and Caul are really easy to kill if I don’t hide them. I should either get them to total safety right at the back so that they can come in late game to damage surviving heavy targets or put them somewhere forward but awkward so that if anything does try to kill them then I can get it the following turn.
|
|
|
|
Post by argentbadger on Jun 4, 2020 7:00:54 GMT
Thanks to the magic of Wartable, I was able to get in a game against Scottish WarmaHordes legend Frazer; despite seeing him at various events I’ve never had the pleasure of playing a game with him. Game 3 – King of the Hill (scenario 1) vs Frazer’s Protectorate of Menoth <a href="https://conflictchamber.com/?c8201b_-2amXmKmJmV545imSmF5qmi5wmj5wmT" rel="noopener" target="_blank">https://conflictchamber.com/?c8201b_-2amXmKmJmV545imSmF5qmi5wmj5wmT</a> Circle [Theme] The Devourer's Host [Morvahna 1] Morvahna the Autumnblade [+28] - Ghetorix [19] - Warpwolf Stalker [17] Gallows Grove [2] Tharn Ravager Shaman [4] Tharn Ravager White Mane [0(5)] Bríghid & Caul [7] Tharn Bloodtrackers (max) [15] - Nuala the Huntress [4] Tharn Ravagers (min) [10] - Tharn Ravager Chieftain [0(5)] Tharn Ravagers (max) [15] - Tharn Ravager Chieftain [0(5)] Well of Orboros [10] I did a bit more swapping around here; most notably getting rid of Brennos in favour of a Warpwolf Stalker as Brennos just never seemed to achieve too much. I also removed the Spirit Cauldron and swapped a couple of other items around in favour of adding a Well of Orboros; it seems to do the job of handing out corpses just as nicely as the Spirit Cauldron and increases Morvanha’s control range to boot. conflictchamber.com/?c2201b_-1r0JlVm0lM9x3t2_lZlS2v3F3Hm2Protectorate [Theme] Exemplar Interdiction [High Reclaimer 1] The High Reclaimer [+32] - Judicator [35] High Exemplar Gravus [8] Scrutator Potentate Severius [0(6)] - Repenter [8] Vassal Mechanik [1] Choir of Menoth (min) [4] Exemplar Cinerators (max) [13] - Exemplar Cinerator Officer [0(5)] Exemplar Vengers (max) [20] Idrian Skirmishers (min) [9] - Idrian Skirmisher Chieftain & Guide [0(5)] Visgoth Juviah Rhoven & Honor Guard [9] I don’t know anything notable about the Protectorate except that I hate to see a Judicator across the table from me. A Judicator with the option of getting Hand of Fate seems even worse. Frazer wins the roll-off and chooses to move first, so I take the bottom side as it means that I can hope to hide behind the house a bit and make Frazer worry about all the forests. In retrospect, I wonder if I might have been better the other way around as I can just ignore those forests anyway. I deploy Brighid and Caul away on the left in the hope that they can make it to the forest over there without getting gunned down. The rest of the Tharn are deployed in the centre; I’ll work around that acid pool as required. Bloodtrackers and Idrians Prey each other; Brighid and Caul choose the Judicator.  Turn 1: Protectorate of Menoth Everything rushes up at me with Gravus giving the Cinerators Desperate Pace. The Judicator lobs a few rockets towards me, but they scatter off to empty spots. The High Reclaimer puts a few clouds down between the central forests.  Turn 1: Circle My Well pops out a Blood Shaman (note that it hadn’t occurred to me that she wouldn’t get the Attached rule if I did this; in future I would shuffle my plans a bit differently) then fires an optimistic shot in the general direction of the Idrians. I get the most ludicrous scatter and kill four Idrians, though I do get a little measure of bad news by clipping a Cinerator too and triggering Vengeance. Everything else runs up as fast as their little legs will carry them. In the centre this turns into a really annoying traffic jam. Morvanha casts Harvest on herself and Restoration on the Bloodtrackers.  Turn 2: Protectorate of Menoth The Judicator and Repenter are allocated two Focus each. The Cinerators move up under Vengeance and then receive Desperate Pace again from Gravus. Severius puts up Road To War and strolls around in the backfield. On the right, the Vengers charge in and drop a Bloodtracker and also kill my rather poorly placed Gallows Grove; they reposition back away from my lines. The remaining Idrians kill a few Bloodtrackers before repositioning back and going to ground and the lead Cinerator kills another Bloodtracker. The High Reclaimer puts Hand of Fate on the Judicator and then puts a few clouds out; it kills a Ravager on my left and the Repenter gets another and then uses Road To War to get back to relative safety.  Turn 2: Circle I upkeep both of Morvanha’s spells and return three Bloodtrackers. On the right, the Stalker kills the nearest Venger and Sprints back with Lightning Strike. The left Ravagers move in on the Repenter and Idrians and achieve basically nothing with some truly awful hit rolls and the Well misses a shot too. Brighid and Caul make a run for the forest. Bloodtrackers kill a Cinerator and jam up where I can. Morvanha gets a clear shot into one further back and RFPs it with Eruption of Life; I have to admit that felt quite nice. Neither of us score.  Turn 3: Protectorate of Menoth Both Protectorate Warjacks get fully loaded with Focus, spells are upkept and Vengeance from the Cinerators kills another couple of Bloodtrackers. Rhoven and his bodyguards charge in to clear out the lead Ravager and the Choir sing Battle for the Warjacks. The Judicator marches up and gets a line on Caul (I hadn’t moved him quite far enough behind the forest) and toasts him thoroughly with a flamethrower; Caul makes his Tough roll but is knocked down and on fire… not a great situation for the big chap. It then launches rockets, killing my Blood Shaman (saving me the awkwardness of not having the attached rule after all), the Ravager Shaman and a bunch of other infantry. Quite the effective turn. The Cinerators charge in, mini-feating back into a shield wall after killing another Ravager and Bloodtracker. The Vengers kill my Objective, the Idrians all bounce off the last Ravager in the centre due to some truly awful dice and finally the Repenter takes out the Chieftain from the left Ravager unit. Frazer scores for getting my Objective; 1 – 0.  Turn 3: Circle Caul burns to death. Morvanha drops Restoration but upkeeps Harvest, and my Vengeance moves achieve depressingly little. Morvanha uses her Feat, puts Mortality on the Cinerators and Restoration on the larger unit of Ravagers. This all takes her to zero Fury but I figure that if I can’t kill a good chunk of Frazer’s forces here and Harvest back to a decent camp then Fury would be the least of my worries. The Well kills Rhoven and a Choirboy as well as hurting the bodyguard who inevitably Shield Guarded the shot and Brighid drops the Vassal Mechanik at the back. My Ravagers kill all of the Cinerators except the one hiding at the back, RFPing them due to the Feat. The Stalker kills a Venger and Lightning Strikes into the zone on the right; the Bloodtrackers ding up another couple of them and generally try to get in the way. Ghetorix moves to the right to threaten the Vengers a bit. No scoring so we remain at 1 – 0 to Frazer.  Turn 4: Protectorate of Menoth The Warjacks get two Focus each and both Road To War and Hand Of Fate are upkept. Gravus kills the second Ravager Chieftain and repositions onto the flag. The Choir put Shielding onto the Judicator which then blows up a bunch of Ravagers and a Bloodtracker. High Reclaimer Feats back a Venger, a Cinerator, Rhoven and 4 Idrians (actually we got mixed up here as Rhoven and most of the Idrians had been RFPed earlier… however, I don’t think that the end result is in doubt) then swaps Hand Of Fate onto the Vengers. At this point my centre collapses entirely as various things clear the contesting Bloodtrackers and wipe out the remaining Ravagers. It’s late and I can see that this is all over, so I concede before the Vengers probably drop my Warbeasts. Circle lose by concession.  That was a very enjoyable way to spend an evening; Frazer is a very fun opponent. There are a lot of individual things I did wrong here, starting with my initial deployment and unpacking. I need to find a way to move my pieces out of their initial deployment positions that doesn’t end up with an awful traffic jam in turn 2. Possibly I could be a bit less conservative with the Bloodtrackers (especially if I’m going to try to recur them anyway), or maybe I need a wider deployment. I think that my general idea with Brighid and Caul was reasonable, I just needed to start with them a bit wider and make it so that if I’m going to lose them then it really cost something to do it. Still, despite another loss I felt that I played a bit better in some regards; in particular I used Morvanha herself far more effectively and even remembered to use her Feat when it would have an impact. The Well of Orboros felt very useful considering its low cost, although I will admit that some truly heroic dice rolls might have led me to overvalue its performance. Things I learned: - I should practice unpacking my force out of deployment. In theory this shouldn’t be too hard since they almost all have Pathfinder but in practice it’s clear that all my units are tripping over themselves. It is also hard to place the Ravager Shaman and the Whitemane in places where their abilities are relevant since the sheer mass of bodies in the way keeps them back from affecting the front line.
- I need find a way to get work from my Warbeasts; currently I seem to have them hiding away at the back, then when I do send them to do something they just get killed too easily (admittedly in this game we didn’t actually play the part where Vengers killed them). Possibly this comes in with the ‘traffic jam’ problem above; if I can clear a lane then I should at least be able to do some work with the Stalker using Lightning Strike to come back to safety.
- I have to get better at assessing where I need Mortality. In this game on my turn 3 it would have been more useful on the Vengers as I had enough attacks to handle the Cinerators I could reach anyway; in the meantime, the Vengers just laughed at the Bloodtracker attacks.
- I need to get some kind of plan for dealing with big beasties like the Judicator. Since it can shoot so effectively long before anything of mine can get anywhere near it, I’m really struggling for how to approach this. The Choir can also stop me casting spells at it too so I can’t even use Mortality to make it easier to wreck. I would definitely appreciate advice.
|
|
|
|
Post by Dev Null on Jun 4, 2020 13:14:29 GMT
Nice one.
When I build new armies, I spec out potential deployments and generic first turn moves. (I used to do this in Vassal; I'll have to try out War Table.) I do this because I struggle so much with the turn 1 unpack, and I waste too much clock on it. When I can, I try to bring the standard deploy, the unpack, and my rough notes on how to get from A to B with me to a game, but often the process of working it out - slowly, and with no pressure - cements it in my head pretty well. Obviously you need to change your deployment and rollout based on terrain and your opponent, but it's surprising how often this results in my pre-determined deploy with one swap, or mirroring it to swap sides. Sometimes I have to do two versions, depending on whether I'm going first.
If you find a good way to deal with shooty colossals, be sure to let us know, yeah? I mean, apart from "Get Ghettorix into it, using miracles."
|
|
|
|
Post by argentbadger on Jun 8, 2020 19:19:11 GMT
Thanks, Dev Null, that's a really good idea to practice unpacking. I should make a bit of time to have a go at that sometime. Game 4 – King of the Hill (scenario 1) vs Joe’s Mercenaries conflictchamber.com/?c8201b_-2amXmOmRmUmSmF5qmj5wmHmTCircle [Theme] The Devourer's Host [Morvahna 1] Morvahna the Autumnblade [+28] - Storm Raptor [34] - Tharn Blood Shaman [0(4)] Tharn Wolf Rider Champion [0(7)] Bríghid & Caul [7] Tharn Bloodtrackers (max) [15] - Nuala the Huntress [4] Tharn Ravagers (max) [15] - Tharn Ravager Chieftain [0(5)] Tharn Wolf Riders (max) [18] Well of Orboros [10] Two big changes to my list this time. Firstly, I’m just not getting much value out of my Warbeasts so I decided to go all in and pick a big one with a useful gun. I have some concerns about generating enough Fury with single Warbeast but Morvanha has other ways to collect Fury so hopefully this will suffice. I also swapped one unit of Ravagers for Wolf Riders as their greater manoeuvrability might make it easier for me to avoid traffic jams with my own stuff. conflictchamber.com/?c6201b_-1Hq7oG5IoQoToRoKoKoIoJoUoUo_p2o_Mercenaries [Theme] Flame in the Darkness [Ashlynn 2] Ashlynn d'Elyse, the Queen's Blade [+22] - Gallant [17] - Talon [7] Alexia, The Undying [5] Grand Master Gabriel Throne [7] Hermit of Henge Hold [5] Morrowan Archon [8] Morrowan Archon [8] Ragman [4] Savio Montero Acosta [0(6)] Thamarite Advocate [0(3)] Thamarite Advocate [0(3)] Legion of Lost Souls (max) [18] - Morrowan Battle Priest (3) [0(6)] Legion of Lost Souls (max) [18] I have no idea what this list is supposed to do apart from abuse the Legion and Archons to make my life really hard. I’m not sure that Ashlynn2 synergises very interestingly with this list but Joe is better than I am at Warmachine so I expect that he has seen something clever that I haven’t. Note that the Battle Priests were split between the two units of Legion of Lost Souls; Conflict Chamber won't allow me to do that for some reason. I win the roll-off and choose to go first; Joe gives me the top of the board. I put the Well in the water as it can’t move anyway, the Ravagers are on the left so that if I end up getting pushed back I can use that forest to jump out of, and Brighid and Caul go on the right to hopefully get some work done from behind that forest. Bloodtrackers Prey the Legion on the left; Brighid and Caul pick the Archon on their side of the board. ![]() thebovineoverlord.files.wordpress.com/2020/06/screenshot_2020-06-05-war-table-deployment.jpg thebovineoverlord.files.wordpress.com/2020/06/screenshot_2020-06-05-war-table-deployment.jpg" alt="" width="690" height="659" /> Turn 1: Circle Everything runs up to claim as much board space as I dare. The Well magics a Ravager Shaman into existence (in retrospect, I think that a Whitemane might have been more useful). Morvanha casts Harvest on herself and the Blood Shaman puts Restoration on the Bloodtrackers.  Turn 1: Mercenaries Ashlynn moves up a tiny bit and puts an Artifice of Deviation underneath herself. Throne makes the left Legion Tough and shoots the lead Bloodtracker before scooting back. Everything runs up; the lead Legion offering themselves up as targets for Vengeance and the rest staying out of my threat ranges.  Turn 2: Circle Morvanha upkeeps her spells and return the dead Bloodtracker. The Well lobs a shot at one of the Legion; it misses and deviates nicely onto Throne, Alexia and a pair of other members of the Legion; the latter both Tough, the Hermit cancels the damage roll on Alexia and Throne suffers a bit of damage. Morvanha walks forward quite boldly, applies Mortality to the left Legion and uses her Feat. Brighid shoots the Archon but Gallant Shield Guards it. The Wolf Riders come forward and throw some javelins into the right Legion; this achieves depressingly little and they reposition backwards. My positioning is pretty poor here; I should not have committed them so half-heartedly. On the left, the Bloodtrackers take advantage of Morvanha’s Feat to RFP a load of the Legion of Lost Souls and the Storm Raptor takes a shot at the Archon which is shield guarded to the Battle Priest.  Turn 2: Mercenaries Both sets of the Legion come forward with Vengeance. Ashlynn drops the Artifice and allocates nothing. Alexia clears a Bloodtracker with Hellfire, then Ashlynn casts True Path and sends Marie Aguillon up to kill another. Throne gives Stir The Blood to the Legion on the right and shoots another Bloodtracker. The Hermit runs through the cloud to sit right in front of my Storm Raptor. The Archon on the left races into my lines and kills another couple of Bloodtrackers and the Advocate follows as far as the flag. Acosta smites a Wolf Rider, then the Legion follow and drop the Champion and a couple more due to my poor placement. The other Archon kills Caul and Gallant strolls into the right zone. Back on the left, the Legion and the Talon kill a couple of Ravagers who both fail to Tough. Joe scores the flag and the right zone; 2 – 0. 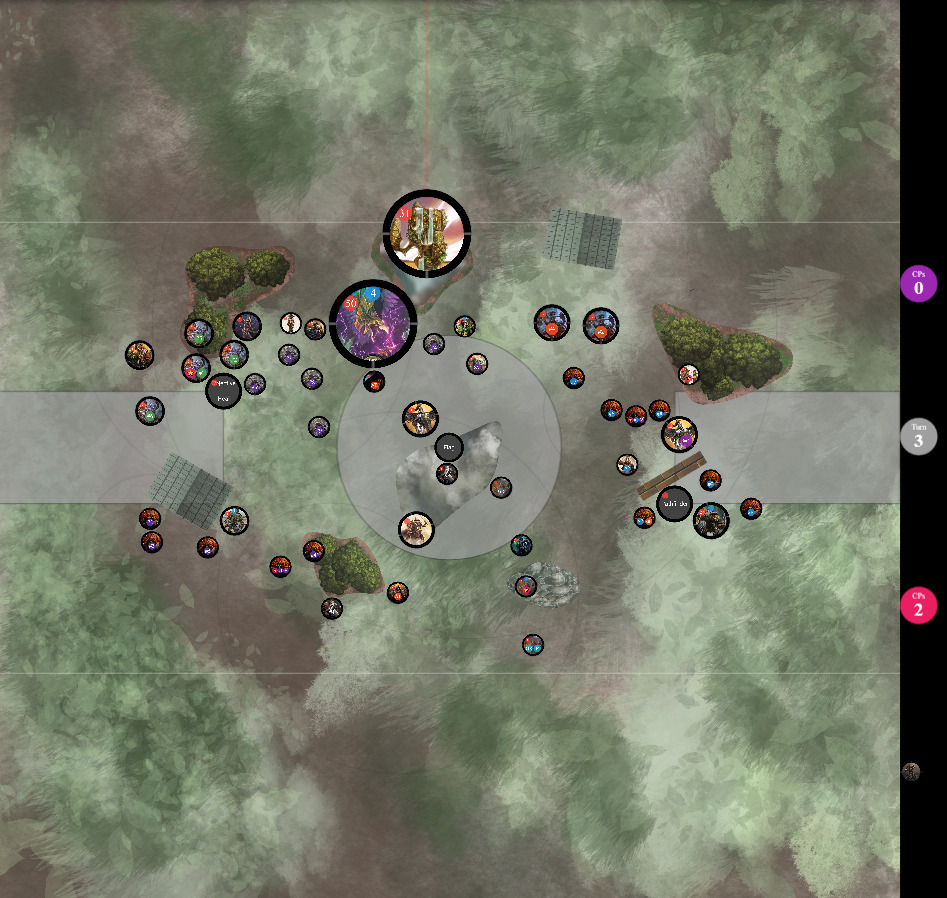 Turn 3: Circle The Ravagers all miss their Vengeance attacks, then Morvahna restores 4 Bloodtrackers and upkeeps her spells. The Wolf Riders take out a satisfying number of the Legion on the right. The Blood Shaman lands Mortality on the central Archon, then Nuala uses her mini-feat to make it her Prey. The Bloodtrackers drop it, swap Prey to Throne and kill him too, swap Prey to the newly created Thrall Warrior and finally swap Prey back to the Legion of Lost Souls. The Ravagers kills a couple of the Legion too and knock the right arm off the Talon. I badly misposition most of the unit in the process though, this means that I would need Joe to trigger Vengeance if I’m going to get much work out of them next turn. Morvanha stabs Acosta to death and kills the Advocate on the flag with an Eruption of Life. The Raptor flies over the Hermit and shoots at the Archon but does nothing except scratch Gallant’s paint after another Shield Guard; finally it repositions back to block access to Morvanha. Neither of us score; 2 – 0 to Joe.  Turn 3: Mercenaries Legion of Lost Souls turn out to have a ludicrous interaction with Vengeance; they eat almost all the Bloodtrackers and return to almost full strength on the left. Ashlynn allocates nothing. The Hermit and Ragman both use their armour de-buffs on the Storm Raptor; the latter also sits on the flag. The Legion on the right kill a Wolf Rider and hurt the Storm Raptor, and the Archon finishes the last Wolf Rider. The left Legion wipe out almost all the remaining Bloodtrackers ut carefully avoid triggering Vengeance on my Ravagers since Joe has seen my misplay on that side. Ashlynn and her friends hurt the Storm Raptor and she Feats back Acosta. He briefly gives me cause for hope by rolling 1,1 for his first attack but then cranks the damage on the second sword to kill my Gargantuan. Joe scores the right zone and flag again to take the score to 4 – 0.  Turn 3: Circle Time for assassination, otherwise I’m done. Luckily Ashlynn is very much in range to attack. The Blood Shaman starts me off with a very lucky landing of the 8 needed to stick Mortality on Ashlynn’s unit via Marie Aguillon. The Well takes a shot but misses and scatters nowhere significant. Morvanha takes matters into her own hands and kills Ashlynn with some fully boosted swings of Equinox. Circle win by assassination.  That was a great way to spend an evening. I’m happy to have my first win playing Circle, even if it was a last-gasp assassination while I was getting crushed on attrition and scenario. Joe was a lot of fun to game with and I’m kind of sorry that his loss was really due to some kind dice in my final turn. It’s probably worth noting that immediately after the game Joe recognised a variety of ways that he could have positioned better to avoid the assassination without letting the Storm Raptor live, so I won’t get that opportunity again. It’s probably worth noting that this felt like quite a nice match-up for Morvanha, featuring swathes of living/undead models that really care about RFP effects. The Storm Raptor felt like it had a lot of potential, even if I didn’t get much value out of it this time, so I think that I will try this battlegroup again. Using the Wolf Riders instead of a second unit of Ravagers relieved a lot of the pressure on my first turn spacing as they don’t really compete for the same area. Things I learned: - Legion of Lost Souls are really crazy when they get Vengeance. I need make sure that I don’t just let them refill back to full strength; good positioning is going to be important for this.
- Ravagers are hard to get good work out of. Either I offer up only a one or two as bait for Vengeance and it doesn’t get taken, or I mis-play the unit entirely and either block them behind terrain or lose the lot. More practice is required.
- The Wolf Riders have a lot of output, but they aren’t too hard to dispatch once they commit. I’m going to keep playing with them and I might learn when to skirmish and retreat, and when to commit all the way in and make the most of all their attacks.
|
|
|
|
Post by argentbadger on Jun 17, 2020 7:12:39 GMT
Last weekend Andrew kindly accepted a game of Warmachine / Hordes with me. I was planning to use Morvahna1 again but since Andrew wanted to play Convergence I realised that would not be a great idea; having a Feat and main spell relying on living or undead enemies isn’t going to make a favourable match-up against an army of clockwork robots. I threw together a fairly simple Wurmwood1 list for the game instead but this gave me a bit more context about using Morvanha1 further; more about this at the end. Game 5 – Invasion (scenario 4) vs Andrew’s Convergence of Cyriss conflictchamber.com/?c8201b_-295v4QjGjFjFjF4Hg4g45e5e5f5fmTCircle [Theme] Bones of Orboros [Wurmwood 1] Wurmwood, Tree of Fate [+27] - Megalith [20] - Wold Guardian [16] - Woldwarden [14] - Woldwarden [14] - Woldwarden [14] - Woldwyrd [9] Blackclad Stoneshaper [0(3)] Blackclad Stoneshaper [0(3)] Sentry Stone & Mannikins [0(5)] Sentry Stone & Mannikins [5] Shifting Stones [0(3)] Shifting Stones [0(3)] Well of Orboros [10] I think that this is probably as simple a starting point as I can manage for Wurmwood in the Bones of Orboros. The idea is to use the Wold Wardens to hold heavies back with Stranglehold so that I can either pick them off one at a time or eventually grind out a scenario win. It feels like there is a lot of support in this list, mainly the Shifting Stones so that Wurmwood can actually move without Cassius. conflictchamber.com/?cc201b_-1Zd8dndndBd4napMoNoNpBnVpNpNConvergence [Theme] Clockwork Legions !!! This army contains CID entries. [Axis 1] Axis, the Harmonic Enforcer [+30] - Conservator [12] - Conservator [12] - Corollary [0(6)] - Diffuser [0(6)] Frustum Locus [4] Prefect Hypatia [0(5)] Void Archon [8] Void Archon [8] Asphyxious the Sanctified [14] - Blockader [33] Negation Angels [6] Negation Angels [6] So it seems that the main draw for this list is to abuse Mage Static and Iron Aggression on the Blockader. It can also use an obscene amount of Focus in a turn between Power Up, the Corollary and Asphyxious himself. The rest seems comparatively manageable. Note that I've somehow missed something here as this looks to only end at 73 points, and also that I don't think that the Diffuser made it to the table in the end. So it seems that the main draw for this list is to abuse Mage Static and Iron Aggression on the Blockader. It can also use an obscene amount of Focus in a turn between Power Up, the Corollary and Asphyxious himself. The rest seems comparatively manageable. I win the roll-off and choose to go first; Andrew gives me the side with the annoying house. I skew toward the right and Andrew puts the Blockader there which is going to be hard to deal with.  Turn 1: Circle I run forward at top speed; surprisingly fast for a load of old stones, but still not very fast. Wurmwood puts a Rapid Growth forest to extend the actual forest and block lines of sight.  Turn 1: Convergence The whole of the Convergence force also runs at me. Mage Static goes on the Blockader, and most of the important things stroll into the central trench.  Turn 2: Circle The Well drops the left most Angel and clips the Void Archon on that side for a bit of damage. Somewhat later, Andrew reminds me that I didn’t create a solo from it yet and generously allows me to do so out of sequence so I get a Blackclad Wayfarer. The Mannikins on the right set up a spray that kills another Angel. On the left, the Wold Warden fails to break the Conservators armour with a boosted Stranglehold so Wurmwood has to do it via Cassius; the latter gets pulled back with Dark Path. The Shifting Stones teleport Wurmwood to the right a little. Megalith boosts to hit another Angel with Stranglehold but also misses; the other Shifting Stones bring him back.  Turn 2: Convergence The Blockader gets a full stack of Focus. It stomps forward and vaporises the Sentry Stone with guns, then leaves the Wold Wyrd on a handful of boxes; the Void Archon finishes the job. Axis puts Iron Aggression onto the Blockader and Feats. On the left, the Negation Angels swarm one of my Wold Wardens for a little damage. Andrew scores the right zone; 1 – 0.  Turn 3: Circle Well, it’s Axis’ Feat turn so I’m not going to get a lot done. The Well misses the Void Archon so I have to kill it off with a Geomancied Stranglehold. Cassius stabs one of the Angels on the left and a Mannikin sprays both of the others to death while one of its buddies stops the Conservators from charging. On the left, I completely fail to land any spells on the Void Archon but Wurmwood does at least manage to put Curse of Shadows on the nearer Conservator. It also Feats and I’m disappointed to find that the forest is only Command Area, not Control Area as I had assumed. That felt a bit rubbish. Neither of us score; 1 – 0 to Andrew.  Turn 3: Convergence The fires from the burning clouds all go out (not that they were going to do much anyway) and Iron Aggression is upkept. The Void Archon on the left kills the Sentry Stone. The Corollary fills up the Blockader with Focus and Asphyxious4 moves to end up in base to base with the planned landing spot. The Blockader then tramples into my forest and uses Iron Aggression, its three original Focus and five Focus from Asphyxious4 to beat both Wold Wardens to death and leave the Wold Guardian on a handful of boxes. The Conservators kill Cassius and one stone from each of the Shifting Stone units. Andrew scores the right zone again; 2 – 0.  Turn 4: Circle I need to take out Asphyxious4 or the Blockader will kill my entire army single handed. Wurmwood clears a bit of room with a Hellmouth into my own Shifting Stone and the right Blackclad Stoneshaper gets a couple more jammers with his spray. The other Stoneshaper gives Earth’s Power to the Wold Guardian and it saunters over to pound Asphyxious4 into the floor, thereby rendering the Blockader inert. At this point, I could move to attrition as I could probably have Megalith deal with one Conservator and the last Wold Warden do some tasty damage to the other, perhaps even Chain Attack: Smite it into the Void Archon. However, I think I have a reasonable shot at getting Axis. The Wold Warden kills off the Shifting Stone in Megalith’s way, and the Wayfarer puts Hunter’s Mark on the Frustrum Locus. Megalith charges in, smacks the Frustrum Locus once then turns his attention to Axis. Sadly he misses the boosted 7 needed to start applying damage and put Weight of Stone on the Convergence Warcaster and the follow-up attacks don’t roll the crazy dice that would have been needed. It’s clear that Andrew can just tidy up in his turn so we call it there. Circle lose by concession.  Many thanks to Andrew for being a fun opponent, and especially for being helpful during the game. He’s played Circle in the past and knew all of the various things that my stuff could do so he gave good advice while we played. Wurmwood1 was really hard to play; there are just so many things that can be done each turn, and also so many limitations on movement that every activation felt like an opportunity to lose. Things I learned: - Shifting Stones and Wurmwood1’s own movement rules means that I need to think one turn ahead about where things need to go.
- Sentry Stones are surprisingly easy to destroy considering stealth etc. Possibly I need to be more cautious about positioning them, but the short command range on the Mannikins means that they can’t keep a very high screen if I want the Sentry Stone to be safe.
- Wurmwood1’s Feat forest is smaller and considerably less useful than I had thought. I had hoped to use it to blunt offence for a turn (a bit like the Witch Coven’s Feat) but it is just too small to do more than keep the tree safe. And I could probably get away with casting Strange Growth and sitting in that forest if I just want to use Prowl.
I realised as part of the lead-up to this game that Morvanha1 was going to have issues into a lot of the game at the moment since there are plenty of lists out there with no living or undead infantry. So, as amusing as I have found playing her, I'm going to move onto a different Warlock as I'm nowhere near good enough at this wonderful game to start a chunk of games with no Feat and a non-Spell. I'm not actually sure where I'll go from here, probably Morvanha2 in Devourer's Host is the obvious choice. Wurmwood1 in Bones of Orboros might be too complex for me at this stage so I'm considering a pair with Krueger2 in the same theme. |
|
|
|
Post by argentbadger on Jun 25, 2020 7:04:08 GMT
Joe and I arranged another game of Warmachine / Hordes via the excellent Wartable system. After realising that Morvahna1 would not be a good fit into too many match-ups, I inevitably continued my love affair by switching over to her next incarnation, Morvahna2. Game 6 – Recon (scenario 6) vs Joe’s Mercenaries conflictchamber.com/?c8201b_-2acGmOoP54mUmj5wmj5wmHmTCircle [Theme] The Devourer's Host [Morvahna 2] Morvahna the Dawnshadow [+27] - Storm Raptor [34] Dhunian Archon [6] Tharn Ravager Shaman [4] Tharn Wolf Rider Champion [0(7)] Tharn Ravagers (max) [15] - Tharn Ravager Chieftain [0(5)] Tharn Ravagers (max) [15] - Tharn Ravager Chieftain [0(5)] Tharn Wolf Riders (max) [18] Well of Orboros [10] This list is kind of an evolution of what I was playing with Morvahna1. I wanted relatively high value individual models in the lists to make use of Morvahna’s Feat and so the Bloodtrackers were cut for a second unit of Ravagers. I’m hopeful that Fog of War will keep things a bit safer from shooting and that therefore a screening element with Stealth will be less needed. I removed the Blood Shaman as Morvahna doesn’t have any spells that I think I would want her to cast. The Well remains, not only for an amusing gun and a ‘free’ solo, but mainly to increase Morvahna’s control range for Scales of Fate, Fog of War and Imperishable Conviction. Finally, I picked up the Dhunian Archon as I think that it should synergise nicely with the general healing and recursion in the list. conflictchamber.com/?c6201b_-1HoH9boGpboToRoKoMoMaeoWoYp2oYp2Mercenaries [Theme] Flame in the Darkness [Fiona 1] Fiona the Black [+27] - Charger [9] - Gallant [17] Alexia, Mistress of the Witchfire [7] Grand Master Gabriel Throne [7] Hermit of Henge Hold [0(5)] Morrowan Archon [8] Thamarite Archon [8] Thamarite Archon [8] Field Mechaniks (min) [3] Order of Illumination Resolutes (max) [13] Order of Illumination Vigilants (max) [10] - Morrowan Battle Priest (3) [0(6)] Order of Illumination Vigilants (max) [10] - Morrowan Battle Priest (3) [0(6)] Fiona, how I hate her and her Feat. Still, at least this time I don’t have to worry about Eliminators running around stabbing all my Tharn in the back. I assume that the list is intended to blunt my attack on Vigilants while using the Battle Priests to trigger Vengeance via Shield Guard, then kill everything with Archons, Resolutes and Gallant. Note that the Battle Priests are two per unit; it’s a known issue with Conflict Chamber that they appear in threes for each unit instead. Joe is playing a couple of points down while he sorts out how the list should look. I win the roll-off and choose to go first; Joe gives me the top so that he can hide Fiona with the house. I end up with a fairly symmetrical approach; a unit of Ravagers on each side of Morvahna and the Wolf Riders and Storm Raptor to either side. The rest of the support crew cluster in the middle until I can work out what to do with them. Slightly to my surprise, Joe almost exactly mirrors my deployment.  Turn 1: Circle Everything runs up but respects Joe’s shooting threat ranges a bit. Morvahna casts Fog of War and puts Carnivore on the left unit of Ravagers. The Well magics a second Ravager Shaman into existence.  Turn 1: Mercenaries Fiona Allocates nothing. The Vigilants move up and spread out to avoid getting caught by the Well’s AoE shot. One of them gets Eyeless Sight from the Objective but misses a Wolf Rider anyway. Throne makes the right Vigilants Tough. Fiona casts Roth’s Mercy on the left Vigilants and Occultation on herself.  Turn 2: Circle Morvahna upkeeps Carnivore but drops Fog of War as it’ll be annoying for my own shooting attacks. The Wolf Riders and Champion move up, kill a couple of Vigilants and Reposition backwards. The Ravagers on the left rush up to jam where I can; I’m not able to make attacks as the Vigilants are too far away (and I’m not going to be getting anywhere next turn as it’s sure to be Fiona’s Feat turn). My plan is to make Joe kill them, then Feat back enough to ride out the Feat. The unit on the left moves more centrally to exert pressure from behind the forest. The left Thamarite Archon is in range of the Storm Raptor and out of Shield Guard Range, so I try to shoot it down. Boost attack, miss; re-roll with Scales of Fate, miss again. I get the hit on the second boosted attack but both damage rolls are a bit low and it survives. Morvahna puts Fog of War back up.  Turn 2: Mercenaries Fiona drops Roth’s Mercy, upkeeps Occultation and Allocates a single focus to the Charger. She also takes Eyeless Sight from the Objective. The right Thamarite Archon helpfully misses my Wolf Rider Champion even with the re-rolls. To keep up Joe’s bad dice, the Charger shoots at one of the Ravagers on the left and fails to kill it. The Vigilants make up for this though, dropping five Ravagers across the two units. At least all this is healing Morvahna back to full. The Morrowan Archon strolls through the forest, kills one Ravager and Blinds another which I keep alive with the Dhunian Archon. Fiona fails to finish the Ravager Chieftain on the left with Soulfire and then Feats.  Turn 3: Circle I upkeep Carnivore again and then immediately forget about it. I think it’s because on Wartable I don’t get the little marker next to the miniatures, but maybe it’s because I’m awful at WarmaHordes. I can do a bit of work on the fringes where Fiona’s Feat isn’t covering. The Ravagers on the left kill off the Thamarite Archon at last and then get in the way of the Vigilants as well as I can manage. The Wolf Riders throw some javelins around at the Vigilants on the right then the Well and the Ravagers polish off the unit. The Storm Raptor does some trivial damage to the Charger because my brain fails and I forget that Fiona’s Feat also affects damage rolls; I compound this error by maxing out its Fury. Spoiler alert, this will be relevant in a minute. Morvahna recasts Fog of War and Feats back five Ravagers and two Wolf Riders.  Turn 3: Mercenaries Joe takes a look at the fact that I’ve now got almost a full army again and decides to go for the assassination since Morvahna is only on 9 boxes. One Focus goes to the Chargers and all the Vigilants try to clear out a Ravager with hilariously ineffective results. They eventually knock it down but still can’t kill it, thereby clearing room for the Charger to get range to Morvahna. Ironically, this is actually a better result for Joe as I could have healed a few boxes on Morvahna if the Ravager had died. Anyway, the Charger misses both shots thanks to the trench, but the Thamarite Archon makes no such mistake and kills her to the box on the first try. Circle lose by assassination.  It’s always fun to play with Joe and this was no exception. I really enjoyed playing Morvahna2 and will certainly be doing so again. I’m very pleased despite losing to a fairly straightforward assassination as I felt like I could have done several things to avoid it. To start with, just not filling up the Storm Raptor on Fury would have let me transfer away damage and probably take assassination off the table entirely. Alternatively, moving back round the Well could have made it really hard to even get shots into Morvahna. While Joe could obviously have shifted to focus on scenario, I doubt that he could clear both zones or get to my flag so I would have had more time to use my attrition advantage to hopefully come into the game. Notwithstanding assassination avoidance, here are some things I learned:
- It’s fine for Morvahna to cut for Fury since her health goes up and down constantly in the game. I was initially worried about having only a single Warbeast for this reason but I think that I can get away with it… at least as long as I leave room for transfers.
- Counter-intuitively, removing Bloodtrackers from the infantry loadout gives me a bit more room to move forward with Ravagers and Wolf Riders. Previously I felt hemmed in my own deployment area as I needed to give the Bloodtrackers room to work and wanted them to screen the rest of the force.
- The Dhunian Archon really needs some forward planning as I spent too long thinking about which attacks I would need to block with her Threads of Life ability. Definitely more practice is needed here.
|
|
|
|
Post by Dev Null on Jun 25, 2020 12:37:31 GMT
Thanks; nother nice report. Coincidentally, I've actually been playing Trolls lately (when I can get a game in at all, in the World of Plague) so I'm reading the Trolls forums as well as these. And one of my favorite purveyors of batreps here was always Trollock, who lately has been playing his trolls again and posting there instead. And he's running variations on Trolls lists with a couple of Dhunian Archons (trust me; I'm coming to a point here any minute now...) Anyways, he talks about one of the primary win conditions for his Dhunian-enhanced troll list being to clock his opponent. Which I thought was funny because, like you, _my_ Dhunian Archons always eat a lot of my clock time figuring out what to block. I got no easy answers for you, except maybe to read some of his reports over in the trolls forums. But the point he made was that (paraphrasing broadly here), by the end of your turn, you should probably already know what the key model to protect is - whether to preserve its abilities, or because of board positioning, or whatever. Then you can ask yourself "is the key safe yet?" and if it isn't, you don't get to spend the Archon on anything else. If it is safe, then anything else is gravy.
(Or at least, that was my take on what he said; any errors are mine.)
|
|
|
|
Post by argentbadger on Jun 26, 2020 18:15:59 GMT
That is a great way to look at it. I think it fair to say that Trollock is a rather better player than I am though! Hopefully as I get more experienced I'll see these options more easily and be able to plan and follow that plan but at the moment there are just so many possibilities to pick the wrong moment for using the Archon. It's quite ironic that Trollock uses the piece to drain the other players' clocks whereas we both drain our own clocks with the Dhunian Archon. Last night’s game was against Lewis, another local player that I’ve never previously faced. I had the impression that, despite his modest protestations to the contrary, he might be quite good at the game. Game 7 – Bunkers (scenario 2) vs Lewis’s ‘Khador’ conflictchamber.com/?c8201b_-2acGmOoP54mUmj5wmj5wmHmTCircle [Theme] The Devourer’s Host [Morvahna 2] Morvahna the Dawnshadow [+27] – Storm Raptor [34] Dhunian Archon [6] Tharn Ravager Shaman [4] Tharn Wolf Rider Champion [0(7)] Tharn Ravagers (max) [15] – Tharn Ravager Chieftain [0(5)] Tharn Ravagers (max) [15] – Tharn Ravager Chieftain [0(5)] Tharn Wolf Riders (max) [18] Well of Orboros [10] The exact same list as last time. I feel that this could do good work if I can just find the right balance between attrition and not getting assassinated. conflictchamber.com/?c3201b_-1GbWlVjCjCoR3EoLoL3z3z2_2vdRKhador [Theme] Warriors of the Old Faith [Vladimir 3] Vladimir Tzepesci, Great Prince of Umbrey [+27] - Judicator [35] Champion of the Order of the Wall [8] Champion of the Order of the Wall [8] Hermit of Henge Hold [0(5)] High Paladin Dartan Vilmon [0(6)] Menite Archon [8] Menite Archon [8] Vassal of Menoth [0(3)] Vassal of Menoth [0(3)] Choir of Menoth (min) [4] Exemplar Vengers (max) [20] Flame Bringers (min) [11] I’m listing this as a Khador force since it has a Khador Warcaster, but due to rules oddities and cross-faction themes it could easily be part of a Protectorate pair. I’ve never played against Vlad3 before but I know that Hand of Fate on Judicators is a bad sign. Double Menite Archons is also likely to cause me a problem as they’re so hard to remove. I win the roll-off and choose to go first. I put the Ravagers in the centre and right with the Wolf Riders and Storm Raptor on the left. The unit on the right can hopefully abuse that forest and I prefer the Wolf Riders to be the ones out in the open on the left so that I can worry about the cloud only with some Ravagers.  Turn 1: Circle My first turn is the same as usual. Everything runs up about as far as possible; I stay out of melee threat range but there’s no point worrying about the Judicator as it can get just about anything with its guns. Morvahna casts Fog of War and puts Carnivore on the central unit of Ravagers. The Well magics a second Ravager Shaman into existence.  Turn 1: Khador Vlad puts Hand of Fate on the Judicator (surprise!) and casts both Dash and Windwall. The Vassal and Choir power up the Judicator and it strolls forward. Despite me cancelling one damage roll with the Archon, the Judicator rolls like a champion, killing one of the Ravagers and knocking down two more.  Turn 2: Circle Morvahna upkeeps Carnivore and drops Fog of War. The Storm Raptor uses its animus and zaps a couple of Vengers (granting various forms of Vengeance to just about every solo in Lewis’s army) and backs up to be mostly out of range of the Judicator. The Wolf Riders go in and hurt a couple more and jam lightly on the left. The Ravagers all rush up as deep as I dare. On the one hand, I don’t want to just get them all killed but on the other hand Lewis’s threat range is rather higher than mine so I feel like I need to try to get some board position and hope to pin the Khador army out of scenario.  Turn 2: Khador Hand of Fate gets upkept and Vengeance attacks kill a Ravager in the centre. The support team power the Judicator up to maximum, then Vlad uses his Feat and casts Dash and Windwall again. The Champion on the right kills a Ravager and sprints away so that the Judicator has a landing spot. The Judicator stride forward and unleashes its firepower at the Storm Raptor, leaving it on a dozen or so boxes (I didn’t know that Flying High was among the many things ignored by spray attacks). The Archon on the left rushes in and kills my Archon, the Ravager Chieftain and a regular Ravager and applies Grievous Wounds to the Storm Raptor and the Champion on that side goes in too and leaves it on 6 boxes. The Vengers finish the job and take out a pair of Wolf Riders; Vilmon gets another. Back on the right, the other Archon does a lovely Thresher attack to finish the last member of my central Ravager unit and gets another and the Flamebringers kill one each. At the end of each activation the cavalry all make use of Dash, Parry and Sprint to get way back out of retaliation range. We both score our zones; 1 – 1.  Turn 3: Circle That hurt a lot more than expected. Vengeance attacks kill the only Flamebringer in range. The Wolf Riders kill most of the Vengers and the Champion gets one and repositions to the left flag. On the right the remaining Ravagers kill all the Flamebringers and put a few wounds on the Archon. The Well, a few Wolf Rider javelins and finally Morvahna kill the central Archon and dismount the Champion; Morvahna then Feats back three Wolf Riders and four Ravagers and repositions back to the zone and hopes for the best behind the cloud. The Ravager Shamans both sit on flags; the central one uses a re-roll from Morvahna to finish the dismounted Champion. I score all three flags and we both score our zones; 5 – 2 to me. But Morvahna is left on 1hp and no transfers.  Turn 3: Khador The Judicator gets cleared off, walks up to within 10” of Morvahna and immolates her with its flamethrowers. Circle lose by assassination.  Many thanks to Lewis for being a great fun opponent. I wasn’t really prepared here for the sheer impact of Menite Archons – high melee impact models with Flight, Parry (from Vlad’s Feat), Thresher and Grievous Wounds are very bad for me. That said, I got too greedy with the Storm Raptor and could have done the same kind of damage in turn two from much further back simply by boosting damage instead of using the animus. Losing it for a couple of Vengers was not much help and once it went down I was pretty much out of the game. Things I learned: - My positioning was poor here, allowing lots of spots for Menite Archon landing zones to remove swathes of my stuff at a time. They’re so hard to kill (for example, compared to light Warjacks of the same point cost) that unless I commit heavily into them then I will end up letting them do it again.
- I still don’t have a plan to deal with a Judicator.
- I have to work on the right balance of offense and defense. Here, I went ‘all in’ with my units in turn two to keep board space and ended up losing just about all of them. Thinking about this, I do wonder if it could have been a broadly successful strategy if I hadn’t also let the Storm Raptor die so easily. With the Gargantuan alive, I would at least have been able to transfer some damage in turn three. Oh well: ‘could have, would have, should have’. I’ll be back.
|
|
|
|
Post by argentbadger on Jun 29, 2020 19:50:03 GMT
Last week was quite the busy week of Warmachine / Hordes. I finished up with a game against Allan who is one of the heroes organising tournaments in central Scotland… at least when there is no global pandemic. Game 8 – Bunkers (scenario 2; but note that we removed the central flag as this seems to be intended for SR2020) vs Allan’s Khador conflictchamber.com/?c8201b_-2acGmOoP54mUmj5wmj5wmHmTCircle [Theme] The Devourer’s Host [Morvahna 2] Morvahna the Dawnshadow [+27] – Storm Raptor [34] Dhunian Archon [6] Tharn Ravager Shaman [4] Tharn Wolf Rider Champion [0(7)] Tharn Ravagers (max) [15] – Tharn Ravager Chieftain [0(5)] Tharn Ravagers (max) [15] – Tharn Ravager Chieftain [0(5)] Tharn Wolf Riders (max) [18] Well of Orboros [10] No change to my list; I feel like it is good enough and that the issue is really around my capabilities. conflictchamber.com/?c3201b_-1S7b7p7p8fno8h8hoMpipinfnfnfnfnn
Khador [Theme] Wolves of Winter [Zerkova 1] Koldun Kommander Aleksandra Zerkova [+28] - Destroyer [14] - Destroyer [14] - War Dog [3] Fenris [8] Koldun Lord [0(4)] Koldun Lord [0(4)] Thamarite Archon [8] Void Archon [8] Void Archon [8] Doom Reaver Swordsmen [10] Doom Reaver Swordsmen [10] Doom Reaver Swordsmen [10] Doom Reaver Swordsmen [10] Greylord Ternion [0(7)] Allan is actually playing Khador with Khador models (or at least, Khador sprites on Wartable). I think that the idea here is to deliver the Doom Reavers with a cloud wall, then get Zerkova’s Feat to more or less skip my turn and have them spend two activations carving up my stuff. I get lucky again and win the roll-off which feels like it could be quite important with the long threat ranges of the Doom Reavers. I put the Wold Riders out on the right where they’re a bit more open for javelin-throwing. The Ravagers go up the middle and on my left, accompanied by the Dhunian Archon. Allan puts his Doom Reavers out in a line across his whole force and keep the rest tightly bunched in the centre. ![]()  Turn 1: Circle To no-one’s surprise, I run up with my whole army. The Wolf Riders can get hilariously far with their run move. The Well gets a lucky scatter onto three Doom Reavers on the right but my luck balances out as I don’t break armour on two of them; it creates a Ravager Shaman to accompany the second unit. Morvahna puts out Carnivore onto the Ravagers and casts Fog of War.  Turn 1: Khador Zerkova uses her cool magical toys and puts four clouds out; the Doom Reavers pace up behind them, being careful to stay out of walking threat from my Ravagers. One of the Destroyers gets revenge for my lucky shot with the Well by scattering a shot directly onto one of my Wolf Riders, killing her to the box. The Koldun Lords do various things to stop shooting.  Turn 2: Circle Morvahna upkeeps Carnivore and drops Fog of War. The Well has a target rich environment so I deliberately shoot something out of range in the hope of getting better blast damage. I luck out spectactularly getting a couple of Doom Reavers but more importantly rolling like a champion to dismount Fenris. The Wolf Riders take out most of the right and unit of Doom Reavers. My Storm Raptor wastes a load of Fury and Morvahna’s hitpoints by repeatedly missing the Void Archon on the right. Finally, the Ravagers run to jam a bit and Morvahna recasts Fog of War.  Turn 2: Khador The central Doom Reavers use Apparition for a better threat range. One unit of Doom Reavers gets hung up on the central jamming Ravager; I use the Dhunian Archon to make the last attack miss too. Fenris walks up and smashes the poor chap, taking out a pair of Doom Reavers in the process. Zerkova walks up and zaps a Ravager to turn him into an Arc Node; she kills another Ravager with channelled Frost Hammers and then uses her Feat. The left Void Archon vapourises half of my left unit of Ravagers including the Chieftain, leaving me wondering yet again how the Archons made it out of playtesting. The other one, along with the few remaining Doom Reavers on the right, kills a couple of Wolf Riders. The Thamarite Archon guns down a pair of Ravagers in the centre. We both score our zones; 1 – 1.  Turn 3: Circle Morvahna drops both her spells. One Ravager in the centre Vengeances forward and is torn apart by a counter-charge from the War Dog (Kommader Barkevich, the Iron Woof) so I guess I’m glad that I didn’t bother to upkeep Carnivore. I hatch a cunning plan to shoot Zerkova with the Storm Raptor until I realise that, surprisingly, being with 14” range of the its gun will also mean being within 14” of Zerkova and therefore not allowed to shoot due to her Feat. Thinking are hard. Instead Morvahna puts Carnivore on the slightly larger left unit of Ravagers, recasts Fog of War (I might as well have upkept this but I made a big error with my activation order) and bring back some Ravagers and Wolf Riders with her Feat. The Storm Raptor kills the Void Archon on the right at last, the Wolf Riders clear the Flag over there and the Champion sits on it to score. The Ravagers on the right get stuck into the Doom Reavers over there but Allan’s poor luck earlier with Tough rolls evens out and I end up only killing one of them. We both score our zones in addition to me getting the right Flag; 3 – 2 to me.  Turn 3: Khador Nothing is Allocated. The Doom Reavers kils a few more Ravagers and both Koldun Lords casts their ‘no shooting’ spell, which is fittingly called Wind Ravager. The Dhunian Archon cancels the one spell from the Greylord Ternion that hits the surviving Chieftain; the Thamarite Archon guns him down instead. Fenris kills a Wolf Rider on the right and one of the Destroyers lumbers over to stop me scoring the Flag. The Void Archon and Doom Reavers on the left wipe out my Ravagers over there, though the Doom Reavers do helpfully thin their own numbers a little with Berserk attacks. The War Dog carries on its reign of terror by killing another Ravager and Zerkova kills the last one herself while heading back away from my few remaining pieces. We score our zones again; 4 – 3 to me.  Turn 4: Circle Zerkova is standing in the open, and I have lost far too much to contemplate any kind of attrition play now, so it is definitely assassination time. The Dhunian Archon kills the nearer Koldun Lord, allowing the Well to shoot again. It drops the other Lord and a couple of fools standing near him at the wrong time. The Wolf Rider Champion fails to kill the War Dog, who is certainly earning her pay today. The Wolf Riders sneak into Zerkova’s back arc and throw javelins; I get lucky and hit twice which forces Zerkova to use her remaining Focus. Morvahna casts Skyfire and moves to within range of Zerkova, being careful to stay away from that counter-charging War Dog as it has done enough damage for the day. The Storm Raptor comes in and electrocutes Zerkova on the second shot. Circle win by assassination.  It was lovely to get a game of WarmaHordes with Allan; despite him being so involved with the community here I think I’ve only ever played him at Malifaux many years ago. If I’m being honest with myself, the game was Allan’s to lose at the end of his turn 3 as he had pretty much eliminated my forces and he just needed to move Zerkova to somewhere that I could have shot her. That said, I was pleased with the way that the assassination came together at the end, with all my remaining pieces having a role to play. Things I learned: - Once again my positioning behind the front line was too clumped, allowing the teleport / dual shot / entropic force combination on the Void Archon to wreak havoc on the left.
- The Wolf Riders are good for dealing with light foes but were outmatched when the Destroyer came over. In retrospect I should have been less worried about keeping them with the Fog of War / Scales of Fate aura and just sent them as deep as possible to kite Allan’s army from the rear.
- Although the attrition ended up going against me quite badly, I did feel that Morvahna’s Feat bought me enough time to enable the Skyfire / Storm Raptor assassination. I was also pleased to play the Storm Raptor such that it contributed without getting destroyed (notwithstanding the poor run of dice shooting the Void Archon on turn 2).
|
|
|
|
Post by marxlives on Aug 25, 2020 15:04:40 GMT
These battle reports are so boss.
|
|


