|
|
Post by argentbadger on Oct 14, 2020 17:43:57 GMT
Dirhavel – thanks for the kind words. I really appreciate the advice for if I play into Trollbloods again, I never would have thought of that rules interaction. Hopefully I'll actually remember to use it next time I play. Last night’s adventure in Warmachine/Hordes was a new experience for me as I played someone on Wartable that (at least as far as I know) I’ve never met in real life. My opponent was Dave, who seems to be well known on the Scotland scene and also on Lormahordes as The Buoyancy of Water. Game 28 – Recon II (scenario 6) vs Dave’s Legion of Everblight conflictchamber.com/?cb201b_-2njP4cjNjNjWoPoP7FfFoNoNjDjDjDMinions [Theme] Will Work For Food [Jaga-Jaga 1] Jaga-Jaga, the Death Charmer [+27] - Blackhide Wrastler [16] - Swamp Horror [15] - Swamp Horror [15] - Gatorman Soul Slave [0(5)] Dhunian Archon [0(6)] Dhunian Archon [0(6)] Rorsh [15] Swamp Gobber Chef [1] Void Archon [8] Void Archon [8] Farrow Valkyries [8] Farrow Valkyries [8] Farrow Valkyries [8] I stuck with Jaga-Jaga for much the same reasons as last time, i.e. that I wasn’t sure how long the game might last and I didn’t think that I could get a Dr Arkadius Feat turn done in a reasonable amount of time on Wartable and without practice. I’ll save that for a game with Gareth sometime, as I think as he’s more patient with me. conflictchamber.com/?ca201b_-2hg-kOkKqceJcococob9kGkJfTfTLegion [Theme] Primal Terrors [Kallus 2] Kallus, Devastation of Everblight [+28] - Archangel [35] - Golab [17] - Mekanoshredder [4] - Neraph [12] Spell Martyr [1] Spell Martyr [1] Spell Martyr [1] The Forsaken [0(4)] Blighted Rotwings (max) [12] Chosen of Everblight (max) [20] Hellmouth [0(6)] Hellmouth [0(6)] My experience playing against the Legion of Everblight is limited to probably a single game, way back in the distant past when we could meet people face to face and play with our toys together. I assume that the plan is to set all my stuff on fire with the Archangel, then send in the Chosen to kill everything and tank any return attacks long enough for the second wave of Warbeasts to eat any survivors. Dave wins the roll-off and picks the first turn. I take the bottom of map as the terrain looks slightly less annoying, though the fact that much of the terrain is clouds is not ideal against all the Eyeless Sight on the Legion side. I put both Void Archons on the right as I think that they’re the key to dealing with Chosen in a timely manner. This leads to Brine facing off against the Archangel on the left which is a problem since the only cover over there is a cloud… which the Archangel ignores. I put some Valkyries and a Dhunian Archon out there to protect him a bit and hope for the best.  Turn 1: Legion of Everblight Kallus puts up Burning Path and everything races up at me.  Turn 1: Minions Gosh, that’s a scary amount of scary stuff, a scary distance up the board already. My moves are very cautious as I don’t want to give up too many first turn charges, though there is nothing that I can do to stop Overrun going on the Archangel and having it fire Golab or the Neraph into me. The Void Archons spray down a pair of Hellmouth Tentacles on the right. Rorsh casts Pig Pen (I dream of a day when that actually becomes relevant), Jaga-Jaga puts up Battle Host and casts Grave Wind on the nearer Void Archon.  Turn 2: Legion of Everblight Kallus upkeeps Burning Path. The Archangel kills a Valkyrie and sets another one plus Brine on fire. To my great surprise, almost everything else just backs off with the exception of a few thngs to contest scenario elements. Kallus does arc a Brand of Fire through a hapless Spell Martyr to set Jaga-Jaga, both Swamp Horrors and the Soul Slave on fire.  Turn 2: Minions I can score my own flag without too much pain and it won’t be hard to contest the other one; scoring the zones seems unlikely though. Otherwise my main plan is to deliver a Void Archon and one Swamp Horror to do as much damage to the Chosen as I can and hope to pin Dave’s forces back a little while dealing with them. The fires do surprisingly little and the right Swamp Horror gets Eyeless Sight from my Objective; the Wrastler puts Rage on it. Jaga-Jaga upkeeps her spells, shuffles a bit and casts Signs and Portents. On the right, one Void Archon tucks in behind a wall and knocks a few boxes off the lead Chosen, then the other one goes in and Void Walks to maximise the positioning of Entropic Force. The fully-loaded Swamp Horror kills three of the Chosen and hurts the Objective. The Valkyries on the left take a few pot shots and contest the flag. My big mistake here is dithering too much with Brine. I didn’t want to throw him into the screens too early but in the end I did nothing at all with him; at the very least I could have had him eat a couple of tentacles or something as he was never going to stay far enough from the Archangel to be safe. I score my flag with a Dhunian Archon; 1 – 0 to me.  Turn 3: Legion of Everblight Kallus upkeeps Burning Path again, puts Overrun onto Golab, Battle Lust on the Rotwings and then Feats, moving to the left a little. Tentacles spawn around the place; one kills a Valkyrie on the left but on the right they miss both the Void Archon and the Chef. The Neraph boosts a charge attack which kills the Void Archon despite Grave Wind and the remaining Chosen go into the Swamp Horror and Valkyries to pleasingly little effect. The Rotwings swarm all over the burning Swamp Horror and make short work of it – hilarious dice sees it die to the second attack. On the left, Golab charges the burning Valkyrie and kills her on its second initial (I cancelled the first hit with the Dhunian Archon) and hurts Brine; the Archangel charges in to finish the job. The last Spell Martyr sits on the flag to score it; 1 – 1.  Turn 3: Minions I think that it’s probably possible to clear both zones here if I get a little lucky which would give me a nice scenario lead and a local attrition advantage on the right, which would be just as well as I’m rapidly running out of anything to work with on the left. The Valkyries on the left take Vengeance attacks on Golab and helpfully land the critical knock down on the very first attack which rather changes the game. Jaga-Jaga shuffles a bit and recasts Sign and Portents. The Valkyries then go again and take Golab down to two boxes. Rorsh finishes it off with a Pig Iron, detonates the right Tentacle and a pair of Rotwings with dynamite but then fails to break armour on the last contesting Tentacle. Good work Mr Pig, but unfortunately I don’t have any further attacks to deal with it; the Dhunian Archon is a bit too far away and anyway has to run to contest the flag. The Void Archon charges a Tentacle and then Void Walks to kill the Hellmouth with boosted damage attacks thanks to the glut of souls it is carrying around. The Valkyries clear the zone and the Swamp Horror Overtakes its way through some Rotwings to score it. I get the right zone and the flag; 3 – 1 to me.  Turn 4: Legion of Everblight Burning Path gets dropped. The Hellmouth pulls in the Dhunian Archon and hurts her but the tentacle helpfully misses Rorsh. The Mechanoshredder puts its Animus on the Neraph which adds a second Void Archon scalp to its collection; slightly to my surprise it sprints back rather than putting more pressure on me. The Forsaken runs up to contest instead. Kallus kills the Dhunian Archon (I have to admit that I was hoping for a bit of Tough / no knock down shenanigans here but it was not to be) then puts Battle Lust back on the Rotwinds. The Archangel aims, puts up its Animus and shoots at Rorsh. The first one gets taken on a Valkyrie (which dies) but Rorsh does survive, albeit on fire. The few surviving Rotwings again roll like heroes to nearly polish off the Swamp Horror but it lives with a few boxes remaining in Body. Dave scores the flag on the left; 3 – 2 to me.  Turn 4: Minions I’m losing too much on the left to have any chance of dealing with the Archangel before it guns down Jaga-Jaga so I need to finish this. I can’t pick up enough points to close out a scenario win (possibly I could have managed it if I’d got the left zone in my last turn) so it’s time for assassination. The Valkyrie survives the fire but Rorsh needs a successful Tough roll to stay in the game. The Valkyrie sidles round into Kallus’s back arc but misses her attacks entirely, never mind the cheeky knock down that I was hoping for. In the process of doing this I also realise that I’ve moved her out of the zone so that removes any chance of holding on for a scenario play. Jaga-Jaga heals the crippled Swamp Horror, casts Signs and Portents and kills a blocking Rotwing with her snake. The Valkyries clear the rest of the Rotwings to free up the Swamp Horror. It charges the Objective, kills it and Overtakes into the Tentacle (with its tentacles, fittingly), kills it and Overtakes into the Spell Martyr, kills him and Overtakes into tentacle range of Kallus. I need a Signs and Portents 7 to land this… and make it. Kallus is dragged, probably kicking with his spare legs and screaming, into charge range of the Wrastler. Rorsh stands up and unloads his guns into Kallus. The Blackhide Wrastler doesn’t need a second invitation and kills Kallus through his transfers. Minions win by assassination.  That was a very fun game, many thanks to Dave for being a lovely opponent. I felt that this was quite a fortunate end to the game from my perspective in the sense that I probably couldn’t have held on for another turn before my attrition disadvantage became completely insurmountable. Still, it was a nice contrast to my previous game – there I was winning nicely and lost to assassination and here it went the other way round. Things I learned: - Not so much a ‘thing I learned’ but rather something that I want to point out. I’ve heard Jaga-Jaga described as quite a boring Warlock in the sense that she mainly just hangs around casting Signs and Portent every turn, and that is true. But the flip side of this is that Signs and Portents just smooths out the probability curves such that things simply work more often; for example on the assassination at the end here I had to hit lots of targets needing 6s or 7s, and most of the time I’d probably want to boost. But under Signs and Portents I have a much lower risk of missing those, which means that when I do need to boost I can really make it count. Also the combination of Ghost Walk, Overtake and Pull enables some truly hilarious plays, though of course the first wasn’t really needed in this case.
- My use of Brine was very poor here. I should have recognised that the Archangel was going to be able to drop him in turn 3 unless I pulled him right back to the point of uselessness. Instead of standing around in a cloud I should have fired him off into the cloud of Rotwings and just Overtaken through as many as I could.
- I’m still not precise enough with my positioning of Valkyries. I often needed them to Shield Guard something only to find that I’d left them 3.1” away from it.
|
|
|
|
Post by argentbadger on Nov 24, 2020 14:58:14 GMT
It's been a while since we've been playing any games here at Chateau Argentbadger; I think that many of my friends had been hoping that face-to-face wargaming might become an option again soon. Gareth and I did find a bit of time to throw down last night, so I decided to try something new (to me); part of the appeal was that rather surprisingly none of the Archons got any rules adjustment in the dynamic change yasterday. Game 29 – King of the Hill (scenario 1) vs Gareth's Cygnar conflictchamber.com/?cb201b_-2nev1d0LpkoPoPp-oRnHoOoOq9oNoNjDjDjDMinions [Theme] Will Work For Food [Azazello 1] Azazello, the Castellan [+29] - Road Hog [15] - War Hog [14] Boomhowler, Solo Artist [0(6)] Dhunian Archon [0(6)] Dhunian Archon [0(6)] Flugwug the Filcher [4] Hermit of Henge Hold [5] J.A.I.M.s [5] Primal Archon [8] Primal Archon [8] The Wastelander [5] Void Archon [8] Void Archon [8] Farrow Valkyries [8] Farrow Valkyries [8] Farrow Valkyries [8] (Note that Azazello isn't in Conflict Chamber yet so the link uses Helga1 instead as she has the same number of Warbeast points) So this is Azazello, the Castellan. He doesn't seem to do a lot for Warbeasts so I took a Road Hog for the Lightning Strike animus, and then a War Hog in case I actually want to smash things. The neatly fills up his entire Warbeast points so the rest of the army was filled up with all six Archons and three units of Valkyries to catch bullets for them. Finally, I added all the cool solos that I always fancied including but somehow never quite manage to fit into a list. The plan is to skirmish a bit with Void Archons and Valkyries, then abuse Counter Charge from the Primal Archons to knock things down before mopping up with a wave of solos and finally my Warbeasts. If I play carefully I should be able to get some work done with Azazello each turn between Storm Rager, Wind Rush, Sprint and Special Orders. Yes, that's right: six Archons. You either die a hero or live long enough to become the villain. conflictchamber.com/?c1201b_-1K919GawicamoTifieiealiMiha2igig9U9VCygnar [Theme] Gravediggers [Brisbane 1] Major Markus "Siege" Brisbane [+28] - Ironclad [12] - Minuteman [9] - Triumph [18] Captain Maxwell Finn [0(6)] Grand Master Gabriel Throne [7] Patrol Dog [2] Trench Buster [0(5)] Trench Buster [0(5)] Trencher Master Gunner [4] Trencher Commandos (min) [10] - Trencher Commando Officer [4] - Trencher Commando Scattergunner (3) [6] Trencher Express Team [5] Trencher Express Team [5] Trencher Infantry (max) [16] - Trencher Infantry Officer & Sniper [5] Gareth is trying Brisbane1 in Gravediggers. I assume that the plan is to gum me up with cheap Trenchers, then shoot all my stuff dead with Triumph, the Express Teams and Trench Busters under Brisbane's Feat. This might be a favourable match-up for me as I have three units of Valkyries plus the Wastelander to deal with all this ranged firepower. Gareth wins the roll-off and opts for the first move. I lumber him with the top side of the map where he'll have to worry about that massive forest. I end up going for a somewhat symmetrical deployment (my standard approach for when I don't know what to do) with a unit of Valkyries and one of each Archon for each flank, and my Battlegroup and most of the utility solos in the centre. The central Valkyries are Azazello's Henchwomen and are marked with purple bases accordingly. JAIMS picks the Trencher Infantry as her Prey on the basis that they're going to have to engage and die if Gareth is going to make anything of the scenario, and once they're gone I can start threatening whatever else needs to afraid of her. I choose the Eyeless Sight Objective in case Gareth has anything cheeky that he can do with that massive cloud on the right.  Turn 1: Cygnar Throne tells the Trencher Infantry to March so that they can get through that forest and then things run up to take board space; everyone seems very keen to avoid being in threat range of the Void Archons though, which sets the line a bit further back than I expected.. Brisbane puts Explosivo on himself and then makes a Foxhole in the middle of the open ground on the right. We didn't notice until later that he should have cast this before things moved into it but it had no impact on the game as Gareth could easily have activated in a different order.  Turn 1: Minions I don't think that I can get anything much done here and I'm going to have to accept a bit of shooting before I can get to grips in melee; even the Void Archons can't spray anything. Boomhowler puts a Covering Fire template in the way of the Trenchers and then gives Azazello some Special Orders. The latter casts Storm Rager on himself and boosts Distraction into the Trencher Infantry before repositioning back a bit. This does leave him on zero camp but between the Valkyries, the Hermit and the Wastelander I think he is probably safe.  Turn 2: Cygnar Triumph guns down a Valkyrie on the right with Rapid Fire and Brisbane upkeeps both spells. The Commandos use their mini-Feat on the right Primal Archon and pull it down on the last attack which is a bit awkward. The Express Team on the right helpfully misses the Dhunian Archon; the team on the left fares just as badly, missing the Void Archon once and having the second shot (courtesy of the Master Gunner) Shield Guarded onto a Valkyrie and then stopped by the Dhunian Archon. Finally Triumph blows away Flugwug; it turns out that it has True Sight. Oh well, I had been looking forward to some shenanigans with Flugwug.  Turn 2: Minions I don't think that I can score anything here so I want to make some progress with attrition. Ideally I would get Azazello to Feat, charge in and kill some Trenchers then Sprint back to safety but due to my poor positioning I've blocked him in and it'll be an order-of-activation nightmare to get anything useful done with him. Azazello upkeeps Storm Rager. The left Void Archon sprays down some Trencher Infantry, Void Walks to the Express team and kills the Ogrun, then slaps the Objective. The Primal Archon smites a random Trencher since there is nothing really exciting to kill and I want it as far forward as possible to be annoying with Counter Charge. Over on the right, the Void Archon flies over the building and sprays to kill the Patrol dog, the other Express Team gunner and a couple of Commandos, then Void Walks to the far corner of the zone and kills some more. The surviving Valkyries on that side drop a couple more but can't get in the zone so I've just got the Archon contesting it once the Objective inevitably goes down. Over on the left, the Valkyries jam the midfield and put a bit more damage onto the Objective. The Road Hog lights a few Trenchers up and Sprints back before Azazello recasts Distraction on the Trencher Infantry and Feats in a rather half-hearted, defensive manner. Most of my solos mill around uselessly as I've positioned them too far back to be relevant. Neither of us score.  Turn 3: Cygnar Triumph starts us off with a tasty shot into the Objective. Brisbane drops all his spells and allocates two Focus to the Minuteman. The Trenchers in the middle try to stab some Valkyries to no effect (actually I forgot that Azazello grants them all Riposte but I guess that Gareth wouldn't have even bothered to make the attacks if we remembered). The surviving Commandos drop another Valkyrie from the unit on the right and Finn zooms over to one-shot Boomhowler. The Ironclad wrecks my Objective in a single swing but I get lucky as the Minuteman leaves the Void Archon on a single box. Various other things with ranged attacks try to finish it off but only Triumph is able to hit and the last Valkyrie jumps in front of that bullet so that I can contest the zone for one more turn. Back on the left, Throne gives the Trench Buster March and they both charge into the Void Archon, killing it easily. Gareth scores for destroying my Objective; 1 – 0.  Turn 3: Minions Time to clear up the left and centre; I'll just need to try to hang on for the right zone. The Void Archon sprays various Commandos and boosts to hit and damage the Trench Buster (but only does two points of damage anyway), then Void Walks behind the Minuteman and leaves it on a couple of points in one arm. The Dhunian Archon also charges in to contest the zone and bop another Commando on his noggin. The War Hog kills Finn and a nearby Trencher; the Wastelander clears the one jamming the Road Hog and Sprints forward. The Road Hog then sets most of the remaining Trenchers ablaze before the central Valkyries finish them off to clear the zone and the flag for my Hermit. JAIMS swaps Prey to the Trench Buster on the left, kills him, swaps Prey to Throne and side steps into him for a second swing; the Primal Archon kills Throne and Prey moves to Brisbane. The left unit of Valkyries clears up the remaining pieces over there and takes out the Objective. Azazello once again find himself without any particular targets so uses Wind Rush and sits in a forest in the centre to threaten for next turn. I score the Flag, Objective and centre zone; 3 – 1 to me.  Turn 4: Cygnar Brisbane allocates two to the Ironclad. The Minuteman drops the Void Archon at last but the Commandos mostly bounce off the now-enraged Dhunian Archon. One of them runs to engage the Wastelander and the Trench Buster rushes over to smite the ronin in a single blow thanks to Flank. Brisbane uses his Feat and drops a Ground Pounder between my Road Hog and Dhunian Archon. The latter manages a Tough Roll and the former takes massive damage but survives with a few boxes. All the Valkyries are missed due to the DEF bonus from being Henchmen. On the right, the Ironclad realises that it can't quite make it to the War Hog so instead leaves the other Dhunian Archon on a single box. Triumph take a shot to finish the Road Hog but a Valkyrie takes the bullet; this also triggers Mother's Embrace to heal the crippled aspects on the Road Hog. Neither of us score; 3 – 1 to me.  Turn 4: Minions I think that I'm going to have to give up on the right zone as I'll never get enough over there to contest it in without the Ironclad being able to pound it into the ground like a tent peg. I should be able finish Triumph and that might leave an opening for Azazello to assassinate Brisbane if I'm careful with positioning. Azazello continues to upkeep Storm Rager. The War Hog clears out the Trench Buster and Commando in the centre zone. My Hermit moves to cover Triumph and Brisbane with Whispers At The Gate, then the Valkyries and Road Hog go in. The second Valkyrie gets a handy critical knockdown which makes things easier but in the end Triumph remains alive, admittedly only with a couple of boxes in its gun arm and on fire. It seems pointless to send Azazello in at this stage and risk a long shot assassination so I just keep him a bit safer. I score the Flag; 4 – 1 to me. 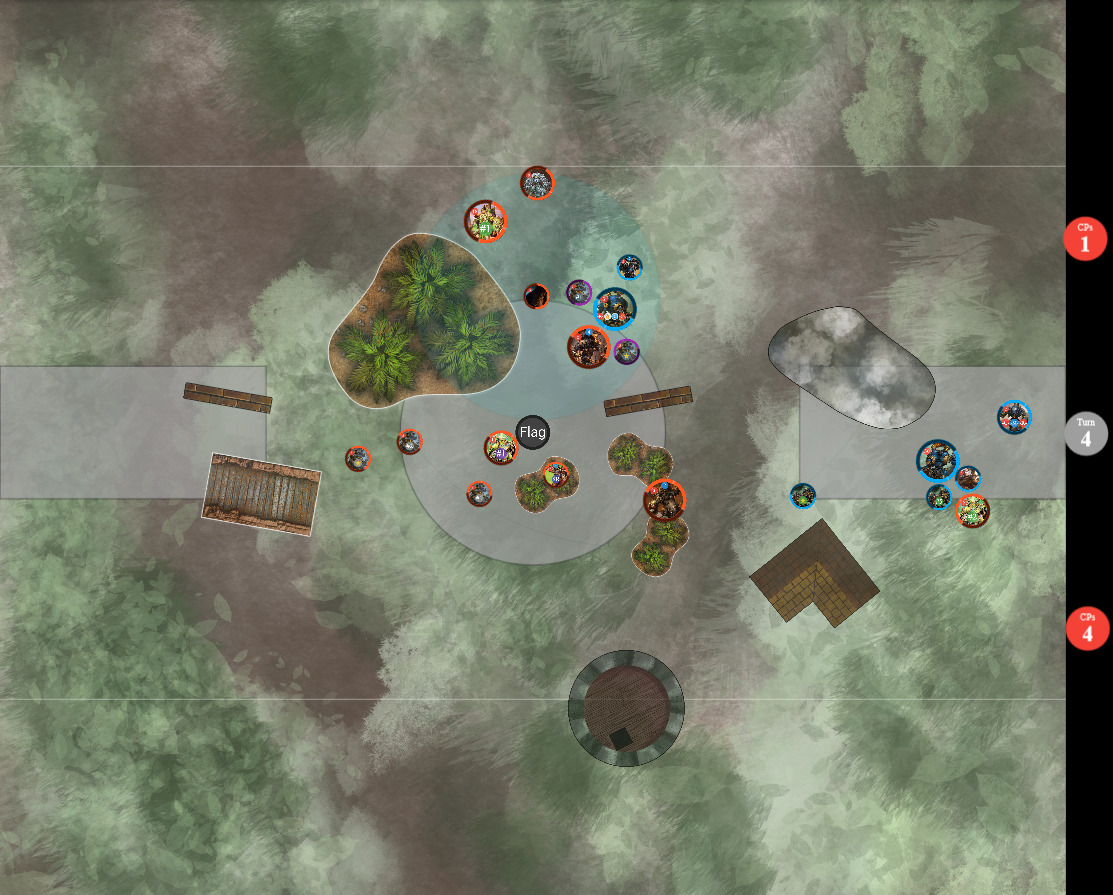 Turn 5: Cygnar Triumph rather helpfully burns to scrap. The Minuteman clears the Dhunian Archon out of the right zone but it's too little, too late and Gareth recognises that Brisbane doesn't have enough output to turn this game around (plus, it's midnight by now) so he concedes. Minions win by concession. Thanks, as always, to my best friend Gareth for fun game of WarmaHordes. As mentioned at the start, I think that perhaps this was a bit of a mis-match between Gareth's shooting and my Shield Guards but he played it out gamely anyway. I really enjoyed this list and I look forward to playing it enough that I actually remember all the rules in one game. For now I think that I'll just focus on a few things each game and try to get them right; everything will come together eventually. Things I learned: - Azazello has some nice potential for personal output and has good enough defensive stats to be able to stay safe against a lot of retaliation so I can afford to be a bit bolder with him. In this game I think that his personal threat really affected Gareth's movement in the centre so in that sense Azazello was still contributing but it would be nice to actually make some attacks.
- I'm not quite sure what to do with Boomhowler. Reposition is quite good, of course, but he's not cheap and his damage output isn't too exciting. He's definitely in consideration for being dropped, perhaps for Orin Midwinter or Eilish Garrity.
- I have to decide where to put the Warbeasts. I can't really afford to lose the Road Hog early since I'm relying on it for Sprint, but the War Hog is so slow here that it's not really threatening much. Having them as a third wave behind the Valkyries and combat solos seems like quite a lot of points just hanging around not doing much for a lot of the game. On the other hand, I suppose it worked OK here.
- The Wastelander didn't look to have much of an effect but the worry of him batting a massive shot back an Express Team or something was definitely changing Gareth's targetting priority. I enjoyed him a lot more than I expected since I figured that he was initially just a slightly janky combat solo.
|
|
|
|
Post by Azahul on Nov 24, 2020 21:53:19 GMT
I know my own battlegroup has tended to be a Road Hog and two Battle Boars, since I agree that Azazello absolutely wants a Road Hog and the lights make it a little easier to score zones and generally be a little more flexible than a War Hog. Plus Primal means the Road Hog can theoretically kill a target on occasion. I don't hate the War Hog idea though, might need to try it at some point.
|
|
|
|
Post by argentbadger on Nov 30, 2020 12:41:57 GMT
Azahul – thanks, I saw that you were going with the Battle Boars. Probably that's the right move in the long run; however I find War Hogs to be quite entertaining to play (and Battle Boars to be rather disappointing) so I'm going to stick with this for the time being. It's clear from your battle reports that you're a considerably better player than I am too, so perhaps the more direct approach with the War Hog will turn out to be easier for me to apply. Andrew and I managed to find time for another Wartable game of Warmachine / Hordes after several rearrangements. It’s a mystery how we ever got proper face to face games considering how hard it can be to schedule even a remote game! Game 30 – Invasion (scenario 4) vs Andrew’s Convergence of Cyriss conflictchamber.com/?cb201b_-2nev1d0LpkoPoPp-oRnHoOoOq9oNoNjDjDjDMinions [Theme] Will Work For Food [Azazello 1] Azazello, the Castellan [+29] – Road Hog [15] – War Hog [14] Boomhowler, Solo Artist [0(6)] Dhunian Archon [0(6)] Dhunian Archon [0(6)] Flugwug the Filcher [4] Hermit of Henge Hold [5] J.A.I.M.s [5] Primal Archon [8] Primal Archon [8] The Wastelander [5] Void Archon [8] Void Archon [8] Farrow Valkyries [8] Farrow Valkyries [8] Farrow Valkyries [8] (Note that Azazello isn’t in Conflict Chamber yet so the link uses Helga1 instead as she has the same number of Warbeast points) This is the same list as last time. There are a few pieces that I’m not sure about (mainly Boomhowler and Flugwug) but I think that it’s probably operator error here so I plan to keep using them while I work out what they’re good for. conflictchamber.com/?cc201b_-1-d8dndndBdedgdgpBnVpx8jConvergence [Theme] Destruction Initiative [Axis 1] Axis, the Harmonic Enforcer [+30] - Conservator [12] - Conservator [12] - Corollary [6] Attunement Servitors [0(4)] Reflex Servitors [0(4)] Reflex Servitors [0(4)] Asphyxious the Sanctified [14] - Blockader [33] Artificer Prime Nemo [18] - Freebooter [9] Andrew’s list is comprised mainly of the big cool toys he bought during lockdown and wants to convince himself will actually see play. Fortunately, the Blockader, Nemo4 and Asphyxious4 are all solid pieces that can probably fit in almost anywhere. Since the Conservators (and the Corollary, I suppose) have Counter Charge thank to Axis, the interactions with the Primal Archons could get quite silly. I win the roll-off and pick second. If I’m being honest, this is mainly because I almost always pick to go first when I can so I wanted to see if a more reactive gameplay where I can potentially score first might be interesting; however when I remember what Axis’s Feat does I think that this is probably the wrong choice. I do at least lumber Andrew with the most annoying terrain. Andrew’s deployment is skewed a little to the left (presumably because of the building in the central zone) so I do the same with my Battlegroup. I make sure that the Wastelander goes on the right near Nemo as that’s pretty much the only shot that he can deflect. JAIMs also chooses Nemo as her Prey in the hope that will make him a bit more cagey. We both pick Observatory for our Objectives in case that central cloud becomes relevant. 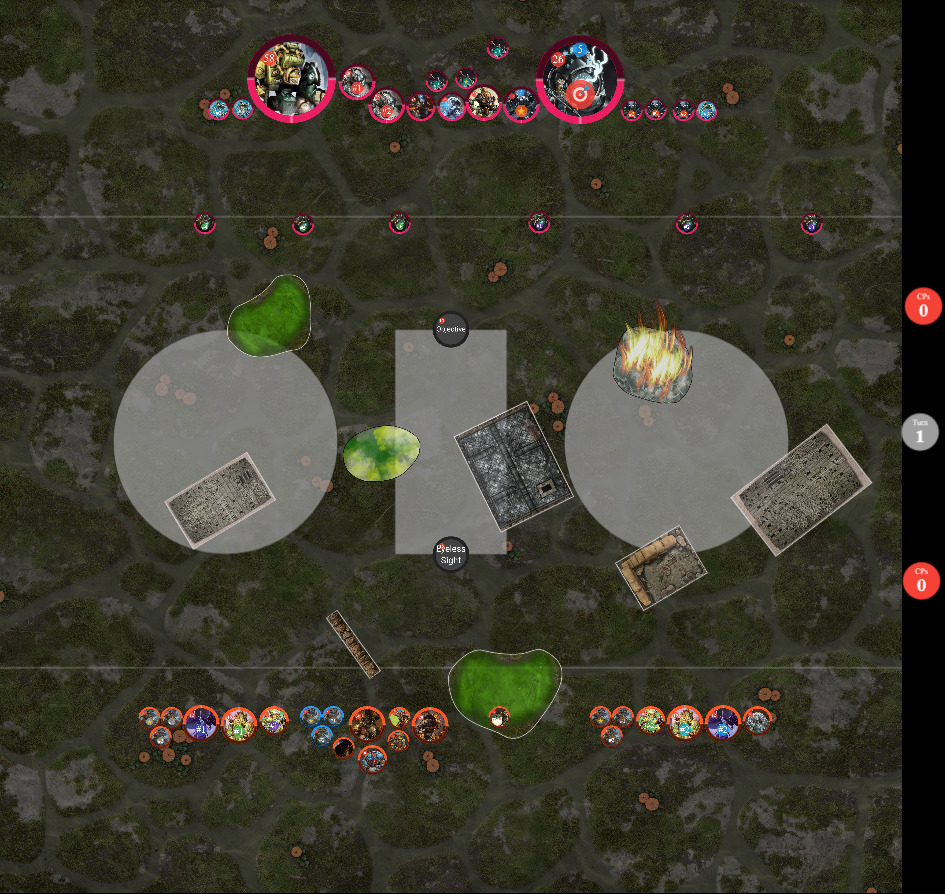 Turn 1: Convergence of Cyriss Axis allocates a Focus to a Conservator that will be passed around the Vectors as needed. Most things run at me; the Reflex Servitors advance and Dig In. Nemo magics up a Frustrum Locus, puts Lightning Shroud on the Freebooter and moves it up with Locomotion.  Turn 1: Minions Almost all of my stuff also runs up. On the one hand I don’t want to make it too easy to kill all my stuff but on the other hand Andrew will certainly use Axis’s Feat next turn so I need to be far enough up to get any work at all done. In the end, I push hard on both flanks but stay a bit more cautious in the centre and use Valkyries to gum up the middle and hopefully keep the Blockader from taking out the War Hog too easily. Boomhowler puts Reposition on the central Valkyries to get them a bit further upfield. Azazello casts Storm Rager on himself and Phantasm on the right unit of Valkyries. 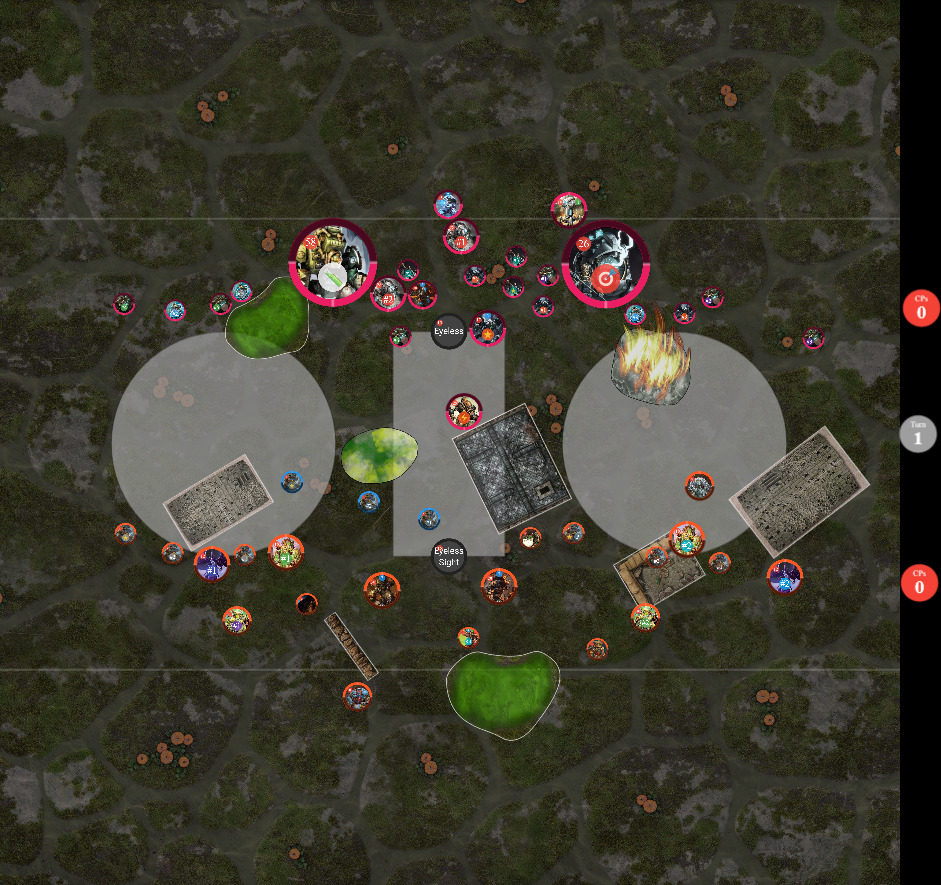 Turn 2: Convergence of Cyriss The central Conservator gets Eyeless Sight and Lightning Shroud is upkept. That Conservator received three Focus and the Blockader gets two (possibly from the Corollary a little later). Axis puts Iron Aggression on the Blockader moves forward and uses his Feat. The central Valkyrie needs to go so that the Blockader has a landing spot to get my War Hog. First a Reflex Servitor blows itself up for no effect. Then the fully loaded Conservator goes in, misses a couple of attacks and has the Dhunian Archon block the one that does hit. The Blockader, denied a chance to get stuck into the War Hog, vents its frustration by smashing the awkward Valkyrie and also one-shotting my Primal Archon. The Arcane Mechaniks use Empower on the Freebooter and super-tune Nemo, but the Freebooter can’t actually get to anything relevant this turn. Nemo shoots JAIMs and ends up killing a Valkyrie due to Shield Guard. The rest of the Servitors mostly run up to jam me.  Turn 2: Minions It’s an Axis Feat turn so I’m not going to get much useful done here. With a bit of luck I might possibly clear the right zone, otherwise my plan is keep the Blockader bottled up with Valkyries and take out the lead Conservator. Azazello upkeeps Storm Rager but drops Phantasm. After numerous attempts to knock down that Conservator with re-rolled hammer attacks from the Valkyries and shots from Boomhowler, I still can’t get it down; in the end the War Hog has to trudge forward and wreck it the old-fashioned way. The Road Hog sprays down the side of the building to set a few things (notable Axis) on fire. On the right I almost clear the zone but one cheeky Servitor survives to contest. Finally, Azazello uses his Feat and Wind Rush to hopefully buy me another turn in which to actually do some work. Neither of us score.  Turn 3: Convergence of Cyriss Iron Aggression and Lightning Shroud are both upkept. The fire on Axis annoyingly goes out, though the corrosion on the Blockader chips a single point of damage off. The Blockader gets two Focus, then the Mechaniks Empower the Freebooter and super-tune Nemo. Nemo uses Locomotion to clear the Freebooter around the corner of the building then shoots the Primal Archon; the Wastelander deflects the first (though sadly Nemo is immune to his own weapon) and a Valkyrie catches the second. Asphyxious moves into position to Interface with the Blockader once it shuffles to the right; it makes short work of the War Hog and my Objective. Axis swaps Iron Aggression to the Freebooter which charges into the Road Hog. A free strike from a Valkyrie fails again to get the critical knock down (though in retrospect it’s immune anyway due to Lash) but does crank the damage to take out the Movement system and therefore fail the charge. It’s better to be lucky than good! The Conservator on the left bops a Valkyrie and then various spare attacks kill the Mechaniks to stop me doing any shenanigans with Void Archons. Andrew scores for the Objective; 1 – 0.  Turn 3: Minions Now I can get some work done. I can pick up the right zone quite painlessly but the main goal for this turn will be to swing attrition in the centre; in particular the Blockader needs to go. Storm Rager is upkept again and Azazello cuts for one. On the right, the Valkyries take the jamming Servitor at the back. The Void Archon charges the Servitor on the right and sprays a truly ridiculous roll to one-shot the Frustrum Locus. That handily gives the Primal Archon a clear lane into Nemo though the damage isn’t too exciting; JAIMs and the Wastelander follow to threaten for next turn. The Hermit moves up to cover the Blockader, Freebooter and Asphyxious with Whispers At The Gate; it’s also covering most of my army too so my plans will have to work! The left Valkyries shuffle around to put a little damage on the Warjacks and mainly to stop the Conservator doing a cheeky Counter Charge. The Void Archon charges the Blockader to apply Dark Shroud and knock off a load more boxes. The Henchwomen Valkyries pleasingly finish it off, saving me from having to send in the Dhunian Archon too. The Road Hog polishes off the Freebooter and Lightning Strikes clear of Azazello who Wind Rushes in to kill Asphyxious and Sprint back. That felt like a pretty effective turn but Azazello couldn’t quite get clear off the Hermit’s aura so I’ll be in danger here from an assassination attempt. I score the right zone; 1 – 1.  Turn 4: Convergence of Cyriss A Servitor puts Flare on Azazello by shooting from out of range so I can’t Shield Guard it; the scatter is lucky and lands on him. Axis casts Unstoppable Force and hits Azazello with a Battering Ram for a bit of damage. The Corollary Bulldozes the nearest Valkyrie out of Shield Guard range of Azazello. Nemo moves away from the Primal Archon (which Counter Charges but he can still shoot) and shoots Azazello, hitting and forcing my one transfer with a massive hit. Luckily, Azazello also gets pushed out of range of the second shot so I survive. 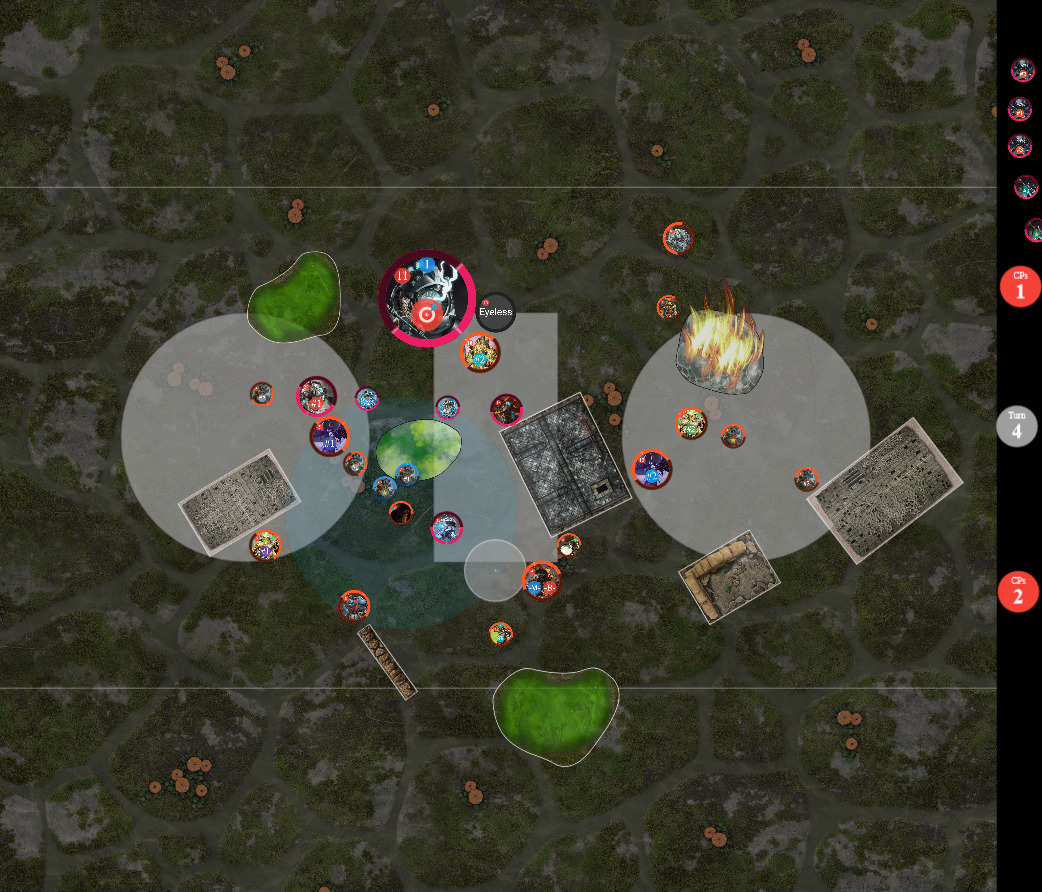 Turn 4: Minions The Primal Archon knocks Axis down and punches him a few times, then JAIMs finishes the job. A real robot killing a human cosplaying as a robot; justice is done. Minions win by assassination.  As always, Andrew is a fun opponent and I really enjoyed this game. Playing via Wartable always takes ages, of course, and we spent plenty of time chatting here and talking through our options so it was after midnight when we finished. I was very pessimistic about my chances after turn 2 with a Blockader in my face and having done basically nothing that turn due to Axis’s Feat but I guess that Andrew found Azazello’s Feat comparably annoying. Things I learned: - Boomhowler is more of a toolbox than I had originally thought. Beat Back and critical knock down on his gun is quite useful (though I didn’t trigger it even once this game) and the Covering Fire template feels like it should be effective with so many single wound infantry around.
- Sending Azazello in on turn 3 to kill Asphyxious was just as satisfying as I hoped. It’s been an interesting change to have a Warlock who can contribute to the game; Dr Arkadius and Jaga-Jaga are rather passive.
- Using the Hermit is going to take a lot of practice. That armour debuff is great but it’s going to be hard not to have it bite me back in my turn if I use it too freely.
|
|
|
|
Post by argentbadger on Dec 7, 2020 12:31:57 GMT
Allan asked for a game of WarmaHordes to try out some of the legacy models in the current Retribution of Scyrah CID. Lucky for me that I don’t know what most of them did before so I’m not burdened by having two slightly different sets of rules to worry about. Game 31 – Recon II (scenario 6) vs Allan’s Retribution of Scyrah conflictchamber.com/?cb201b_-2nev1d0LpkoPoPp-oRnHoOoOq9oNoNjDjDjDMinions [Theme] Will Work For Food [Azazello 1] Azazello, the Castellan [+29] – Road Hog [15] – War Hog [14] Boomhowler, Solo Artist [0(6)] Dhunian Archon [0(6)] Dhunian Archon [0(6)] Flugwug the Filcher [4] Hermit of Henge Hold [5] J.A.I.M.s [5] Primal Archon [8] Primal Archon [8] The Wastelander [5] Void Archon [8] Void Archon [8] Farrow Valkyries [8] Farrow Valkyries [8] Farrow Valkyries [8] (Note that Azazello isn’t in Conflict Chamber yet so the link uses Helga1 instead as she has the same number of Warbeast points) No change for my Azazello list. It seems to be doing quite nicely and when I consider swapping out solos I always seem to find some case where the current load-out works fine. Since my main issues with the list at the moment are 1) remembering what the rules of my many solos actually are and 2) working out where to apply said solos for best impact in the game, I figure that minimising changes is probably for the best. conflictchamber.com/?c5201A_-1nf10v0vhQhJ3y4141oNhO3uhO3umpmpRetribution [Theme] Defenders of Ios [Thyron 1] Thyron, Sword of Truth [+27] - Manticore [14] - Manticore [14] - Fane Knight Guardian [0(4)] Aelyth Vyr, Blade of Nyssor [0(5)] Arcanist Mechanik [2] Ghost Sniper [0(3)] Ghost Sniper [0(3)] Void Archon [8] Ryssovass Defenders (max) [16] - Soulless Escort (1) [1] Ryssovass Defenders (max) [16] - Soulless Escort (1) [1] Dawnguard Trident [16] Dawnguard Trident [16] (Note that this adds up to 77 points; this is because Ryssovass Defenders are being tested at 15 points for a max unit) Allan’s list is mostly legacy models that he’s testing for the CID process; we’re using the week 2 rules. Thyron is pretty much the elf version of Azazello so this should be quite an entertaining match-up. I also note that neither of us have any great way to speed things up, nor any meaningful ranged threat (apart from the Tridents) so I’m expecting a big brawl in the centrefield. I win the roll-off and choose to move second. This is partly so that I can force Allan to deal with the annoying house in the right zone, partly to keep practicing playing second (since at least locally almost everyone seems to prefer to move first) and partly because with the movement ranges on offer here I think that I’m unlikely to get jammed out of anything. Giving the Tridents a shot at before I move twice is a little annoying, but I’ve got plenty of Shield Guards so I’m unlikely to lose anything that I don’t want. JAIMs chooses Aelyth as her Prey; I figure that she’s got to come forward if she’s going to do more than just apply Veteran Leader to the Defenders.  Turn 1: Retribution of Scyrah Thyron puts Storm Rager on himself and Fury on the left Defenders. Then everything runs right down my throat.  Turn 1: Minions All my stuff also runs. I figure that Allan will direct the Tridents to take out my Void Archons, so I make sure that they’re well surrounded by Shield Guards. Azazello casts Storm Rager on himself (so, it’s going to be one those games!) and Phantasm on the leftmost Valkyries though I don’t expect the latter to actually be shot directly by anything.  Turn 2: Retribution of Scyrah Both spells are upkept, but no Focus is allocated. Both Tridents shoot at their Void Archons and I spread the incoming fire across the Valkyries and Dhunian Archons; in the end I have Vengeance on both units and the Void Archons aren’t even touched. I will also note that Allan rolled a lot of 7s here when he needed 8s to hit the Void Archons which was perhaps a bit improbable. The Manticores on each side put down Covering Fire in the zones, then the Defenders flood forwards.  Turn 2: Minions Allan hasn’t contested my flag, so I need to make sure that I get at least one point. The Objective is probably within reach too, but I think that I’ll be better served taking out the Void Archon if I can get that far. Otherwise my plan is to tidy up as many of the Defenders as possible, contest all the scenario elements and use Azazello’s Feat to weather the following turn. I drop Phantasm but upkeep Storm Rager. The Valkyries on the left kill a few Defenders though one does die to a Last Word attack. The Void Archon there sprays down a few more and Void Walks back to relative safety and the Primal Archon moves forward to be an annoying counter-charge threat. Boomhowler gives the Henchwomen Valkyries in the centre Reposition then lays down his own covering fire to keep the remaining Defenders bottled up at the back of their zone. The central Valkyries clear some of the Defenders in the middle and Reposition back a little, then Azazello takes his turn. He Feats, casts Wind Rush to move forward and then charges the Void Archon. After killing the ghostie in one swing he casts Lightning Strike to Sprint back and sit at 20/20 (in melee) with a couple of transfers and the Hermit handy, daring Thyron to come for him and hoping that he won’t get knocked down by anything. That felt very satisfying. JAIMs is apparently awestruck by this display and missed both attacks into a Defender so the Void Archon lines up a perfect spray to kill five of them and make her lack of contribution irrelevant. The Valkyries move to block a landing spot for the Trident to get into melee with the Void Archon and gun down another couple of Defenders. Allan’s tough rolls were truly awful; I think that he made only one or two all turn. I score my flag; 1 – 0.  Turn 3: Retribution of Scyrah The Objective gives Thyron Pathfinder; he drops Fury from the tattered remnants of the Defenders unit and upkeeps Storm Rager. The left Manticore gets Empower from the Mechanik. The Ghost Sniper shoots a Valkyrie on the left so I Shield Gard it to the one which won’t automatically die. Thyron uses his Feat and charges Azazello. Flashing Blade attacks kill a nearby Valkyrie and JAIMs and force out both my transfers and the Hermit, but Azazello is untouched; Thyron Side Steps clear at the end. Aelyth goes in but misses her swing. The left Defenders poke at the Primal Archon and a Valkyrie in the way, though I use the Dhunian Archon to save the Valkyrie; in the end the Manticore has to kill her to clear a landing zone for the Trident. It now goes for the big play by slamming the last Valkyrie, but Allan doesn’t manage the 5” slam he would have needed to contact Azazello. The Trident lets rip with its gun anyway but only a single fully boosted shot gets through (though that does really hurt). Back on the right the Trident slams the Primal Archon and shoots up my Valkyries a bit for pleasingly little effect while the Defenders jam me up. One of them kills Aelyth to make room for the Fane Knight to charge in out of nowhere but luckily (for me) he doesn’t manage to hit. I score my flag again, 2 – 0.  Turn 3: Minions There is probably some way that I can score my flag plus another couple of points to just win on scenario, but Thyron is right there and it would be rude not to just kill him. Azazello upkeeps Storm Rager and cuts back to full fury. The Valkyries kill the Fane Knight and a couple of Defenders to clear off the right Void Archon. It charges into Thyron’s back but misses both initials; it does chip a few point of damage off with the spray and Void Walks to a open up more landing spots in case I need them. Azazello takes off most of Thyron’s boxes with boosted attacks (dying now to a cheeky Riposte would be rather sad) then the Wastelander reminds me what I pay him for by rolling a hilarious damage roll and over-killing the Warcaster about three times over. Minions win by assassination.  Many thanks to Allan for a fun game on a Friday evening. It felt very good to do what I dreamed with Azazello and have him tank pretty much Allan’s whole army though I would have also found it quite cool if the Trident had managed the slam and got the kill even under such high stats. I’m enjoying the learning process of what I can and can’t get away with using such an interactive front-line caster. Things I learned: - I need to get better on my planning for movement. Too much of my army ended up bottled up in the centre between the big rock and the burning rubble and getting them clear of it ended up being blocked in with my other stuff.
- Each solo is an interesting packet of tools; I am still trying to work out when I need to use each one. This is easier with pieces like Boomhowler and the Dhunian Archons as they can stay safe at the back and still contribute but Flugwug, JAIMs and the Wastelander are quite easy to squander if I send them in at the wrong time.
- DEF20, ARM20 turns out to be quite a tricky stat-line to deal with. Obviously I knew that intellectually but it was quite fun to experience it in the game.
|
|
|
|
Post by argentbadger on Dec 8, 2020 12:11:13 GMT
Allan’s adventures in the CID for Retribution of Scyrah continue and I was happy to oblige him for another game of WarmaHordes via Wartable. Game 32 – Bunkers (scenario 2) vs Allan’s Retribution of Scyrah conflictchamber.com/?cb201b_-2nqr1d0LpkoPoPp-oRnHoOoOq9oNoNjDjDjDMinions [Theme] Will Work For Food [Azazello 1] Lord Azazello, the Castellan [+29] - Road Hog [15] - War Hog [14] Boomhowler, Solo Artist [0(6)] Dhunian Archon [0(6)] Dhunian Archon [0(6)] Flugwug the Filcher [4] Hermit of Henge Hold [5] J.A.I.M.s [5] Primal Archon [8] Primal Archon [8] The Wastelander [5] Void Archon [8] Void Archon [8] Farrow Valkyries [8] Farrow Valkyries [8] Farrow Valkyries [8] Hurrah! Conflict Chamber is updated to include Azazello. In the interests of my sanity I kept the same list as before. I figure that this also helps Allan’s testing a bit by giving him a stable baseline to work against, but the main reason was definitely my quest to get a handle on my own rules. Retribution of Scyrah [Theme] Defenders of Ios [Falcir 1] Falcir, the Merciless [+28] - Gorgon [9] - Aeternae [17] House Ellowuyr Warden Executioner [5] House Ellowuyr Warden Executioner [0(5)] Arcanist Mechanik [2] Arcanist Mechanik [2] Hermit of Henge Hold [0(5)] Scythe [0(6)] House Ellowuyr Swordsmen (max) [16] - Soulless Escort (1) [1] House Ellowuyr Swordsmen (max) [16] - Soulless Escort (1) [1] Dawnguard Trident [16] Dawnguard Trident [16] Allan wanted to try out the new Warcaster, Falcir the Merciless. These are week 2 rules which is probably good for me as she seemed to be regarded as quite oppressive in her original incarnation. Much of the rest of the force is also either brand new or under test for CID, but as per the previous game I just don’t know enough about the original rules to comment on the changes. I’m assuming that the basic plan is to jam me up with those Swordsmen units, use Falcir’s Bounty rules to hamstring any reply, then finish up any survivors with the Executioners and the Warjacks. Allan wins the roll-off and asks to have the first turn. The terrain on the bottom looks a bit less annoying so I give Allan the top; I might be able to use that house to score my own zone. I go with my usual set-up with a unit of Valkyries accompanying one of each Archon out on the flanks and everything else in the middle. I do put Flugwug out on the left as I might be able to use his stealth and mobility to get a cheeky score on that flag. JAIMs chooses the left unit of Swordsmen as her Prey.  Turn 1: Retribution of Scyrah Falcir casts Flashing Steel on the left Swordsmen and uses Cyclone to move further forward; everything else rushes me.  Turn 1: Minions My stuff also runs, though I’m careful to keep out of melee threat range. I can’t stay out of Trident shooting range but with all my Shield Guards I’m not too worried about them, whereas my Road Hog and Void Archons will make short work of the Swordsmen if Allan wants to play keep-away. Azazello casts Storm Rager on himself and Phantasm on the Henchwomen Valkyries in centre.  Turn 2: Retribution of Scyrah Falcir gets Pathfinder from the Objective and drops Flashing Steel. She moves up to cover pretty much my entire army and Feats to give Bounty tokens to Azazello, both Void Archons, the left-most unit of Valkyries and the Road Hog. Falcir also casts Pay The Price on the War Hog to give it a token too, then Cyclones back to safety behind the wall. At this point, she chooses Azazello’s token to be Falter Courage and the War Hog’s to be Snare. Scythe shoots the Road Hog; the first one is deflected back by the Wastelander (and the damage is cancelled by the Hermit’s Mad Visions) and the others do some nice damage. The Valkyries’ Bounty is chosen as Snare and all the others (both Void Archons and the Road Hog) are Confuse. Both Tridents use Telekinetic Wave to move a Swordsman forwards but rather surprisingly elect not to bother shooting. I suppose that this was to avoid triggering Vengeance but I’m not sure that it is worth avoiding Vengeance if the cost is not killing any of my stuff. The Swordsmen run to jam on both sides; one makes sure to contest my zone.  Turn 2: Minions Looking at the effect of these Bounty tokens, I don’t think that they’re going to be as crippling as Allan seems to expect. I can definitely score my zone and I can probably get the left flag as there are only Swordsmen around it. Otherwise, Allan has offered up enough Swordsmen that I reckon I can more or less take them all off the table this turn and get a nice leg up on attrition. The Objective heals my Road Hog and Azazello upkeeps Storm Rager but drops Phantasm. I start on the left where the Valkyries shuffle a bit to maximise Gang coverage and clear out the front row of Swordsmen. The Primal Archon then charges through and eats a couple more and threatens as far forward as I dare while the Void Archon sprays down several more (using the glut of souls acquired to boost in order get round Confuse) then Void Walks back behind the Valkyries. Flugwug moves round, Jumps to the flag and kills the last two contesting Swordsmen to make sure that I can score the flag. On the right, things work out more or less the same, though the Primal Archon manages to knock down a significant number of Swordsmen plus the Gorgon and Executioner. The Void Archon takes the opportunity to kill off the knocked down Executioner and Void Walk back to safety. The Henchwomen Valkyries clear the Road Hog and knock down the Hermit; Boomhowler finishes him off. The Road Hog slightly strands itself by killing its Swordsman target with the assault spray to stop it Sprinting back (I thought that this still worked but Allan assured me otherwise) and setting the Gorgon ablaze. JAIMs runs to contest Allan’s zone. Finally, Azazello moves forward, Feats rather defensively, kills the Gorgon with his pistol and Wind Rushes back a bit. I had to strike a balance here between covering my models on the left under his Feat and staying in Shield Guard Range; I opt more for the former on the basis that his stats are probably good enough. I score my zone and the flag on the left; 2 – 0 to me.  Turn 3: Retribution of Scyrah Allan’s going to have to assassinate me here or he’ll run out of models long before I do. The Aeternae gets Pathfinder from the objective and gets Empowered by both Mechaniks. Scythe one-shots JAIMs, presumably just to clear her out of the way. The left Trident trundles forwards but fails to deal with the leader of the Henchwomen Valkyries. The Executioner also fails to kill her (but I don’t get a cheeky Riposte knockdown either, sadly) and shoots the War Hog. Aeternae also fails to kill that Valkyrie so Falcir has to take the long route. She walks forward, Cyclones into melee with Azazello but fails to even hit him. I had the Hermit and two transfers in case that is needed too. Killing Falcir from here would be trivial so Allan [virtually] shakes my hand; Minions win by concession.  I had a fun game here and Allan’s always a nice chap to play with. I think that he made too much of a mess of his second turn, mainly over-estimating the impact of Falcir’s Bounty tokens, for this to be much of a learning experience on my side. Still, it is quite satisfying to have a turn where everything just plain works. |
|
|
|
Post by marxlives on Dec 9, 2020 16:06:13 GMT
Hey Ardent do you do games on request for doing online games?
|
|
|
|
Post by argentbadger on Dec 13, 2020 19:09:53 GMT
Hey Ardent do you do games on request for doing online games? To be honest, I never have before. All my online games have been arranged through a couple of local (i.e. Scotland-centric) message groups.
However, if this is a really a request for a game then send me a PM and we can see about setting something up.
|
|
|
|
Post by argentbadger on Dec 21, 2020 17:54:20 GMT
I got another game of Warmachine / Hordes in via Wartable. My opponent this time was Andrew who is working on a Convergence list with more than a little jank in it. Game 33 – Bunkers (scenario 2) vs Andrew’s Convergence of Cyriss conflictchamber.com/?cb201b_-2nqr1d0LpkoPoPp-oRnHoOoOq9oNoNjDjDjDMinions [Theme] Will Work For Food [Azazello 1] Lord Azazello, the Castellan [+29] – Road Hog [15] – War Hog [14] Boomhowler, Solo Artist [0(6)] Dhunian Archon [0(6)] Dhunian Archon [0(6)] Flugwug the Filcher [4] Hermit of Henge Hold [5] J.A.I.M.s [5] Primal Archon [8] Primal Archon [8] The Wastelander [5] Void Archon [8] Void Archon [8] Farrow Valkyries [8] Farrow Valkyries [8] Farrow Valkyries [8] This is the same list as I’ve used for the last few games. I think it’s useful to play a list for a few games regardless of how good or bad the match-up is so that you can see where it has good options and where you’ll struggle. More importantly, I’ve been finding it really fun. conflictchamber.com/?cc201b_-2od2nBnBoRnHpMoNoNpB1hpNpNpN2525Convergence [Theme] Strange Bedfellows [Aurora 1] Aurora, the Numen of Aerogenesis [+29] - Mule [14] - Mule [14] Hermit of Henge Hold [5] J.A.I.M.s [5] Prefect Hypatia [5] Void Archon [8] Void Archon [8] Asphyxious the Sanctified [14] - Stalker [8] Negation Angels [0(6)] Negation Angels [0(6)] Negation Angels [0(6)] Soulhunters (min) [11] Soulhunters (min) [11] Andrew is using the Convergence theme that incorporates a load of random Mercenary and Cryx options. I assume that the point of this list is to turbo-charge those Soul Hunters and fire them into me from across the board. I win the roll-off and choose to move first. Against such a fast force I’m worried that I’ll be jammed up in my own deployment zone if I let Andrew take the first turn; he gives me the side with a slightly more annoying house. I keep my deployment quite symmetrical as usual, with one of each Archon and one unit of Valkyries on each flank and everything else going straight up the middle. My JAIMs picks the left unit of Negation Angels as Prey; Andrew’s JAIMs chooses the Void Archon on the right.  Turn 1: Minions Everything runs forward. I can’t avoid being in range of the Negation Angels with the leading Valkyries so I spread them out to ensure that I should only lose one per unit if Andrew commits them (which I doubt). Azazello casts Storm Rager on himself and Phantasm on the leftmost unit of Valkyries.  Turn 1: Convergence of Cyriss Everything moves up but mostly stays clear of my threat ranges. Aurora casts Aerogenesis and Arcane Might; Asphyxious puts some clouds on the left to cover some Soul Hunters.  Turn 2: Minions I’m not really in range to do much so my plan is just to rush up and claim some table space where I can, then Feat and hope not to lose too much. Azazello drops Phantasm but upkeeps Storm Rager; he also Feats and shoots a couple of wounds off the central Void Archon. Over on the right the Valkyries drop a Soul Hunter and I send Flugwug in to eat a pair of Negation Angels; I figure that he’s cheap enough to make that a worthwhile trade. Then I pass the turn and cross my fingers. 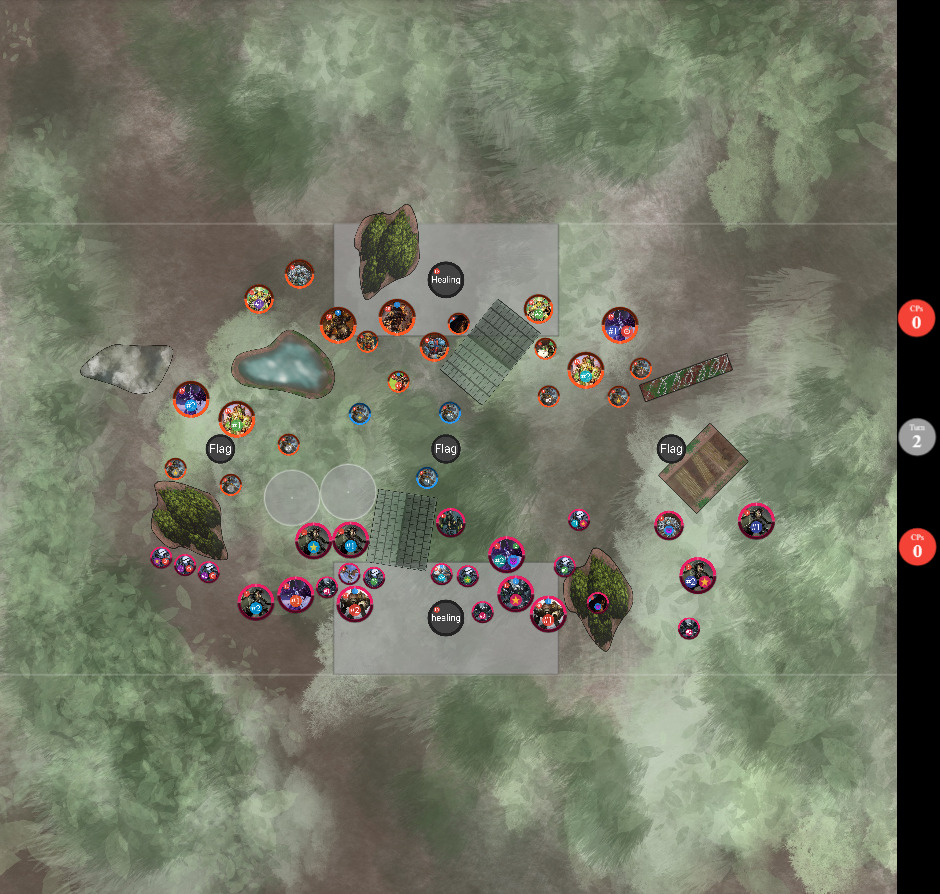 Turn 2: Convergence of Cyriss Aurora upkeeps Arcane Might. Various things move with Swift Vengeance or Apparition; JAIMs triggers a Counter Charge from the Primal Archon which misses anyway. Aurora Feats (catching pretty much her entire army), casts Aerogenesis and then charges a Valkyrie on the right and repositions onto the flag. We mess the rules up a bit here as we forget to give her Shadowbind from the Primal Archon and I also take a Riposte attack when she misses the Valkyrie even though she’s too far from Azazello to get Riposte. We figure that this evens out fairly, and anyway Aurora could have just run to the flag if she really needed it. The Hermit uses Whispers at the Gate and repositions deep into my right side. JAIMs kills her Void Archon and sidesteps into my zone; the lone Negation Angel flies right to the back of my zone too. The Soul Hunters on the right charge into the Dhunian Archon; the first one amusingly misses an impact attack on Flugwug and dies to Riposte but the second one leaves the Archon on a single box. The Stalker and a unit of Negation Angels team up to kill the Primal Archon on that side. The lead Void Archon finishes the wounded Dhunian Archon and also incidentally kills Flugwug with the spray. Asphyxious kills the two contesting Valkyries on the right and puts down a cloud in the centre to block my view. On the left, Andrew pulls back most of his models, though the Negation Angels do get stuck into the Void Archon for a little damage. Andrew scores his zone and the right flag; 2 – 0.  Turn 3: Minions Ouch! I’ve lost a lot and my first thought here is to go for assassination. I upkeep Storm Rager. The Valkyries in the centre have a go at clearing the way for Azazello to get to Aurora but I would need to get extremely lucky to get everything (in fact I’m not at all certain that I even have enough attacks to make it work) and abandon the attempt as it’s clear after just this activation that it isn’t going to work out. Instead, I switch to seeing what else I can do to stay in the game. On the left, JAIMs and the Dhunian Archon clear the Negation Angels off my flag, though due to poor positioning and order of activation issues I need to waste the Void Archon’s activation to just sit on the flag. The Road Hog sets JAIMs and the lead Void Archon on the right ablaze and Boomhowler knocks down JAIMs but can’t get lucky enough to kill the contesting Negation Angel. Crucially, I forget to put Special Orders on Azazello. My Warlock uses Wind Rush to get round the building and walks over to kills Asphyxious (and JAIMs by using Flashing Blade) but it takes all of his Fury to do so, meaning that I can’t use Sprint to get back to safety. We each score the edge flags; 3 – 1 to Andrew.  Turn 3: Convergence of Cyriss Aurora upkeeps Arcane Might and the Hermit puts up Whispers again. The Negation Angels make full use of Arcane Might to Paralyse Azazello and kill him easily without any other models even needing to activate. Minions lose by assassination.  Many thanks to Andrew for being a fun opponent, and sorry to him for not putting up more of a fight here. Andrew made very good use of his mobility to pivot me round that building in the middle and ensure that most of my hitters were stranded away from where I could use them. I need to think of a way to deal with such an army; I’m just not certain how to position against an alpha strike with such a long threat range, Flight and Parry. Any suggestions will be gratefully received. That said, I think it’s easier to learn from a defeat than a victory so hopefully this will help me improve as a player. - Always use one of Boomhowler’s Fell Calls. Repositioning Azazello 3” backward behind the house in my last turn might well have been enough to keep me in the game.
- Also on the subject of Boomhowler, I could have made much better use of him further on the right; his gun is perfect for handling the Hermit in particular since the low POW doesn’t really matter. Critical knock down can be clutch too.
- I’m not really getting good value out of the Primal Archon’s counter charge. Perhaps it is just something where I need to opportunistically take advantage of a positional error from my opponents but in general I find that it is very easily shut down.
|
|
|
|
Post by Azahul on Dec 21, 2020 21:02:18 GMT
Counter Charge in my experience is a rule that gets better the more of it you have in one place. I.e. rather than having the Primal Archons out on flanks, I would be looking to keep them close to the centre to create overlapping fields the opponent has to contend with.
That said, I also cut Primal Archons from my Azazello list, and with the likes of Kogan and Boomhowler3 and Gudrun2 releasing I can't imagine they'll be going back in any time soon even when I'm not playing VoD.
|
|


