midas
Read Page 5

Posts: 24
|
Post by midas on Jan 29, 2019 20:42:38 GMT
lucky me, a Photon is on its way to me thanks to a recent sale  any tips on resin or setup parameters? |
|
|
|
Post by Soul Samurai on Jan 30, 2019 4:57:49 GMT
Honestly, I'm having issues getting successful prints myself. My biggest issue is that I can't get the bed level. I follow the instructions and everything, but it's just never level, as a result things don't stick to the bed towards one side, and can be too close on the other. In order to get successful prints despite this issue I print lots of pieces at the same time, with multiples of each piece. Also I make sure the support beds overlap to create one big raft; this compensates to some extent for the unaligned bed by creating a large level surface to print from. This also mostly solves a problem I was having where small areas of resin would stick to the resin vat and have to be scraped off, scratching the clear film at the bottom of the vat (this happens when something doesn't stick to the bed, so the resin just gets cured stuck to the vat).
Oh, BTW: don't print straight on the bed, the initial layers don't maintain height very well. Always suspend the part using supports.
Surprisingly I've found printing at 0.02mm layers gives me as good or better results than printing at 0.01mm layers, so right now I'm printing at 0.02 with a layer time of 7 seconds.
Rather than try to pull the parts off the bed before curing, I dunk the whole bed in alcohol in a bucket (best I could get was medical alcohol from a pharmacy), swish it around a lot to clean off the excess resin, then put the whole thing out in the sun to finish curing, rotating every few minutes. There can be uncured resin at the bottom of the raft though after this, so be careful when removing it from the bed.
I'm not convinced by the automatic support feature in the bundled software, so I add them manually in said software, then save the supported pieces out as an STL so I never have to add the supports again.
I've read that the inside of a printed part cures slowly over time thanks to "ambient U.V."; I don't know if that's true but I will leave a larger part unprimed for a while to allow it to happen. I'm experimenting with priming parts with Vallejo gloss black primer through an airbrush; the idea being that the black should protect the resin from U.V. in the future, and the gloss should help create a smoother surface. In theory.
|
|
midas
Read Page 5
Posts: 24
|
Post by midas on Jan 30, 2019 19:07:08 GMT
i picked up this trick for smoothing out the parts: have a brush ready and paint the parts you want smooth with uncured resin and let cure, preferably under UV. there are cheap maglite type lamps or get a led light source with a wavelength of around 405nm (some nail polish curing thingies have this, but not all, just check the description).
you could try to make hollow prints with drain holes, so there is less possibly uncured resin on the inside. but i would generally not worry about it.
about the alcohol, look for Propyl alcohol, iso-Propanol, 2-Propanol or n-Propanol, different names for the same chemical. it is usually available in quarts or 5L canisters, which should net you basically a life time supply of that stuff.
about the leveling, my remote-diagnosis-advice would be to check if the screen is actually level in the socket, eventually you will have to adjust it there in addition to the tightening screw on top.
|
|
|
|
Post by Soul Samurai on Jan 30, 2019 20:07:49 GMT
i picked up this trick for smoothing out the parts: have a brush ready and paint the parts you want smooth with uncured resin and let cure, preferably under UV. there are cheap maglite type lamps or get a led light source with a wavelength of around 405nm (some nail polish curing thingies have this, but not all, just check the description). I'm typically finding my prints from the Photon to be smooth enough; a quick light sanding is enough to get rid of most visible layer lines. you could try to make hollow prints with drain holes, so there is less possibly uncured resin on the inside. but i would generally not worry about it. I'll keep that in mind if I try printing anything large. So far I've mostly printed small stuff, but that might change. about the alcohol, look for Propyl alcohol, iso-Propanol, 2-Propanol or n-Propanol, different names for the same chemical. it is usually available in quarts or 5L canisters, which should net you basically a life time supply of that stuff. I have not been able to find any such thing around these parts. The medical alcohol I am using is labelled "95% methylated spirit", and it works, however it does seem to leave a light film on surfaces (it has castor oil in it), which I have to wash off with water. about the leveling, my remote-diagnosis-advice would be to check if the screen is actually level in the socket, eventually you will have to adjust it there in addition to the tightening screw on top. Yeah, I've wondered about that. I've watched videos about disassembling the printer to access the screen though, and it's a bit of an ordeal; one that I can't be bothered with right now. Also, ironically tightening the screen locking screw tends to disrupt the screen position. I've tried to prevent that from happening, but it's hard to tell how successful I'm being, or how much of a contributing factor it is to begin with. |
|
midas
Read Page 5
Posts: 24
|
Post by midas on Feb 5, 2019 0:12:22 GMT
about the alcohol, what you have is ethanol, and it is "denaturated". basically it is high percentage beverage alcohol with a chemical that makes it nonedible. that is the residue you noticed.
i don't know where you live, but i can get a 5L canister of isopropanol from either lab supply internet shops, fire place supply, cleaning supply stores or good ol' ebay.
|
|
|
|
Post by Soul Samurai on May 14, 2019 8:22:35 GMT
It's kind of off-topic, but since this is the first thing I've finished painting this year I felt a need to post it:  This is a belt-buckle I painted for a friend's birthday. |
|
|
|
Post by NoSuchMethod on May 14, 2019 14:46:29 GMT
It's kind of off-topic, but since this is the first thing I've finished painting this year I felt a need to post it I have only two questions for you:
(awesome work, is what I'm saying)
|
|
|
|
Post by Soul Samurai on May 14, 2019 16:40:23 GMT
I have only two questions for you: (awesome work, is what I'm saying)
- Yes
- Sure, if you'll pay for the plane ticket...
Seriously though, thank you! |
|
|
|
Post by Soul Samurai on Mar 20, 2020 7:34:34 GMT
Figured I might as well post this:
Sculpted bases for my Undercity freebooters. The bases they come on are a couple of millimeters undersized, but really I just wanted them to match my "privateer" basing scheme of wooden planks. Also I magnetise my bases for transport so moving these two to magnetised bases allows me to actually play them. Which I might just do at some point in the near future... hopefully.
Other than these guys, most of my "recent" progress has been painting (which I've posted elsewhere), and simple non-conversion assembly of non-PP models. Mainly Infinity stuff, but I did just assemble some of Prodos' discontinued Xenomorphs; I actually liked them so much that I immediately ordered some more. I'll post photos here if anyone is interested, but again it was just simple assembly and I've mainly been using this thread for models with at least some degree of conversion work.
|
|
|
|
Post by Soul Samurai on Apr 19, 2020 10:09:55 GMT
I haven't actually been doing much conversion for some time; mainly focussing on basic assembly and painting (when I actually find time; been super busy recently). But I decided that I wanted this guy assembled, and I didn't really like his weapons, so I took them off and magnetised him instead: 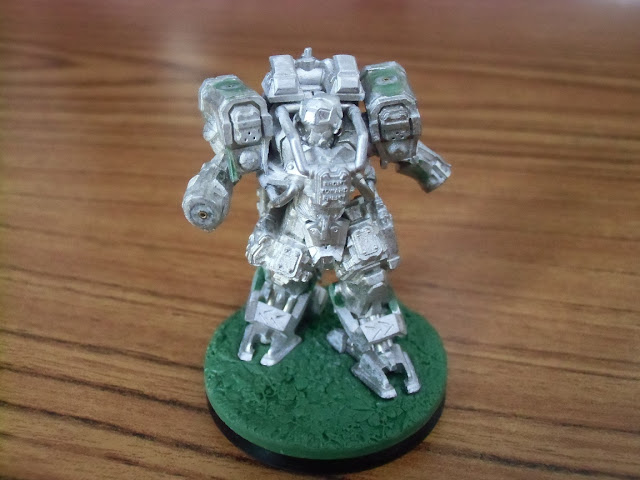 He's an Ariadna Blackjack; the original model has weapons in both hands and a sort of turret-mounted sniper rifle on his shoulder: 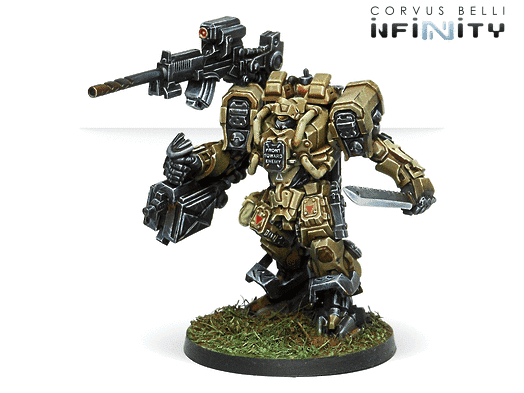 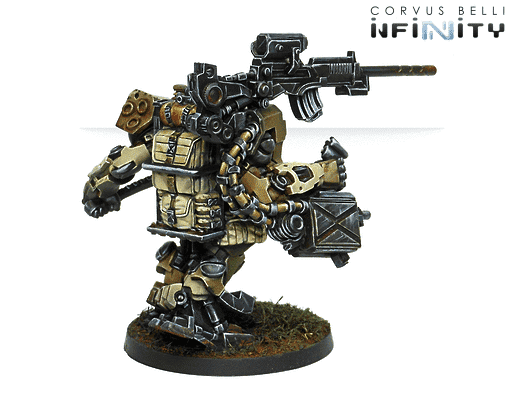 So I cut the hands and turret off and installed magnets in the wrists and on the shoulders. Some missing or damaged details had to be resulpted: 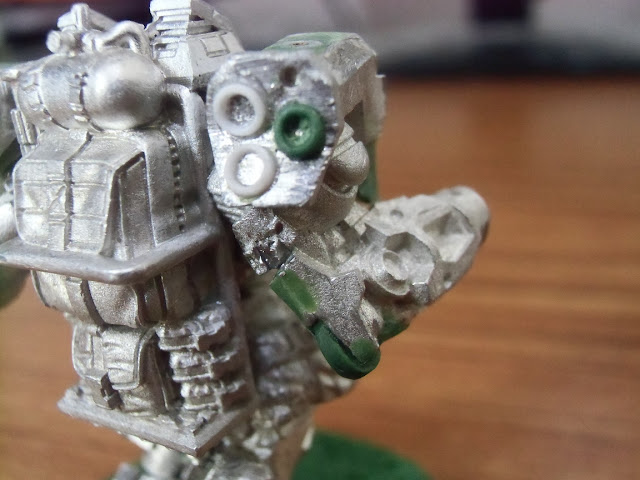 He's not quite done yet as there's a bit of cleanup needed and I still haven't sorted out his new hands, but I felt like posting photos anyway. |
|
|
|
Post by Soul Samurai on Feb 16, 2021 16:11:28 GMT
Finally finished (almost) a Butcher proxy:  Comparison to the original model:  Looking at the photo I realised that the model could use a bit more cleanup and smoothing though. |
|
snoozer
Junior Strategist

Posts: 467 
|
Post by snoozer on Feb 17, 2021 11:28:13 GMT
Very very cool! where did you take the main Mini from? How did you make the ice? How will you save the ice from primer? |
|
|
|
Post by Soul Samurai on Feb 17, 2021 15:14:31 GMT
|
|
|
|
Post by nyarlathotep333 on Feb 24, 2021 17:35:33 GMT
Groundwerks is good stuff, I've used a few of their products myself. I'm going to have to look at getting a few of those bases you used there though, they'd be pretty cool for my Legion stuff.
Also, I'll add my comment for a really cool conversion - that's pretty slick for sure. Are you going to add any armor or leave him as is? Also, love your greenstuff work - I wish I could sculpt like that! I'm getting better, but nowhere near the level of your stuff Soul. Great work!
|
|
|
|
Post by marxlives on Feb 24, 2021 21:10:23 GMT
Finally finished (almost) a Butcher proxy: Comparison to the original model: Looking at the photo I realised that the model could use a bit more cleanup and smoothing though. Very cool though I love your rendition. All alpha. |
|