|
|
Post by thebuoyancyofwater on Apr 5, 2017 11:49:20 GMT
Hi folks,
Have finally got round to creating a thread to write up all my battle reports. Hope you enjoy!
Game 1: April Fuel Daze Report
Game 2: Irusk2 vs Denny1
Game 3: Irusk1 vs Caine3
Game 4: Zerkova1 vs Fyanaa2
Game 5: Strakhov2 vs Maddox
Game 6: Strakhov2 vs Magnus2
Game 7: Strakhov2 vs Axis
Game 8: Irusk2 vs Kaelyssa
Game 9: Strakhov2 vs Haley1
Game 10: Strakhov2 vs Nemo3
Game 11: Strakhov2 vs Kruger2
Game 12: Strakhov2 vs Kaya3
Game 13: Irusk2 vs Stryker2
Game 14: Irusk2 vs Makeda2
Game 15: Old Witch1 vs Gaspy2
Game 16: Strakhov1 vs The Heretic
Game 17: Strakhov2 vs The Heretic
Game 18: Strakhov2 vs The Dreamer
Game 19: Strakhov2 vs Zaal1
Game 20: Karchev vs Kolgrimma
Game 21: Karchev vs High Reclaimer
Game 22: Butcher2 vs Makeda3
Game 23: Butcher2 vs Horgle2
Game 24: Vlad2 vs Jarl
Game 25: Old Witch1 vs Ragnor
Game 26: Strakhov2 vs The Wanderer
Thanks for reading!
Cheers,
Dave
|
|
|
|
Post by thebuoyancyofwater on Apr 5, 2017 11:50:37 GMT
April Fuel Daze Tournament Report
One of our PG's decided that we should have two 2-day events a year (Scottish Masters being the other) and so we had our first April Fuel Daze on the 1st and 2nd of April. The format was six groups of four play the other three in their group on day one, then on day two the winners play a six man SR, as does the second places and so on. Lists were all submitted before anyone knew which group they were in and I went with the following two lists:
Winter Guard Kommand
Butcher3
-Argus
-Argus
-Juggernaut
-Kodiak
-Kodiak
-Ruin
Gun Carriage
Kovnik Joe
WG Field Gun
WG Field Gun
WG Infantry (Min)
-WG Officer & Standard
-3 x WG Rocketeer
WG Mortar
Effigy of Valor
Winter Guard Kommand
Karchev
-Destroyer
-Devastator
-Devastator
-Juggernaut
-Juggernaut
-Kodiak
-Kodiak
Battle Mechaniks (Min)
WG Mortar
WG Mortar
Armory
Sadly lists were submitted just before the new themes dropped, so there was no chance to play them. Sadly, one person had to drop from my group, leaving me with a group of three for day one, with opponents fielding Cryx and Khador.
Game 1: Butcher3 vs Mortenebra, Incursion
After a bye in the first round I was up against Cryx with Mortenebra and Denny3. I went for Butcher3 and ended up against Mortenebra running something like:
Morenebra
-Deathjack
-Deathripper
-Deathripper
-Scavenger
-Stalker
-Stalker
-Another Heavy
2 x Pistol Wraith
Machine Wraith
2 x War Witch Siren
Repair Thrall
The main piece of terrain for this game was a forest surrounding the central flag. I lose the roll and my opponent chooses sides. That's fine for me since I want to go first with Butcher3 in Winter Guard Kommand. I deployed the gun carriage on my right flank with a mortar and field gun just inside of that. Butcher and his jacks took up the center with a kodiak on either side, then Ruin and the juggernaut inwards and Butcher in the middle. The winter guard infantry followed behind and the other field gun was on my left. Cryx skewed hard to my left with almost everything, though the heavy, a deathripper and a war witch siren were pretty central. Deathjack ADed on my left and I advance moved my jacks forwards.
Turn 1:
My jacks run up the board, though stay out of Deathjacks melee threat. I Energizer up and put Silence of Death on Ruin before he charges up the board too. Gun carriage runs up my right flank and the infantry and artillery all run up too, the infantry getting tough from Joe.
Everything runs up the board as expected! A light jack goes right up to the flag on my left and the Deathjack receives an armour buff.
Turn 2:
Upkeep Silence of Death and allocate out a couple to the kodiak on my left. It goes into the lead chicken, killing it and contesting that flag. The gun carriage tramples up, puts out some gun shots before repositioning to the right flag. The more central kodiak runs to the central flag and the juggernaut and Ruin move left to threaten a counter attack. Butcher and the winter guard stay safe.
Deathjack goes into the kodiak and kills it with a little help from the heavy before the scavenger runs to control the flag. Support solos make a general nuisance of themselves and the remaining bone chicken runs over to my right, but doesn't manage to contest. Nothing contests the middle either.
Khador: 2 Cryx: 1
Turn 3:
Through Energizer and the bond I can get both Ruin and the juggernaut into the Deathjack and scavenger on my right. Ruin removes the armour upkeep from Deathjack, then kills the scavenger and heavy thanks to Silence of Death. Butcher recasts that onto the juggernaut, then feats to cast Energizer before moving to my right away from two flanking stalkers. The remaining kodiak charges the chicken on my left, getting into its back arc and managing to kill it before the juggernaut goes in and kills the Deathjack. The gun carriage kills the central war witch siren before repositioning back to the flag.
Khador: 3 Cryx: 1
The remaining lights and solos try to stick some damage on Ruin and the juggernaut, doing about half to both of them.
Khador: 4 Cryx: 1
Turn 4:
I clear out the left flag to control it.
Khador: 5 Cryx: 1
Victory to Khador!
Pleased with how that went overall. My opponent didn't put enough on my right flank, which let the gun carriage and a kodiak bully that area and control the flag a little too easily. The jack rumble on the left was a lot of fun! Dispel and Silence of Death really swung that in my favour though.
Game 1: Butcher3 vs Zerkova1, Close Quarters
Time for the Khador-off! Normally I would like Karchev into Khador, but seeing Irusk2 and Zerkova1 with doom reaver spam I figured the only choice was Butcher3. I was against:
Zerkova1
-Juggernaut
-Ruin
Fenris
5 x Doom Reaver Swordsmen
I lose the roll again, but my opponent chooses sides to get the one with the wall in a nice spot to prevent drags, giving me first turn again. The gun carriage deploys on my left and the battlegroup is fairly central, slightly leaning towards my right to guide Butcher to his flag. Kodiaks again take the outside of this set up. Infantry follow behind in the middle, there's a field gun on my left and both the other artillery pieces on my right. My opponent puts Zerkova and her jacks central ready to get up behind the wall and Fenris on my left flank to counteract the gun carriage rough terrain. The doom reavers advance deploy right across his front and I advance move my jacks forwards.
Turn 1:
Silence of Death goes on Butcher and he Energizers then charges up the board. The kodiaks lead the way, running up to just outside doom reaver threat range. Ruin moves up behind on my left and the juggernaut runs up on my right. The gun carriage tramples up and sticks down some rough terrain (also killing a doom reaver with blast) before repositioning. Infantry run forwards in the middle with tough and the artillery run up.
Doom reavers run up! Some engage the lead kodiaks on either flank while the rest spread out behind. Zerkova and her battlegroup get up behind the central wall and Fenris stays out on my left flank. Zerkova puts up four clouds, blocking line of sight to various models on both flanks.
Turn 2:
I upkeep Silence of Death and allocate out some focus. The kodiaks both vent steam and trample to take out several doom reavers each. The juggernaut also tramples over a couple and the artillery kills or knocks down several more. Ruin charges into a couple blocking the gun carriage before Butcher casts Energize to move him out the way and reposition the other heavies. The gun carriage then charges into the doom reavers, impacting through a couple and blowing up others point blank with its cannons before repositioning over to my left, getting between one of the only remaining reavers on my left and Ruin.
Both jacks get loaded up with focus and go to work on the kodiak on my left and juggernaut on my right. Both are killed with a little help from doom reavers. Fenris and the last doom reaver on my left attack the gun carriage, halving its boxes. Otherwise on my right doom reavers put solid damage onto the kodiak and generally contest. A single doom reaver has a line to charge Butcher, but he cancels the damage.
Turn 3:
Vengeance kills the doom reaver next to Butcher and Silence of Death upkept and Butcher keeps his focus. Ruin before Butcher moves to my flag, drags the juggernaut to him and kills it before feating back to full focus. The kodiak continues to trample and vent steam around the place, killing more reavers or at least making them tough. A field gun knocks Ruin down and some rockets stick some damage into him before my Ruin converts some souls into focus and charges in, not quite killing his doppelganger but removing it's mace and cortex before killing a nearby reaver to get a soul. The gun carriage goes mad and kills Fenris and the last doom reaver.
Khador: 1 Khador (Impostor): 0
Nothing can get to my flag to contest, but hero Ruin and the gun carriage are killed.
Khador: 2 Khador (Evil Twin): 0
Turns 4 onward:
There's a couple more turns, but basically nothing can stop me scoring my flag and I have the guns available to clear out evil Ruin and the remaining doom reavers before they can do much.
Khador: 5 Khador (with Cygnar cousins): 0
Victory to Khador!
I was initially worried that the doom reavers would be able to swamp me and force Butcher to get too involved, but in the end the army proved it can handle a fair amount of advance deploy weaonmaster infantry quite nicely!
With that, I'm into group one for day two.
Game 3: Karchev vs Kreoss3, Entrenched
I previously tried Karchev into Menoth and it worked ok, so decided to give it another go against the following.
Kreoss3
-Vassal
-Light that shoots 3 rockets
-Light that shoots 3 rockets
-Melee light
Wrack
Choir (Min)
Flamebringers (Max)
Rhoven and Co.
Vengers (Max)
Vengers (Max)
There might be some other stuff missing..?
I lose the roll and get handed second. Opponent deploys Kreoss centrally and his jacks ready to move towards my zone. There's a unit of vengers on each flank and the flamebringers are to my left. I deploy a devastator ready to go to each zone and a mortar on each flank. The remaining jacks and Karchev are all central with mechaniks behind. I advance move the two devastators.
Turn 1:
Assail goes on the light melee, Ignite on the vengers to my left and Arcane Ward on the flamebringers before Kreoss makes his way up field. Everything largely runs.
I run full speed with the devastators, following with most other jacks. The destroyer boosts a shot into a flamebringer that got too close, killing it before a mortar scatters about and does two damage to a venger on my left as well. Karchev casts Battle-Charged and tramples up the board.
Turn 2:
Upkeeps stay up. My opponent spends a very long time trying to decide what to do and eventually goes for mostly backing off, except the ranged lights to get battle and full focus and start firing into a juggernaut on my right. One shot scatters and lands on the right mortar, killing it. The vengers on my right run up, staying out of threat and one of the toeing my zone behind a house where I can't really reach it. I kodiak is Force Hammered back as well, catching Karchev but not doing any damage.
At this point I have 52 minutes to approximately 30 on my opponents clock. So I take a pretty quick turn to put the pressure back to my opponent. I upkeep Battle-Charged and position Karchev behind a forest in safety. The devastators both run, getting well into each zone while the other jacks follow. The destroyer tries to shoot a flamebringer, but misses I think. Same with the mortar. Mechaniks repair some damage to the juggernaut that got shot before it advances up the field.
Turn 3:
Upkeeps stay up. Seeing the time issue, things get a bit quicker. Kreoss takes some focus from the wrack, which explodes and kills a venger (don't worry, instant karma incoming for me) before Force Hammering a kodiak. The loaded up ranged lights finish the juggernaut and the melee light does some damage to a kodiak. The cavalry charge in where they can and put some damage on the jacks. He's unlucky and leaves a kodiak on my left on three boxes, so tries to charge past the devastator with one of Rhoven's guards. With minimal attacks left I freestrike to kill it before the other guard charge the now open devastator for a bit of damage. Something kills my objective.
Khador: 0 Protectorate: 1
Battle-Charged is upkept and some focus is allocated. The devastators aim to stay shut and simply slam/headbutt this turn. The barely alive kodiak boosts a vent steam to kill a venger then moves up and attacks another in melee, killing it with the good arm. The destroyer boosts a shot on a flanking flamebringer, misses and scatters perfectly onto the remaining mortar, killing it and re-balancing the wrack. The juggernaut on my left moves over to kill another flamebringer and the second kodiak kills the melee light. Karchev stays safe behind his forest. A jack kills his objective at some point.
Khador: 1 Protectorate: 1
Turn 4:
Time is really short now. I believe upkeeps stay up and vengers finish off a devastator out of spite before time runs out.
Victory to Khador!
My opponent spent much too long on their turn two and that's not the first time I've seen it happen when playing Karchev and sticking up Battle-Charged. Kreoss could have moved up and feated to remove it for a turn and when talking it through afterwards we thought that would be the better turn two. Come forward and feat to drop Battle-Charged, then charge in and do as much damage as possible with the cavalry. Only issue is keeping the momentum to continue doing decent damage each round.
Game 4: Butcher3 vs Doomie3, Recon
A current thorn in my side in my meta. Doomie3 is really strong and after a test game last week my Karchev build really doesn't like it, so I drop Butcher3 instead. Sadly the scenario doesn't even necessitate spreading out the beasts.
Doomie3
-Axer
-Bomber
-Bouncer
-Mauler
-Mauler
-Mulg
Shaman
Shamn
Whelps
Stone (Max)
-UA
Fuel Cache
I lost the roll, so got second. Opponent deploys his battlegroup centrally with Doomie slightly to my right. The axer is also on that flank. Two whelps start on the table and the rest wait for later. I deploy with Ruin opposite Mulg and the other jacks slightly to my left. Infantry follows behind Butcher in the middle and artillery is spread around. The gun carriage is on my right flank.
Turn 1:
Stuff runs forward! Admonition is on Mulg unsurprisingly. Fury gets dropped into the stone.
I stick Silence of Death on Butcher and everything runs up, staying out of melee threat range. The gun carriage runs further round on my right to a flanking position. I put the juggernaut within ten of his objective to force something to stop me getting a scenario lead.
Turn 2:
Admonition gets dropped. Doomie feats this turn and puts Admonition on a mauler before getting his beasts in position in the zone. The bomber puts some damage on a kodiak. Doomie also casts Implacability and uses his Arcane Suppression scroll, catching Butcher.
I hate this feat so much. Silence of Death stays up and I keep everything else. The first kodiak walks up to the mauler, which Admonitions away, still blocking the juggernaut. The second kodiak then walks up and throws the mauler into Mulg for some damage. Ruin follows closely behind and Butcher casts Energizer to move stuff a little. The juggernaut charges the objective and leaves it on one box. I'm not sure why the mortar didn't shoot it... Winter guard and field guns take pot shots at any whelps or anything they can see and the gun carriage manages to tag a random stone member.
Turn 3:
Admonition goes up on Mulg and Implacability is cast again. The beasts do all out, killing the juggernaut, a kodiak and Ruin, plus about half boxes on the other kodiak. Mulg is able to then cast Arcane Suppression while within ten of Butcher. Support moves about. My objective is also casually one-shotted by Mulg.
Khador: 0 Trollbloods: 1
I upkeep Silence of Death for two focus again. The gun carriage runs to limit Admonition moves, so Mulg uses it to get back within the stone aura. The winter guard move, but one of them is in an awkward spot. They ping some damage around. The mortar kills the objective and the field gun do a little damage I think. The kodiak fails at hurting much at all. Butcher then charges Mulg, killing him with one focus left. Because of the winter guard in the way he can't then start killing the mauler, so uses that focus to kill a whelp before feating and Energizing to reach the mauler. He then fails to kill it after using all his focus.
Khador: 1 Trollbloods: 1
Turn 4:
Butcher is stood in front of a mauler who regens to fully operational thanks to the field marshal before killing Butcher easily.
Victory to Trollbloods
Bit disappointed with how that finished! Doomie3 is a real problem for me right now, though I'm hopeful the Legion of Steel will finally help me deal with it. So far every time I've tried to play against it has been a pretty miserable battle unfortunately. Butcher rolled terribly against Mulg and the mauler, he should really have been camping a little at least. However that winter guard model was right in my way, so poor positioning on my part there.
And since I was the pair down that was it! Overall I came 5th and got best in Khador, which was great! It was a really good event and I thought the format used was really cool. It seemed to keep everyone really interested on both days since. I definitely recommend folk try it.
On my lists, Karchev is certainly done in this set up. I think Jaws of the Wolf looks great for him and I've been playing about with a couple ideas. I still really like my Butcher3 list, so will leave it as is and see how it fits in with my other lists once I have a better idea of what they are.
Thanks for reading!
Cheers,
Dave
|
|
zeffid
Junior Strategist

Posts: 163 
|
Post by zeffid on Apr 5, 2017 13:12:57 GMT
Thanks for the report. Congrats on your nice performance!
Some photos are always welcome to better understand the game.
|
|
|
|
Post by thebuoyancyofwater on Apr 5, 2017 13:27:14 GMT
Yep there'll be photos for future ones  Except tonight's game, that will be on Vassal... Cheers, Dave |
|
Growl
Junior Strategist
Posts: 496
|
Post by Growl on Apr 5, 2017 14:51:32 GMT
Great job and nice write ups! I always feel that I get a lot out of your reports. I'll be back for more! As an observation, it's interesting how in your match against Doomie3, that it sounds like you were already unhappy with that opponent. Then from your write up, that you made at least 2 mistakes; not finishing off the enemy objective and then the awkward placement of a WG model. The reason why this stands out to me is because I know there are certain matches that I don't like as well, or certain players that I feel I am disadvantaged against and I always seem to make some weird error that impacts the game in their favor. Perhaps I am reading into too much, or making too many assumptions based on your reports, but in any event my observation holds true for me.
|
|
|
|
Post by thebuoyancyofwater on Apr 5, 2017 15:02:03 GMT
I'm actually good friends with the player, just his Doomie3 list infuriates me no end! And yeah I feel I could say "well dice happened" with Butcher attacking beasts, but I think there were some bits to learn instead. Most notably blocking Butchers landing spot with my own winter guard model and not allocating to the juggernaut to be sure he got the job done on the objective.
I think I have a solution for it, so might get to test it at some point in the not too distant future.
Cheers,
Dave
|
|
|
|
Post by thebuoyancyofwater on Apr 6, 2017 11:43:52 GMT
Irusk2 vs Denny1, Extraction
So since Khador's new theme forces dropped I've been kicking some ideas around. One of them is Irusk2 running Jaws of the Wolf. The list seemed very strong on paper and I recently got a chance to try it out. I'll start with the report, then right a little about the list itself at the end. Unfortunately there's no photos since the game was on Vassal.
Jaws of the Wolf
Supreme Kommandant Irusk +27
-Behemoth -25
-Juggernaut -12
-Juggernaut -12
Greylord Forge Seer -0
-Destroyer -14
Manhunter -0
Widowmaker Marksman -4
Battle Mechaniks (Min) -3
Kayazy Assassins (Max) -15
-Underboss -4
Kayazy Eliminators -5
Widowmaker Scouts -8
Arcane Wonder
Ghost Fleet
Denny1
-Bone Chicken
-Bone Chicken
-Leviathan
Captain Redgrave
Dead Caine
Pistol Wraith
Pistol Wraith
Revenant Cannon
Revenant Cannon
Revenant Crew (Max)
-2 x Rifleman
Revenant Crew (Max)
-2 x Rifleman
Revenant Crew (Max)
-2 x Rifleman
Bunker
Terrain had a hill right in the middle of the table with a patch of rough terrain that also provided concealment on the left and right of it. There was an obstruction and forest on my left flank and an obstruction on my right flank with a similar set up mirrored on my opponent's side. A little bit too symmetrical maybe, but there were variations in size and exact locations of terrain at least. Despite my opponent's +1 to the starting roll I win and choose to go first. There's also no enemy advance deploy, so the two theme lists are really strutting their stuff so far!
Deployment
Having won the roll I pick first turn. I deploy the destroyer left of center with a juggernaut on it's right. The forge seer deploys next to the juggernaut with Irusk on his right and Behemoth right of him. The assassins deploy next in the line and the other juggernaut is on their right. Eliminators and mechaniks follow the main center of the army. My opponent deploys Denny towards my right flank with a chicken and the other chicken and leviathan quite central. All three pistol wraiths deploy on my right flank away from the destroyer. The first pirate crew are central with cannon on either flank, then there's a crew on my left flank and another following these two, slightly towards my left flank. I advance deploy the manhunter centrally and the widowmakers and marksman off to my left flank, though close enough to get tough from Irusk after initial moves.
Turn 1:
I start with the advance deploy stuff running to get out the way. The manhunter makes a move towards the left and the widowmakers take up a more central position looking to use the central hill next turn. The marksman is nearby. Both juggernauts run forward before Irusk activates, cast Fire For Effect on the destroyer, Solid Ground on himself and Energize to move his jacks forward. He then advances up further. The destroyer runs, as does Behemoth, and the forge seer follows, keeping both well within his CMD range. The eliminators run up centrally, the assassins run up and the mechaniks follow everyone.
The Cryx turn is largely spent running forward to get into position, though things are careful to stay more than eighteen from the destroyer (staying over twenty from Behemoth isn't realistic). I don't think any upkeeps go out.
Turn 2:
I upkeep both spells and Irusk keeps the rest. The destroyer advances forwards and shoots, but the AoE scatters. The forge seer uses Empower on Behemoth. The widowmakers and marksman spend the turn targeting the cannon crews since the other pirates will just come back. I leave the first cannon alive after a miss and the second loses a crew member as well. Behemoth advances slightly and sticks out two AoEs, finishing the cannon on my right and killing a couple other models with scatters. The manhunter stays near the flag on the left and the juggernauts run up, staying out of major threat ranges. Assassins run up again, though not their full distance. Irusk puts and Artifice on three of the widowmakers and advances into the killbox, also casting Energizer and sitting on one focus next to the Arcane Wonder (which also covers Behemoth, the destroyer, the forge seer and some random infantry). The eliminators run up centrally, one in the Artifice and the other back a bit.
My opponent can't do much else other than advance forwards and take some pot shots. He uses Ghost Walk on the pirates flanking on my left to let them walk through one of the obstacles and otherwise the pirates advance up into better positions. They can't hit the widowmakers due to elevation or Artifice and can't get close enough to the stealth models. The pistol wraiths continue flanking though, becoming a potential problem on my right.
Turn 3:
I upkeep Fire Fore Effect and Solid Ground and drop Artifice of Deviation. The destroyer uses Take Aim and kills about five pirates. The forge seer Empowers Behemoth again and Behemoth shoots, finishing the second cannon plus multitudes of dudes. Widowmakers reposition slightly before adding to the kills by sniping out individuals here and there that survived the bombards. The manhunter and eliminators go in and kill a couple more each. The left juggernaut runs to claim the flag. Before I run the other I spot it has the range to reach a bone chicken, so Irusk goes first, Energizes, advances and sticks a new Artifice over him, a couple mechaniks and the destroyer. That puts the juggernaut in range to charge the bone chicken and after the axe attack hits and takes out movement it's easy for the fist attack to finish it off. Assassins are somewhat hemmed in my rough terrain, so position on my side of it ready for a later feat to let them through.
Khador: 1 Cryx: 0
Denny allocates two extra focus to the leviathan. The three units all gain some models back first of all. The remaining bone chicken runs up near the juggernaut on my left. Denny activates, advances a little, feats and casts Parasite through the arc node into the left juggernaut. A pistol wraith makes the juggernaut on the right stationary and it's outside control after charging the chicken, so it's out for a turn. The other pistol wraith runs to contest the right flag and Dead Caine runs round behind an obstruction on my right. The leviathan and pirates on my left start shooting and kill the juggernaut there while the central pirates get unlucky and can't hit the eliminators (still DEF15 against melee).
Turn 4:
Fire Fore Effect, Solid Ground and Artifice are all upkept and Irusk keeps four focus. The destroyer uses Take Aim to obliterate the incorporeal pistol wraith on the right flag. The forge seer Empowers Behemoth, who shoots both guns to take out a bundle of infantry (things are getting cramped) and the pistol wraith that shot the juggernaut. The eliminators walk about and kill a guy, hampered by Denny's feat. The manhunter advances into melee and kills a rifleman, again hurt by the feat. Irusk walks further into the Artifice after the mechaniks get out his way before feating. The assassins are partly affected by Denny's feat, so they reposition to stop Dead Caine getting too far round the flank and a couple get past the rough terrain thanks to my feat, ready for next turn. Widowmakers and the marksman all aim and take out individuals where they can, being sure to leave a couple from each unit in Irusk's control area.
With everything except Dead Caine and the leviathan affected by my feat and Denny's now spent with three Khador heavies romping about my opponent concedes. A fair bit of infantry comes back, but they're struggling with the high DEF and continuous bombards coming their way, plus I'm now in a good position to get the assassins stuck in next turn.
Victory to Khador!
Well, the list put in a solid performance and I got to test almost every aspect I had thought about when putting the list together. Was nice to see some theory work well on the table! A general summary of what I was looking for is below followed by a couple thoughts on each model.
The ranged platform of the marshaled destroyer with Fire For Effect plus Behemoth getting Empower from the forge seer was really impressive. Backed up by the widowmakers for spot removal after the smoke cleared it worked very well as a source of long range pressure for my opponent. There was then a bit of a link between having light infantry that's blast immune allowing these AoEs to continue even after the eliminators and manhunter had engaged.
Speaking of which, the light infantry allowed in the Jaws of the Wolf theme is supported really well by Irusk2. In fact the only thing lacking was some non-feat pathfinder for the assassins. I might switch the list up a little by minimizing that unit and putting Yuri in. Maybe, I'm not sure, so will test again as is to see if it remains a problem. But generally he makes them blast immune and immune to knockdown plus has a damage buff, a defense buff and a tough bubble.
Energizer meant Irusk have a solid speed buff for his jacks, which was really nice (let the juggernaut reach the arc node). Plus having the forge seer around meant I felt he had enough focus to get stuff done every turn while keeping a couple for himself. The list didn't feel focus starved when running four heavies and casting spells.
The thing I didn't get to try was the scenario play. Between removing advance deploy, a SPD penalty feat, a SPD buff for his jacks, rough terrain generation and quite a few advance deploy/fast models I think the list has a solid scenario game available.
Jaws of the Wolf
Seems to be a really cool theme, though I didn't get to use every aspect. I really like the contrast between the light infantry and the heavy warjacks and the theme fluff reasons this very well to me. Overall, I think PP did a great job on all three theme forces for Khador! There's compelling reasons to play all of them, but also reasons to play out of theme (Ruin with Strakhov2 for example).
Supreme Kommandant Irusk
I took me a while, but after a couple of reads of Jaws of the Wolf Irusk2 clicked for me as a caster to make it shine, and I think he did from this first outing. He not only supports the light infantry excellently, but also has a mass speed buff for his jacks plus a speed penalty feat to add to the loss of advance deploy. Haven't played him in a while and certainly not in a list similar to this, but I will be playing this for a while I'm pretty sure.
Behemoth
Never once received focus from Irusk, never needed it. It was very much the artillery piece in this game, but it's such a powerful late game threat. Energizer is great for either letting it aim or simply increasing the range of the guns. Still seems fine at 25pts, though the theme effectively makes it 21pts I guess.
Juggernaut
Nice trading pieces and with Energizer they quickly became part of the front line. I'm considering switching one or both to kodiaks depending on what happens with the assassins, but I might loose too much hitting power.
Greylord Forge Seer
Very solid and I was pleased with how it worked as a jack marshal. Empower is fantastic for making Behemoth brutal at range without any focus from the caster. The field marshal seems great in Khador and I think it helps out a lot of lists.
Destroyer
Was a great jack to marshal to the forge seer! I can see it being less great without spells like Fire For Effect, but that was just excellent. Especially when Take Aim got involved. Missing out on Energizer was well worth it for the buffs it got.
Manhunter
Surprisingly solid! Being free is nice of course. Having a stealth model that can hang around outside Irusk's command but within his control range was a nice little extension on that interaction.
Widowmaker Marksman
A great shooter who could pass out swift hunter easily and was easier to position due to Solid Ground. He could generally hang about near the jacks and not worry about explosions.
Battle Mechaniks
Didn't get up to much this game, but I always want them with Behemoth around due to the vulnerable sub cortex. Reposition is nice, but probably not so handy here when they have blast immunity anyway.
Kayazy Assassins
Got a bit stuck due to terrain, though I like having that full unit hanging around for the late game. A big unit is also very good for Battle Lust, and it'll be painful if they ever get that and backstab against anything!
Kayazy Eliminators
Great with Irusk2! Acted as first wave harassers that were very difficult to remove. Also great Battle Lust targets at times.
Widowmaker Scouts
They could sit in the middle of the board due to Irusk's defensive tech and were ideal for removing the occasional model that survived the AoEs.
Thanks for reading!
Cheers,
Dave
|
|
|
|
Post by thebuoyancyofwater on Apr 10, 2017 12:03:34 GMT
Irusk1 vs Caine3, OutlastFinally time for a report with photos! And what better than two painted armies to boot! I was keen to try out Legion of Steel and got to drop it into some filthy swans. I'm not 100% sure that's the correct scenario name, feel free to correct if that doesn't look right. Onto the lists: Legion of SteelIrusk1 +27 -Conquest -37 Iron Fang Kovnik -0 Iron Fang Kovnik -0 Ulhan Kovnik Markov -7 Black Dragon Pikemen (Max) -17 -Black Dragon Officer & Standard -0 Great Bears -9 Iron Fang Pikemen (Max) -15 -Iron Fang Officer & Standard -4 Iron Fang Ulhans (Min) -12 Caine3 & Buddies -Ace -Grenadier -Grenadier -Stormwall Trencher Master Gunner Trencher Master Gunner Lady Aiyana & Mater Holt -Trencher Attachment Guy Trencher Cannon I win the roll to go first so take it. Terrain and everything can be seen in the deployment photos below. Sorry, some are a bit blurry. 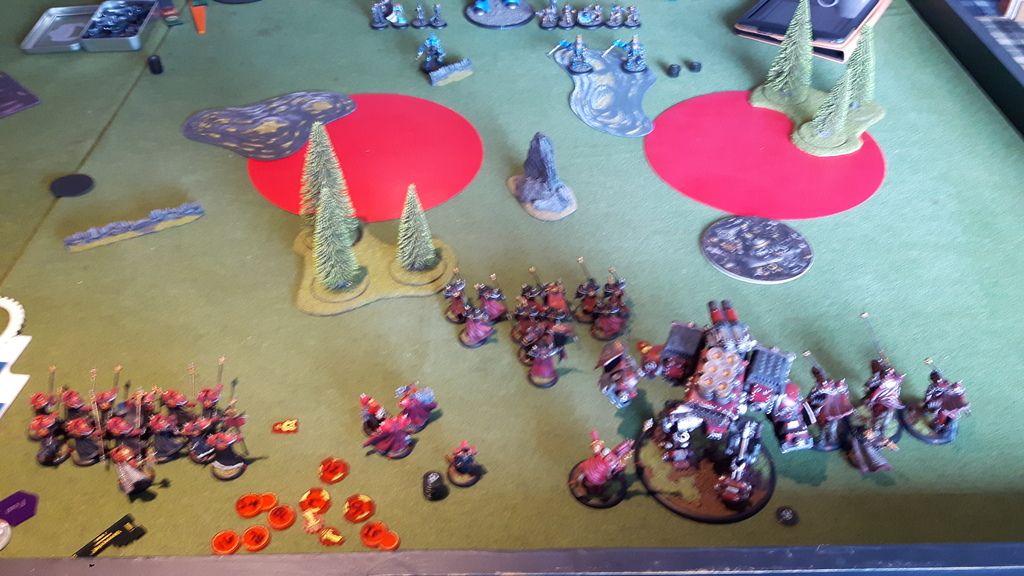 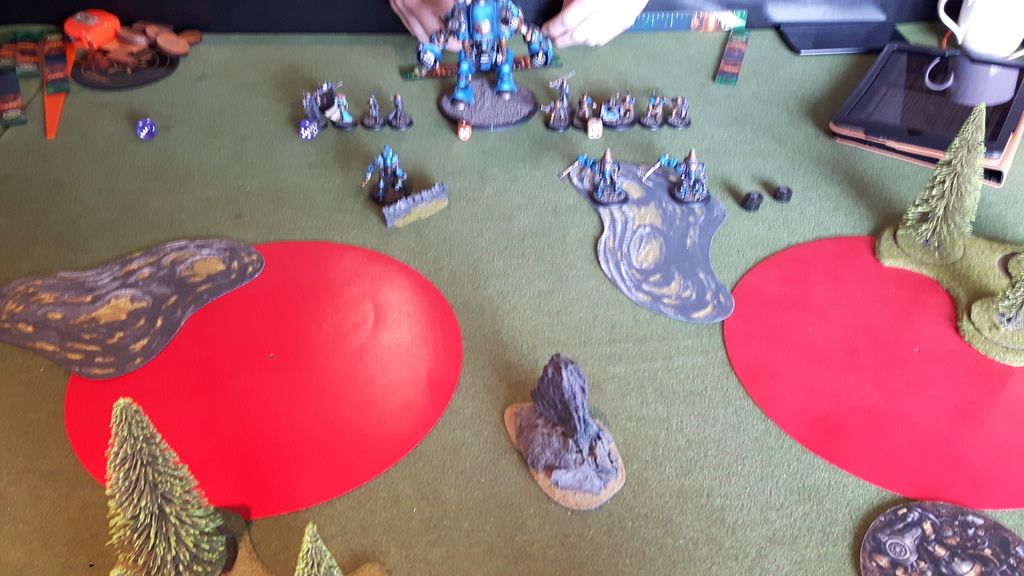 Turn 1: Turn 1:Nothing gets allocated out. The normal iron fangs run round the forest on the left flank, followed by a kovnik sneaking in among them. Irusk gives Special Orders to the black dragons, sticks Iron Flesh on them and Superiority on the conquest before advancing up behind the forest slightly towards my left. The black dragons shield wall up the board, using Iron Zeal as well. Conquest runs up to start bullying the right zone. Ulhans flank on my right. Markov, the other kovnik and the Great Bears run up centrally. 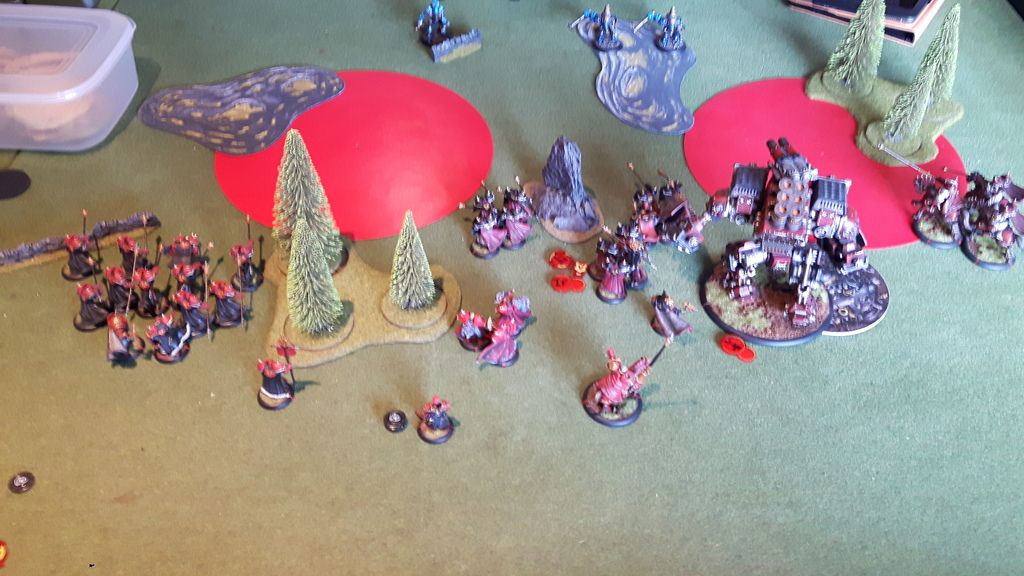 Cygnar advances up fairly slowly. The trencher models all group up, dug in and on the hill. Some long range shooting goes into the black dragons and a couple die. Stormwall puts down some covering fire templates. 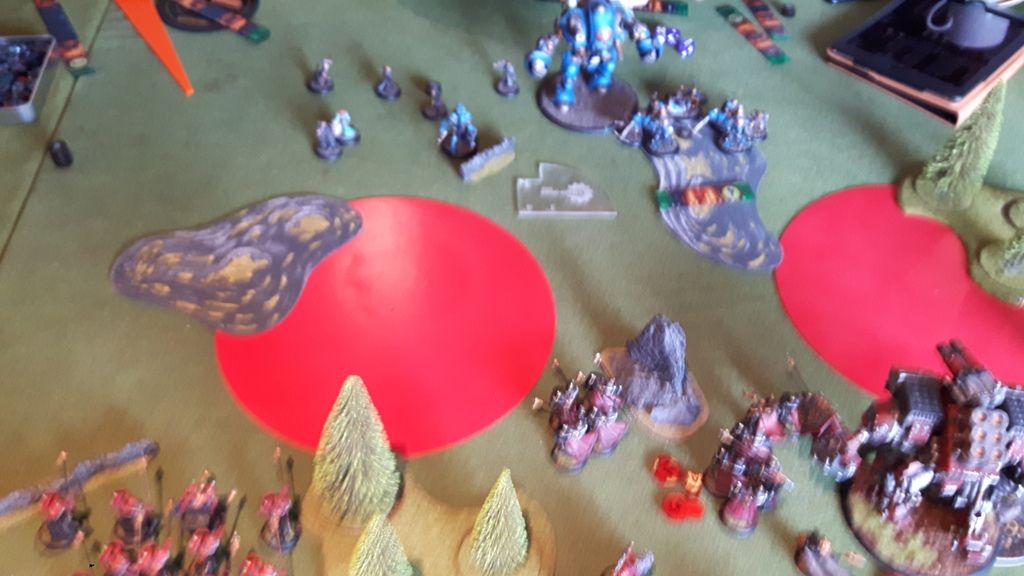 Turn 2: Turn 2:Both spells are upkept and nothing is handed out. The black dragons again get Special Orders and Irusk feats from behind the forest. The regular iron fangs advance and use their mini-feat, all but two of them staying in control range of Irusk (I didn't realize the feat had changed from MKII). The black dragons also advance up in shield wall, repositioning forward again. Conquest advances into the right hand zone, threatening the whole zone now. It lays out some creeping barrage templates to restrict access to the right zone. Ulhans run into the zone too. Solos and Great Bears all position further up the board and in the feat bubble. Focus gets handed out to the battlegroup. Aiyan, Holt and their attachment go, but Aiyana misses the Kiss on the iron fangs and only a couple die to shooting. Caine goes and sticks up his feat. Between his unit, the battlegroup and some trencher shots most of the black dragons die. Stormwall puts covering fire in front of Ace, who is contesting the left zone, before sticking a pod somewhat in the way in the middle of the zone. 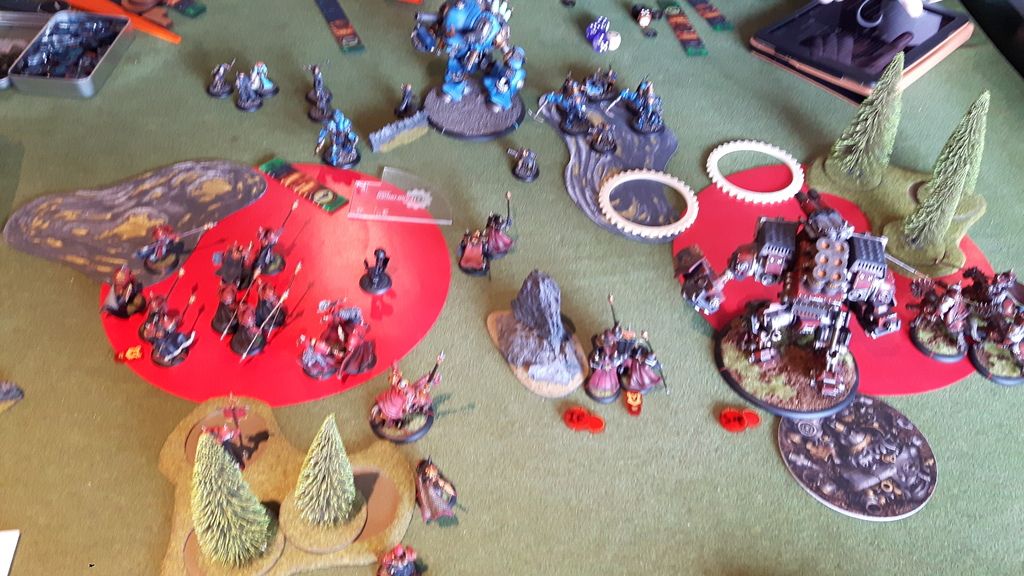 Khador: 1 Cygnar: 0 Turn 3:I upkeep Superiority and drop Iron Flesh. Irusk puts reposition, Iron Flesh and Battle Lust on the regular iron fangs. A kovnik charges the storm pod to get it out the way before Markov charges Ace through the covering fire. He gets the crit. and knocks him down, doing solid damage too. He repositions a little. The iron fangs then shield wall, one of them providing a buff to a couple others that walk through the covering fire and finish off Ace. Black dragons charge, doing damage to the stormwall and killing a trencher master gunner. Conquest continues to use creeping barrage to dissuade anything coming into it and the ulhans run into the forest for some concealment. Focus gets allocated out again. A load of stuff is cleared out from the middle before the stormwall charges into the left zone (putting a pod in the right zone too) and killing some more things. Markov, both kovniks, a Great Bear and about five iron fangs are killed, plus several more black dragons. 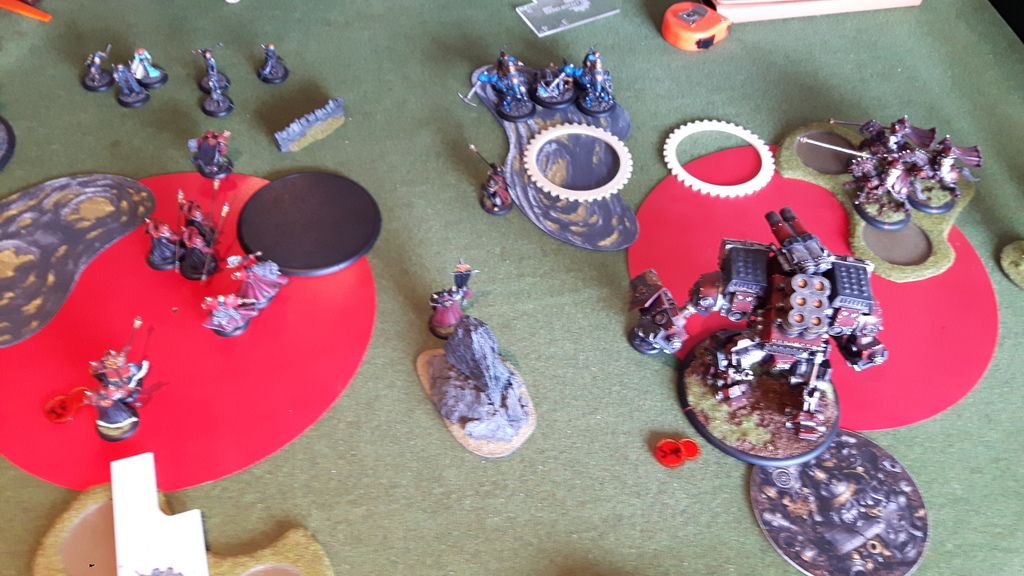 Khador: 3 Cygnar: 0 Turn 4:Keep focus again. Conquest smashes the pod and the ulhans charge in, killing a grenadier. The iron fangs get Battle Lust again and they attack stormwall (represented by the huge base in the photo) along with the remaining Great Bears, doing reasonable damage. The black dragon officer charges the other grenadier for some damage. 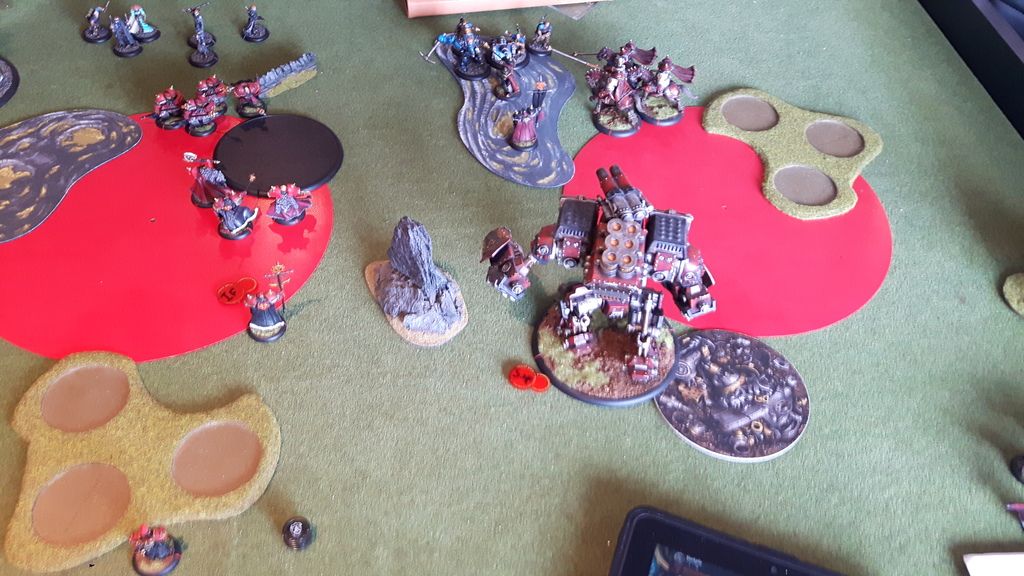 Cygnar kills off all the remaining iron fangs except the standard bearers and an ulhan before the stormwall runs into the right zone, dropping a pod. 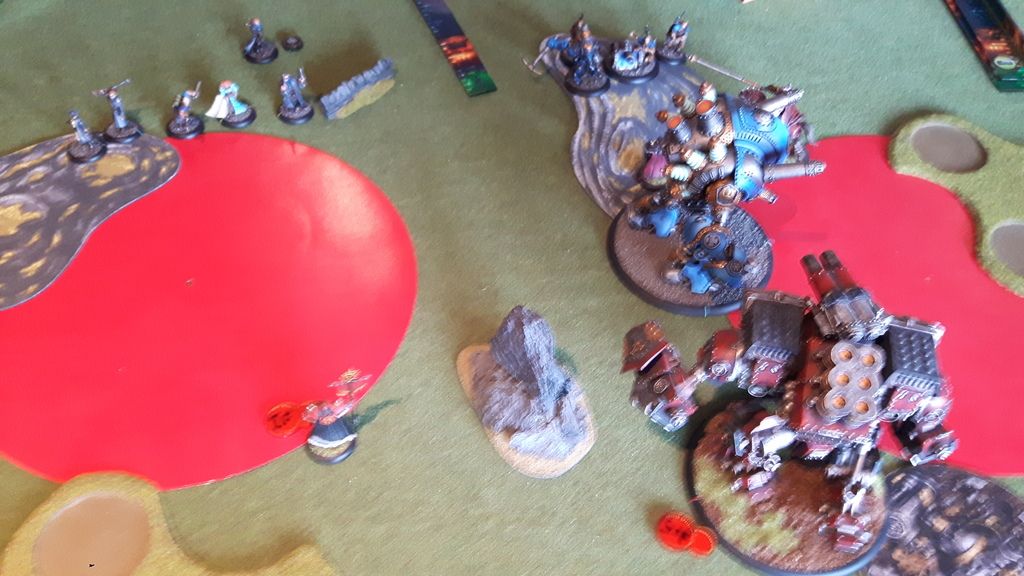 Khador: 4 Cygnar: 0 Turn 5:Superiority is upkept and conquest is given two extra focus. Irusk shoots the storm pod before conquest finishes off the stormwall. 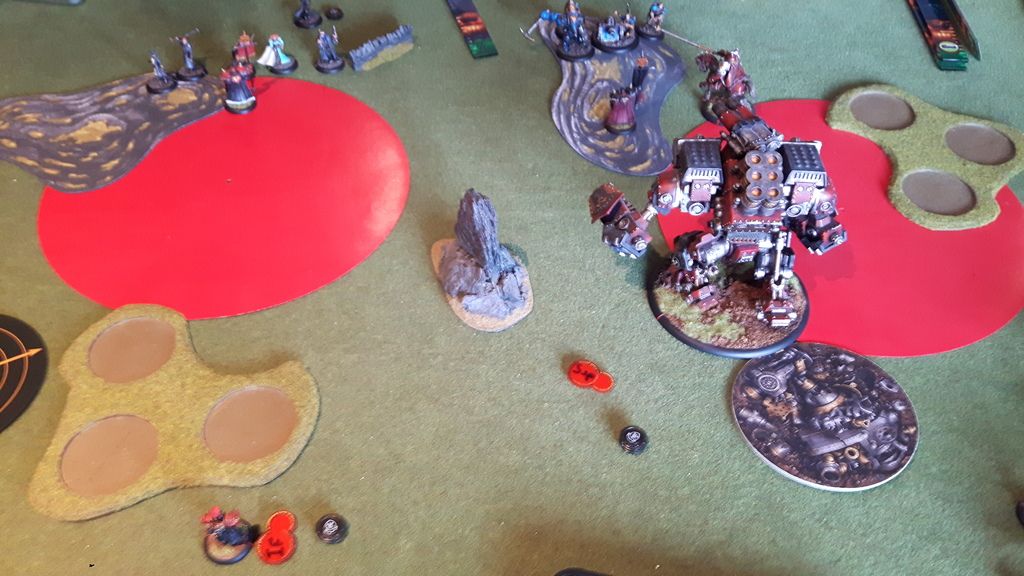 Khador: 5 Cygnar: 0 Victory to Khador!Pleased with how the list performed! Irusk1 protected the army well on the way in and gave them some buffs once they arrived. While most things died, it meant that by the late game my opponent still had a conquest with Superiority to deal with, meaning it could pretty much do as it wanted at that point. Legion of SteelA solid theme list I think. The advance move lets pikemen get up the board faster while staying in shield wall, which is great. Counter charge was more of a general deterrent, but I can see it being really effective against some lists. Like the other themes, the restrictions are not too strict that the list isn't really usable, but is restrictive enough that playing out of theme is still equally tempting. Irusk1Seemed to really fit in with this list well. Solid buff for the colossal, an ARM buff on the unit most likely to be soaking the incoming fire, a great feat and some solid abilities and other spells that give him some utility. Inhospitable Ground can still mess up some armies badly too. ConquestWas great! Superiority is obviously nice, but the ranged game it brings was more important. Having creeping barrage really helps a melee focused list like Legion of Steel and the potential critical with the main cannon is something opponents have to be very wary of. Iron Fang KovnikNice solos for threatening counter charges through pikemen, plus the precision strike and no sleeping on the job bubbles are really nice. Ulhan Kovnik MarkovTactician seems really important with this list and he's a serious counter charge threat. Cavalry models with crit. knockdown are nice, being MAT8 P&S16 makes him even better. Black Dragon PikemenTook a beating this game! But did their job very well, lasting a long time. Great unit, though the lack of pathfinder can hurt (though Irusk1 can sort that). Great BearsSeem good with counter charge. Irusk1 also helps them out nicely. Iron Fang PikemenCompared to MKII they actually have a place alongside black dragons. Overall they seem in a good spot really. Relentless charge is very good to have and the mini-feat is excellent. Meant all my iron fangs were arriving at the same time under Irusk1's feat. Iron Fang UlhansA strong flanking unit. Didn't get up to much in this game really, but they combine with Irusk1's buffs nicely. Thanks for reading! Cheers, Dave
|
|
|
|
Post by thebuoyancyofwater on Apr 17, 2017 7:29:21 GMT
Irusk1 vs Kaelyssa, Extraction
I got another game in with the previous Irusk1 list, this time against Retribution. However It turns out my memory has totally gone of the details of this game, so I'll just put down some highlights.
1. Game ended with me loosing. The game went a bit odd and dragged on for ages! We both needed to go home so I went for a long shot assassination with conquest, but the main gun threw her too far away for the secondaries to reach her (rolled a 6) so we called it there. Attrition had started going against me anyway.
2. Black dragons should have used Iron Zeal on turn 1. We discussed it during the game and both forgot that battle mages do a POW10 after pulling models out of shield wall. This meant they killed on 5's, not 8's. Combined with 3 stormfall archers all rolling the hard 9's to hit black dragons on a hill and set a heap on fire meant almost the whole unit was dead before my turn 2.
3. Mass counter charge causes headaches! Though I knew this from playing Karchev, it's nice to have other lists that can use it now.
4. Conquest is excellent in Legion of Steel. It provides great cover and control for the all-melee army on the way in. Both opponents found that having to deal with a conquest after chewing through all the pikemen felt tough.
5. Irusk1 was very good for the list, but I think I prefer him out of theme overall. I certainly like shock troopers with him, so I'll maybe wait to see what the MoW theme force does and how that gels with him.
Cheers,
Dave
|
|
|
|
Post by thebuoyancyofwater on Apr 17, 2017 11:41:26 GMT
Zerkova1 vs Fyanna2, Extraction
A lot of Extraction lately! After trying Legion of Steel with Irusk1 it was time to try it with a different caster. Fortunately, one of my favorite casters when I first started Warmachine has a good time with Legion of Steel, so it was time to try Zerkova1! I didn't play the Seattle list, instead basing it on what I have available and can get before a tournament at the end of the month. Game was on vassal, so no photos sadly.
Legion of Steel
Zerkova1 +28
-Conquest -37
Iron Fang Kovnik -0
Iron Fang Kovnik -0
Ulhan Kovnik Markov -7
Battle Mechaniks (Min) -3
Black Dragon Pikemen (Min) -10
Black Dragon Pikemen (Min) -10
Great Bears -9
Iron Fang Pikemen (Max) -15
-Iron Fang Officer & Standard -0
Iron Fang Ulhans (Min) -12
Fuel Cache
Legion of Flying Beasties
Fyanna2
-Angelius
-Angelius
-Naga Worm-Thingy
-Neraph
-Raek
-Seraph
-Seraph
Forsaken
Shepard
Shepard
Sorceress on Hellion
Sorceress on Hellion
Spellmartyr
(Something might be a little off, but that's the jist of it.)
Bunker
There was an obstruction just to my right and a forest about halfway up the board on that side. There was a hill on my other side I believe. My opponent's army is so fast most of the rest of the terrain didn't come into it! There was another forest near the left flag. I win the roll and take first turn.
Deployment
Conquest deploys slightly to the left of my objective and Zerkova positions centrally. A black dragon unit, a kovnik and the Great Bears deploy to the conquest's left. The iron fangs deploy to the right of my objective with the other black dragon unit behind them. Markov and the other kovnik are in among this lot and the ulhans are on my right flank. Fyanna deploys centrally with beasts all about the place. The raek is on my right flank and the naga is in the second row on my left flank, but otherwise the beasts are all fairly central. Support follows. I advance move the iron fangs forwards and for upkeeps my opponent has Iron Flesh on Fyanaa, Fury on a seraph and Admonition on an angelius.
Turn 1:
Fuel Cache puts smoke to my left, where it stays all game. The iron fangs shield wall up and the black dragons run up, everything staying out of melee threat range. Solos and Great Bears all follow and the ulhans run round on the right flank, though the forest will make life difficult for them potentially. Conquest runs up to the left of my objective and Zerkova casts Watcher, puts out a couple clouds and charges up the board.
Fyanna's spells are all upkept for free. The beasts fly up the board, led by the Admonition angelius, which is the only one to get just into threat range. The raek runs up behind the forest on my right, threatening the ulhans nicely. Sorceresses both position fairly centrally.
Turn 2:
Watcher is upkept and Zerkova keeps her remaining 6 focus. The iron fangs and black dragons all advance in shield wall. Markov moves more centrally to cover the army with his command bubble before a kovnik moves up behind the iron fangs and the other kovnik and Great Bears move up behind the black dragons on my left. The ulhans back off out of threat range of the raek. The conquest advances and boosts a main shot into a sorceress, hitting but not getting a critical. The shot does a couple points of damage before it puts down some creeping barrage to be annoying. Zerkova enters the killbox and sticks down three clouds to hamper the sorceresses and potentially give MAT penalties to beasts.
Upkeeps stay up and fury gets reeved in. Fyanna advances into the killbox and feats, dumping a couple fury I believe. A sorceress comes up and drops a 5" AoE of pain on some iron fangs and the more central kovnik before the Admonition angelius charges into the iron fangs. Markov counter charges and the angel doesn't Admonition due to setting off more counter charges if it does. Markov hits and uses precision strike to remove it's spirit. However the blast also kills a couple iron fangs, including the angelius' charge target, so it redirects it's armour piercing attack onto Markov, killing him. The seraph with Fury charges into the black dragons on my left. it kills one before advancing with overtake. This puts it in counter charge range of the Great Bears, so one charges in. I get lucky and get the 8 to hit, doing solid damage. Since it can't dodge off a miss the other two Great Bears charge in. At MAT10 they have an easier time hitting and are now weaponmasters, and they kill it. A ranged heavy shoots a Great Bear, but it toughs and stays standing thanks to the kovniks. The raek jumps into a couple of pikemen, killing one. The other angelius charges in on the flag to my right, clearing everything off and basing it for a point. The other beasts and the sorceress all position as best they can.
Khador: 0 Legion: 1
Turn 3:
Watcher stays up and Zerkova keeps 6 focus. The black dragons on my left charge a seraph, doing solid damage with a couple CMA's and dropping it's spirit with precision strike. The Great Bears charge another heavy on my left side, but don't kill it. The kovnik on the left then runs to the flag on that flank. The conquest advances and boosts a shot into some support and between the scatter and dodge of the original target it doesn't hit anything. Zerkova puts Ghost Walk on the iron fangs, feats, advances between conquest and my objective and sticks down two clouds in front of herself. Basically it means nothing can walk into melee with her without being -2 MAT and taking a Watcher punch from the conquest. The iron fangs charge the angelius on the flag, again using CMA's to make sure they hit and precision strike to remove spirits. They then use their mini-feat to get back into shield wall. The central kovnik charges the Admonition angelius, who backs away but keeps it in reach range. The other black dragons then charge it and use CMA's to do more damage, leaving it on about 5 boxes of body. The ulhans charge the raek and manage to kill it after the first two hit.
Khador: 1 Legion: 1
At this point my opponent concedes. Pretty much every beast has lost it's spirit and is surrounded by iron fangs. Plus conquest is now sitting ready to get stuck into combat and Fyanna is in a very risky spot.
Victory to Khador!
I thought that was going to go really badly given the beasts all ignore Zerkova's clouds, but it actually worked very well! The amount of counter charge can become a real pain for opponents very quickly. I'm liking that the iron fangs hit hard, but also accurately and with a couple ways to improve accuracy further. Precision strike became a big factor in this game very fast. Almost every beast lost it's spirit whenever they got attacked.
Legion of Steel
Enjoying this theme a lot! The advance move lets a unit advance in shield wall on turn 1 and still get a relevant board position. The counter charges are great, the abilities on the solos are ideal for threatening to really mess up opponent's turns.
Zerkova1
So I had read the theory on why she works in this theme force and was suitably impressed! That was against an army that can largely see through her clouds too. Sadly she never got on the offensive since beasts got into melee before she could deal with the likes of Admonition, but her defensive tech felt solid.
Conquest
Conquest is excellent at supporting armies where most of the rest of the army is melee based. It didn't get a chance to shine much here, but was still a solid center for the army. I think if people manage to chew through all the iron fang models plus Zerkova's tech they'll struggle with the conquest.
Iron Fang Kovnik
Precision Strike was a pain for my opponent in this game. That combined with counter charge is excellent, plus mass steady is great for the army.
Ulhan Kovnik Markov
I was a bit unlucky to loose him, but he was still very effective before he died. Letting things move through each other is excellent. If it wasn't for Fyanna's feat I would have counter charged with something else initially just to keep him safe, but needed the cavalry bonus to help the accuracy in this instance.
Battle Mechaniks
Nice to have with a conquest around.
Black Dragon Pikemen
I actually really liked the two minimum units. They could just follow the iron fangs and then get stuck in when needed. A bit more independent of the solos due to their in-built abilities and Ghost Walk can cover a lack of pathfinder if needed.
Great Bears
The counter charge threat is very good. I basically figured I could charge one in and see what happened, then base the actions of the other two on the result of that attack. Getting the hit immediately meant the others could get in at MAT10 for some accurate smackdown.
Iron Fang Pikemen
Very good at leading the way in shield wall. I saw an opportunity to jam up hard in turn 2 through using the mini-feat, but wanted to keep everything together. But the mini-feat plus Ghost Walk could cause some serious issues for some opponents.
Iron Fang Ulhans
A nice flanking unit for the list. A bit of extra SPD and a higher base P&S is good.
Thanks for reading!
Cheers,
Dave
|
|
|
|
Post by thebuoyancyofwater on Sept 1, 2017 9:43:20 GMT
Strakhov2 vs Maddox, Spread the Net
Hi folks,
Finally time to get some battle reports up and I thought a good place to start would be my first foray into Strakhov2 playing Legion of Steel. Ended up against Maddox running Storm Division. Sadly no photos... Here's the lists:
Legion of Steel
Strakhov2 +22
-Kommando
-Kommando
-War Dog -3
-Kodiak -13
-Marauder -10
Iron Fang Kovnik -0
Iron Fang Kovnik -0
Ulhan Kapitan Markov -7
Black Dragon Pikemen (Min) -10
Black Dragon Pikemen (Min) -10
Great Bears -9
Iron Fang Pikemen (Max) -15
-Iron Fang Officer & Standard -0
Iron Fang Ulhans (Max) -20
Storm Division
Maddox
-Squire
-Centurion (I think? Heavy with a sword and shield.)
-Stormwall
Junior
-Light with an electric gun and spear
Max Stormlances
Max Stormlances
I feel like I'm missing some models, but this was the jist of it.
Set Up:
Terrain had a forest fairly central, splitting the rectangular zone in two. There was a wall just into the zone on my right, plus a forest on my flank there. There was another forest between my deployment and the zone on my left. The was a hill on my opponents side just edging into that zone and another forest towards my opponents left flank.
I won the roll and took first turn. I deployed the ulhans on my left with a kovnik behind them, then the marauder towards the middle to go round the other side of the forest. Strakhov was next with his buddies, plus the dog and a black dragon unit behind. Regular pikemen take the middle of deployment (and advance move forwards), then there's the other black dragon unit and the kodiak on my right. Great Bears, the other kovnik and Markov all deploy behind the central clump. My opponent puts stormlances on both flanks, the stormwall slightly towards my left flank, Maddox and the other jacks take the middle and support follows.
Turn 1:
Strakhov puts Inviolable Resolve on the ulhans and Quicken on the iron fang pikemen before advancing and repositioning forwards a little. Jacks and ulhans run up while the iron fangs shield wall up the board. Both black dragon units run, the one on my right making sure everyone was within six of the right circular zone.
I had neglected to consider the stormwall threat range, so it gets Snipe and advances towards the ulhans. However it takes both big guns to kill one ulhans thanks to Inviolable Resolve. Otherwise it pops out some covering fire and a pod in the left circular zone. Stormlances and jacks mostly run up, staying out of Quickened iron fang threat ranges. There's maybe a couple of shots here and there, but nothing of note. The heavy jack gets Arcane Shield and Maddox puts her ARM buff on herself.
Turn 2:
Both spells are upkept and Strakhov keeps the remaining four focus. The ulhans run into and around the forest on my left, toeing the zone and staying mostly out of stormlance charge range (a couple can make it into melee). The kovnik on that side sets up on their left flank to threaten counter-charges. The central iron fangs shield wall up further and the black dragons on my right shield wall into the zone. The kodiak tramples and puts down a cloud on that side to limit line of sight. Strakhov and his buddies go, feat, cast Last Stand on the left black dragons, advance forward and create clouds before repositioning back behind them. The marauder runs up into the central zone and the Last Stand black dragons shield wall up behind it, threatening to counter attack anything that goes for the marauder or ulhans. Great Bears and Markov move up, as does the last kovnik. Everyone except a couple black dragons on my right are covered by the feat.
Cygnar upkeeps their spells. The stormwall and heavy shoot at the marauder for solid damage and the stormwall leaves some covering fire again. It also drops a pod in the central zone. The stormlances on my left charge two into the same marauder while the rest hang back. In the end the marauder has four boxes left, cortex and right arm. The other stormlances, the light jack and Maddox take out one or two pikemen (light jack through melee, rest through shooting), but the feat mostly saves them. Black dragons score on the right.
Khador: 1 Cygnar: 0
Turn 3:
After a bit of plotting and measuring Quicken and Inviolable Resolve are dropped and Last Stand is upkept. The marauder walks up and kills the storm pod in the central zone. The Last Stand black dragons charge the two stormlances that attacked the marauder, only two making attacks to kill them in the end. Strakhov activates, puts Quicken on the ulhans and Inviolable Resolve on the pikemen before the cloud wall is set up on my left, touching the central forest. They reposition out the way. The pikemen use Defensive Formation and run/charge. They kill the light jack and get a critical knockdown on the heavy before repositioning around in the middle. Following this, Markov runs to my left, behind the cloud wall. This lets the ulhans charge through the black dragons to reach the three remaining stormlances on that flank. One impacts through the storm pod, but then rolls a five for charge damage on the stormlance, leaving it on a box. The other two kill their targets while the last one puts some damage on the knocked down heavy. They reposition to block up the stormwall. Remaining solos and Great Bears move up and the black dragons shield wall on my right after the kodiak advances and clouds. I score all three zones.
Khador: 4 Cygnar: 0
Time for retaliation! The last stormlance on my left kills a blocking ulhan, allowing the stormwall to advance up and take out another one of two I think. The storm pod is dropped behind the Last Stand dragons, taking them out. The heavy goes in and finishes them off. Maddox feats (we discussed this a fair bit, it doesn't seem great) and kills a couple of pikemen before using Quickwork to kill the kovnik on my left. The stormlances on my right charge in, taking out several pikemen, the marauder plus the other kovnik. They reposition so three are in the central zone and two in the right zone. Junior then charges in! Thanks to the feat I think he takes out another two pikemen. The squire runs up, but can't contest.
Khador: 4 Cygnar: 0
Turn 4:
I drop all upkeeps and hand a focus to the kodiak. Markov starts by charging a stormlance in the central zone, killing it. The remaining pikemen (about three plus officer and standard) advance up and take out one of the other two stormlances in the middle. The kodiak can then walk over and kill the third, giving me the last control point needed! Back up plan was to Quicken the Great Bears, letting them all reach a stormlance in the right zone. Killing it would then let all six black dragons charge the last stormlance in that zone to claim it instead.
Khador: 5 Cygnar: 0
Victory to Khador!
Very pleased with the list and caster! The scenario game was very solid and damage output is very good. Obviously not much ranged, but the list felt fast enough to make up for that. Quick rundown of the models below:
Theme Force
I think the Khador themes are all designed well. Each has it's own distinct flavour and play style, they have a solid limitation on what you can take, the free points available isn't obscene and the in-game benefits are nice but not game breaking. I hope the greylord and man o war themes have been implemented as well as the existing themes.
Strakhov2
I've held off playing him until now and greatly enjoyed the first game with him! For a caster that is effectively a buff-bot he was felt very dynamic and interesting to use turn by turn. And there was always the possibility of him going super-solo if needed. The cloud wall was a great ability on the unit too. While it's only been one game, I don't see Lock the Target or Return Fire getting a huge amount of play.
War Dog
Spent the game collecting sticks and barking. Did both very well.
Kodiak
A bit of pathfinder is nice for the list, plus the extra cloud can be used to extend the cloud wall as required.
Marauder
The threat of a marauder with Last Stand reaching a huge based model makes it a top priority for many opponents, which is nice for keeping iron fangs alive.
Iron Fang Kovnik
Did their thing really. Threatened counter-charge and gave out precision strike to the normal pikemen. I find the overlap between black dragons and kovniks a little annoying, but I think that's an issue with the black dragons, not these guys.
Ulhan Kapitan Markov
Really nice! The ability for models to move through each other is excellent and he packs a punch when required. The cloud wall worked well with him, letting him come a little further forward than normal.
Black Dragon Pikemen
I added these minimum units to both help with ADR switch outs and to provide little pockets of Last Stand threats. Worked really well since I was able to make sure the blocking stormlances would be killed. As mentioned, the overlap with the kovnik (and Markov) is annoying. I'd like to see them drop precision strike for set defence personally.
Great Bears
Cloud wall again helped these guys play a little further forward and their general threat is very nice.
Iron Fang Pikemen
Excellent targets for both Inviolable Resolve and Quicken. Quicken combined with advance move let me really grab table space early on, though I'll need to see how that works when going second. Unlike the black dragons, the synergies with the iron fang solos work well on them.
Iron Fang Ulhans
Like the pikemen they were great with access to Inviolable Resolve and Quicken! They normally get work done, but were even better here. They were a bit unfortunately not to take out the last stormlance, that would have impacted the stormwalls output in the final Cygnar turn.
Thanks for reading!
Cheers,
Dave
|
|
Growl
Junior Strategist
Posts: 496
|
Post by Growl on Sept 4, 2017 1:06:08 GMT
Glad to see you writing again! I've had some recent games with Strak2 in LOS and also found him to be pretty interesting even though he is mostly just buffing folks. There is a bit of a threat with him and his dudes so that even with just casting upkeeps all the time, he still needs to be respected. Once again I see that you run only one unit of Uhlans, something that I see in many other lists posted in the forums. I happen to run the double Uhlans and they have been great for me! I was wondering if you could explain why you run only one, what advantage do you feel it brings? You did mention ADR flexibility, but I don't really think in this theme that there are many other options. I've found the speed and power that the Uhlans bring, especially with being able to layer them, thanks to Markov, keeps them safe and allows for them to be unjammed.
As a side note, I believe you were the kind gentleman who helped me figure out how to post pictures on the old forums. I see that you had trouble with your photobucket pics like I did with mine. I switched to Imgur, and so far it has been really easy and still free!
|
|
|
|
Post by thebuoyancyofwater on Sept 5, 2017 11:17:30 GMT
Hi Growl, Thanks for the advice on pictures, I'll give that a go next time I take some during a game On the ulhan front, there's a couple reasons really. First is I only own two min units, so can only have one max unit. Second is that for me it depends on the buffs available from the caster. Some might want two min units more while others prefer a single max unit. So in Strakhov2's case I like having one large unit so that they all benefit from Quicken/Inviolable Resolve as required. Battle report incoming! Cheers, Dave |
|
|
|
Post by thebuoyancyofwater on Sept 5, 2017 11:18:30 GMT
Strakhov2 vs Magnus2, Recon 2
Time for another test with Strakhov2. Swapped the battlegroup around when I saw I'd be playing Magnus2, wanted a gun to use on feat turn. Here's the lists:
Legion of Steel
Strakhov2 +22
-Kommando
-Kommando
-Destroyer -14
-Juggernaut -12
Iron Fang Kovnik -0
Iron Fang Kovnik -0
Ulhan Kapitan Markov -7
Black Dragon Pikemen (Min) -10
Black Dragon Pikemen (Min) -10
Great Bears -9
Iron Fang Pikemen (Max) -15
-Iron Fang Officer & Standard -0
Iron Fang Ulhans (Max) -20
Stockpile
Magnus2 +28
-Freebooter -9
-Freebooter -9
-Nomad -11
-Nomad -11
-Renegade -10
Gastonne Crosse -4
-Vanguard -11
Kell Bailoch -5
Lanyssa Ryssl -4
Savio Acosta -6
Dannon Blythe & Bull -6
Lady Aiyana & Master Holt -8
Thorn Gun Mages -9
Stockpile
Set Up:
There was a building roughly central on the table and another off to my right. There was a forest on my left towards my opponents side, some water to my left between deployment and the zone there, plus a hill on my right on my opponents side of the zone. There were also a couple of walls dotted about. I was hoping to see how the list coped going second, but my opponent won the roll and chose sides, giving me first turn.
I deployed ulhans on my right flank, the destroyer in from them, regular pikemen in the middle, the juggernaut to their left and a black dragon unit left of that. Strakhov was between the destroyer and pikemen. Other black dragons followed behind and solos and Great Bears are spread along the lines. Pikemen use the advance move. Opponent has a freebooter on each flank and the nomads and renegade more central with Magnus. Blythe & Bull, the thorn gun mages and Gastonne and his vanguard are on my right flank while Kell, Aiyana & Holt, Savio and Lanyssa end up on my left.
Turn 1:
Inviolable Resolve goes on the ulhans and Quicken on the pikemen before Strakhov advances and repositions forward. The pikemen shield wall up and pretty much everything else runs.
Escort is cast, and everything runs up, keys pieces staying out of destroyer gun range where possible. Kell manages to advance and take out a pikeman, as expected.
Turn 2:
Both spells are upkept and I decide to test the jamming potential of the lift. Pikemen use their mini-feat to advance way up in shield wall, engaging several jacks and solos, including Kell. The juggernaut running into the zone on my left, and the black dragons on that flank set up to counter attack, staying back to be mindfull of Magnus' feat. Ulhans threaten right through the right zone and the black dragons on my right run into the middle of the zone to block access to the ulhans. Strakhov advances to my left, puts up his cloudwall and feats before casting Last Stand on the black dragons on my left. He repositions behind his clouds with his buddies. Markov moves more centrally, Great Bears move up towards my left and the kovniks run forward to hand out no knockdown everywhere. A kovnik runs onto the flag nearest me and I have jacks in both zones.
Escort stays up. Magnus advances really aggressively, using the central house to keep fairly safe, and feats on most of my army, choosing his table edge and mine. He kills one or two jamming pikemen. The rest of the army lays into them and by the end of the turn most are dead. A nomad gets within two inches of the juggernaut, but after a sideways counter charge from a kovnik he focuses on that, failing to kill it (it had to spend one to trample, then DEF12, ARM20 with tough and no knockdown is a thing). The freebooter on my right gets into the zone and kills a couple of black dragons there. The zones are contested, but my flag isn't. A couple of lead pikemen have survived the turn contesting the enemy flag, so Kell doesn't score it.
Khador: 1 Mercenaries: 0
Turn 3:
Quicken is dropped, Last Stand and Inviolable Resolve stay up. The feat causes me a lot of issues, but as planned some black dragons with Last Stand are free. They charge the nomad after the kovnik hits it again to remove the buckler and it gets taken out. Everything else largely repositions where it can, going into shield wall if possible and making the occasional attack. Strakhov takes stealth, switches Last Stand onto the pikemen and two of them CMA Acosta to kill him.
Khador: 2 Mercenaries: 0
Escort stays up. The freebooter on my left goes into the juggernaut after it is hit with Kiss, leaving it on a few boxes but with all systems up. The other freebooter gets through the remaining black dragons an into an ulhan, but can't get through Wall of Steel plus Inviolable Resolve. It does finally contest my flag though. The last of the pikemen die, leaving just the UA, plus the black dragons are wiped out.
Khador: 2 Mercenaries: 1
Turn 4:
Last Stand is dropped and both jacks receive some focus. The juggernaut make short work of the freebooter on my left (possibly with help, can't remember), letting the last two Great Bears charge up. They kill Aiyana and cripple the renegade, plus one of them contests the enemy flag. The kovnik also charges up, adding to the damage on the renegade and engaging Lanyssa. The destroyer leaves the other freebooter on about ten boxes. Markov charges in and goes crazy, killing the freebooter with the charge and putting damage on one of my ulhans (needing twelves) and a damage on my destroyer (needing elevens)! This frees up the ulhans, who finally charge in. They kill Gastonne, Bull, the remaining two gun mages and knockdown and hurt the last nomad before repositioning into base to base with others in the unit. I score the flag and zone on my right, everything else is contested.
Khador: 4 Mercenaries: 1
The remaining nomad is loaded up with focus and Escort is upkept. The only option for Mercenaries is for that nomad to charge into a position to contest the zone but not reach the flag, which it does. The contesting Great Bear is cleared out on the other side, freeing up the flag.
Khador: 5 Mercenaries: 2
Turn 5:
Just need to kill the nomad and contest the enemy flag to win. Ulhans, destroyer and guns from Strakhov's unit (after it's knocked down) kill the nomad and the last Great Bear advances to contest the flag once again.
Khador: 7 Mercenaries: 2
Victory to Khador!
That became a bit of a grind! Magnus' feat was really good against an almost entirely melee-based army, but the early jamming with the pikes let me get through. Since I split up the list in the last post I thought I'd do a brief breakdown of my impressions of Strakhov after a few games:
Stats:
A very solid statline, both defensively and offensively. P&S is maybe a little on the low side, but then there's combo-strike I guess. It's a bit odd that he and his grunts are worse at shooting than regular assault kommandos with Strakhov1 though...
Abilities:
Mostly legit! Reposition is absolutely great when combined with the clouds from the grunts, and stealth is handy when you can't get behind the cloud wall (Magnus' feat...). Overtake seems a bit niche though. I don't think that will come up very much, but I guess when it does it'll be good to have it there. The gun seems good, though maybe a little short ranged and his trench blades are good, though a little low P&S maybe.
Spells:
Mostly excellent! I've not used Lock the Target or Return Fire yet, though I guess I will at some point. His upkeeps are all excellent buffs in Legion of Steel and I've been surprised by how much use I've got out of Last Stand. I thought it'd mess with the trading game too much. He's a little focus strapped, but it's manageable (and one of the reasons Lock the Target will rarely be cast I feel). He can reduce the need to camp anything through his abilities too.
Feat:
Great! Straight up money on the feat! Not much else to add.
Grunts:
A good couple of fighters, though mostly good for their cloud wall. Haven't seen them in melee yet, though their guns get some nice work done.
Overall I'm still pleased with the list.
Thanks for reading!
Cheers,
Dave
|
|
Growl
Junior Strategist
Posts: 496
|
Post by Growl on Sept 5, 2017 19:59:22 GMT
OMG!!! I completely did not know that Strakhov's Grunts have clouds! I am silly, but on the bright side that just makes him even more of a pain in the butt. Great game above! I think you really play your list like Shrek, it has layers!!! Seriously though, I've been liking my list because although it is fairly straight forward, there are different ways to get things done. With regard to my thoughts on the double Uhlans, I like to have the one unit that goes relatively straight for the enemy have Inviolable Resolve and be in B2B for the 4point ARM swing. The 2nd Unit gets quicken and is safe behind the first unit, this way they can leap frog each other. At least that's how it's supposed to work.
|
|


