|
|
Post by Soul Samurai on Jan 14, 2019 16:48:02 GMT
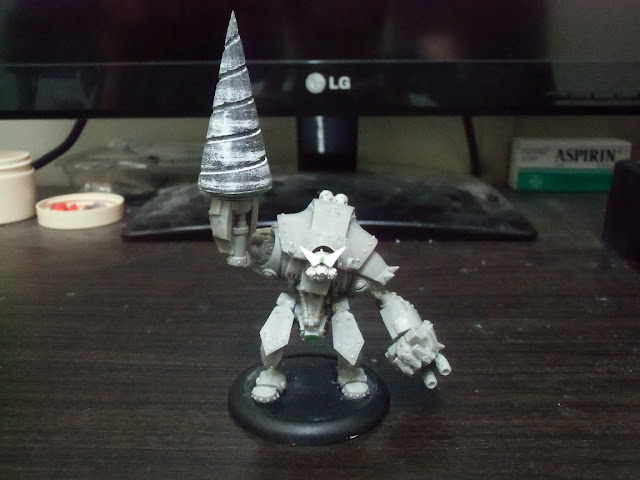
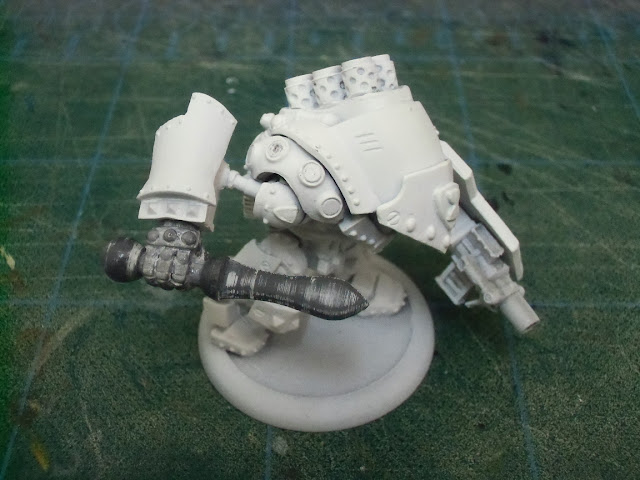
This hand has a hole for the hammer shaft in it; I did model it up without the hole for the gun hand. I decided to just assemble the hammer without the top engraved piece. Some gap filling was necessary. The gun was modeled with features of both firearms (the ejection ports and magazine) and flamethrowers (there's a cylinder on top and a pressure gauge behind the ejection ports) for plausible deniability.   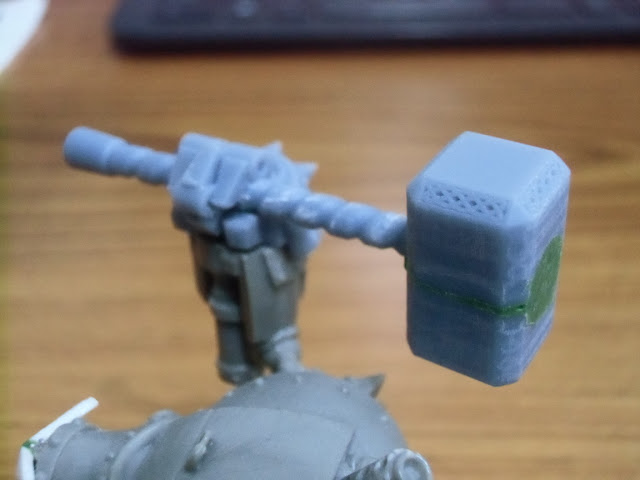 Well, this guy is done for now; no idea when I'll actually get around to painting him. Anyway, I'm still struggling with the airbrush. I only wanted to use it to save some time basecoating, but it's taking so much time to try to get workign that at this point I think I'm going to just give up and do things the old fashioned way. |
|
|
|
Post by elmagnifico on Jan 14, 2019 17:53:25 GMT
From that first angle, I'd say your hand looks *better* than the official one. Congratulations!
|
|
|
|
Post by tapecrawler on Jan 15, 2019 0:24:33 GMT
The fingers are definitely cleaner on your stuff! What problems are you having with the airbrush? I know a little about them. I’ve played around with three of the four I have quite a bit.
|
|
|
|
Post by Soul Samurai on Jan 15, 2019 6:55:36 GMT
From that first angle, I'd say your hand looks *better* than the official one. Congratulations! Thanks! The fingers are definitely cleaner on your stuff! Thank you. I'm not sure if the irregular shape of the fingers on the official model is part of the original sculpt, or a mistake that happened as part of cutting the molds, or just a result of casting. What problems are you having with the airbrush? I know a little about them. I’ve played around with three of the four I have quite a bit. I have two airbrushes, but both are meant for applying makeup rather than being for miniature painting. While trying to use one of them, I ran into some technical issues. The second one was kind of working, then the paint stopped coming out. See, I'd used it successfully a couple of times before with Vallejo Game Air paints straight from the bottle, but yesterday I was trying to use Vallejo Game Color (Scarlett Red). First I tried to use it straight from the bottle, then I tried thinning it with distilled water. I suspect that what happened was that I didn't thin it enough, and/or when I used it straight first time I partially clogged the airbrush. I'm going to clean it out and try again, this time thinning much more heavily (and making sure it's mixed properly with the water for even consistency; yesterday I might have rushed that step). Fingers crossed. |
|
|
|
Post by Soul Samurai on Jan 15, 2019 16:38:50 GMT
The reason why I used distilled water before was because I couldn't find my Vallejo airbrush flow improver. Well, I managed to dig it out and, after a big airbrush cleaning session, tried basecoating again. Luckily it worked quite well this time. I probably applied the paint too thickly of course; I'm still new to this after all. I considered airbrushing a wash over the whole model, but I think that would just make it harder to fix the inevitable mistakes that will happen when I apply the other colours, so from this point on I'll just stick to what I know: the humble paintbrush.
|
|
|
|
Post by tapecrawler on Jan 15, 2019 19:41:11 GMT
The thing I’ve discovered about the higher end airbrushes is they easier to maintain. They are designed for the end user to be able to strip them down fairly easily and the parts are robust enough that they don’t cross thread or otherwise go together crooked. I’m not sure about the cheaper airbrushes. I had a lower end double action airbrush that was nothing but a source of frustration and then got a Badger Krome. It’s not one of the more expensive airbrushes. I think I got it for a little over $110US but it has been worth every penny! Apparently it wasn’t as much me as it was having an airbrush that was consistent every time I used it. I also spent a lot of time talking to the airbrush guru at the local hobby store. The most important part of airbrushing is keeping the damn thing spotlessly clean in the guts. As long as you can do that you should get good results once you get a little practice.
I would recommend only working with airbrush ready paint until you get past the learning curve. Otherwise you’re adding a really dynamic variable that will drastically effect the outcome every time you pull the trigger.
If you want to practice cheaply get some drawing ink and a watercolor pad. It will teach you trigger control which is another of the most important aspects of airbrushing. This will help a lot because once you get more comfortable with the airbrush you’ll reach for it more and more to do modulations, fades, highlighting, zenithal highlighting, and so forth.
|
|
|
|
Post by Soul Samurai on Jan 16, 2019 7:01:53 GMT
That's good to know. Maybe I'll pick up a proper airbrush someday; I really only started airbrushing at all because it was the only way to use chrome paints (or rather, the only way to varnish chrome painted models properly).
|
|
|
|
Post by marxlives on Jan 17, 2019 15:58:13 GMT
Keep going man, these conversions are too cool to stop doing.
|
|
|
|
Post by Soul Samurai on Jan 17, 2019 17:54:32 GMT
Keep going man, these conversions are too cool to stop doing. Thanks. At the moment I'm trying get some actual painting done for a change. |
|
|
|
Post by fallenexile on Jan 17, 2019 23:17:40 GMT
"Painting"? What's "Painting", precious?
|
|
|
|
Post by Soul Samurai on Jan 27, 2019 5:39:25 GMT
Ages ago I had printed a weapon part on my PLA printer. Then I primed it and smoothed it etc. However, this weekend when I tried to paint it I found it still had a lot of layer lines and stuff. So I ended up printing it again on my resin printer (which I didn't have back when I first printed the piece), to much better results. Still need to prime it again and attach it in place of the old piece. Man, this one model is taking forever.
|
|
|
|
Post by tapecrawler on Jan 29, 2019 1:51:04 GMT
We can wait. Barely. I’m excited to see how it turns out!
|
|
|
|
Post by Soul Samurai on Jan 29, 2019 3:57:11 GMT
We can wait. Barely. I’m excited to see how it turns out! Now I'm just afraid you'll be disappointed... Seriously though, thanks for the encouragement, it does help keep me motivated. |
|
midas
Read Page 5

Posts: 24
|
Post by midas on Jan 29, 2019 18:20:40 GMT
do you own a 3d printer? if so hat type/model is it? looks like a DLP printout. |
|
|
|
Post by Soul Samurai on Jan 29, 2019 19:52:58 GMT
do you own a 3d printer? if so hat type/model is it? looks like a DLP printout. I own two, a Robo R2 FDM printer, and an Anycubic Photon DLP printer. I've printed a few pieces with the R2, but it's just not good enough for miniatures, so it's been relegated to non-miniature work while I'm using the (much newer) Photon for miniature bits.
Here's some parts printed with the R2, from before I got the Photon (photos AFTER extensive cleanup):
So you can kind of manage jack-sized parts as long as the detail is not too fine (this is using a 0.4mm nozzel; I haven't had luck with smaller nozzles). The Photon is much better though, and all future parts will be printed using it.
|
|