|
|
Post by Soul Samurai on May 28, 2018 7:58:36 GMT
I don't know if this counts as a conversion or not, but I gave Andrei a cloak. Because he's exactly the kind of arrogant jerk who'd actually feel the need to wear one on the battlefield. He probably gets annoyed with the conscripts he throws in front of bullets for getting their blood on his clothes. 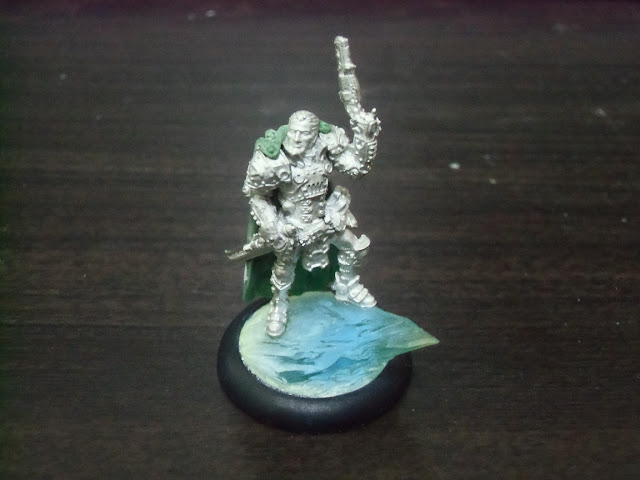 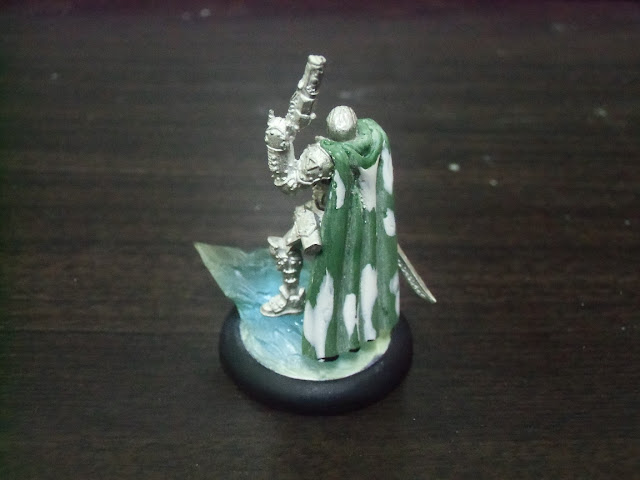 This was my first successful attempt at sculpting a cloak; I've tried before but never managed to pull it off. And this one took three tries... |
|
|
|
Post by W0lfBane on May 28, 2018 17:45:38 GMT
I can now see why he insists on wearing a cloak. He looks smashing
|
|
Fang
Junior Strategist

Posts: 117
|
Post by Fang on May 29, 2018 15:58:43 GMT
Looks much better than the hugely thick cloaks that usually come on pp models imo, well done!
|
|
|
|
Post by Soul Samurai on May 30, 2018 8:11:16 GMT
Well, this is the last unpainted conversion I have waiting to be posted right now. I think I finished him over two years ago. I actually started painting it ages back, but screwed up and had to strip the paint. I haven't had the motivation to try to tackle it again. 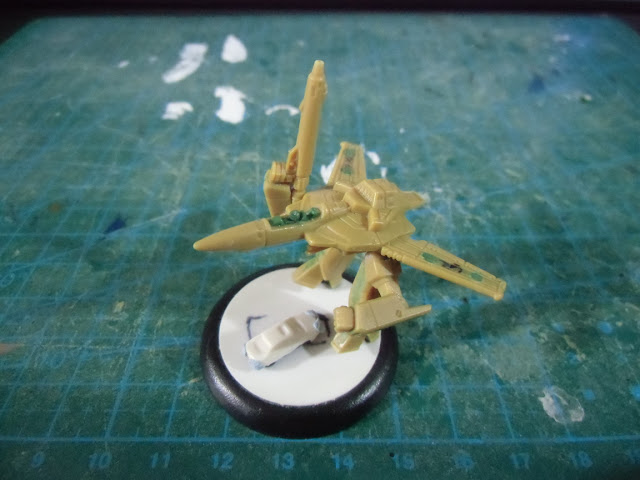 LEDs in the thrusters and the car: 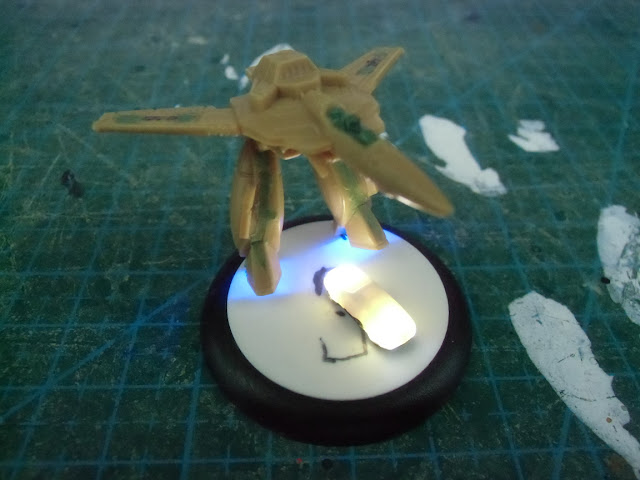 "Glass" canopy: 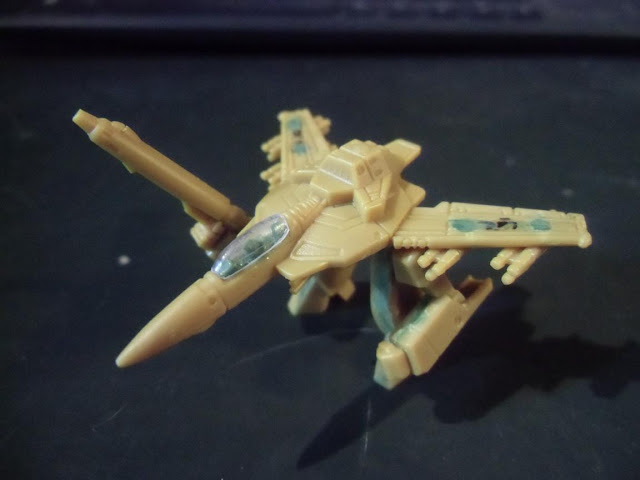 I made a greenstuff mold of the original brown plastic canopy, then cut if off and sculpted a rough mold of the inside volume of the cockpit. I then softened a small piece of clear blister plastic with a heat gun and pressed it between the two mold pieces. The cockpit and pilot details were carefully sculpted in greenstuff of course. 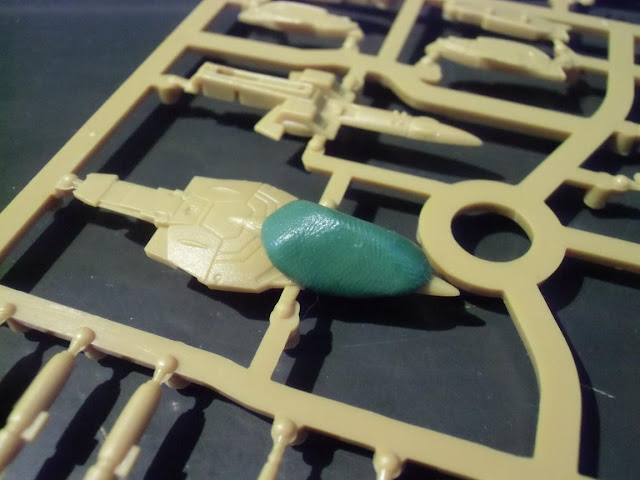  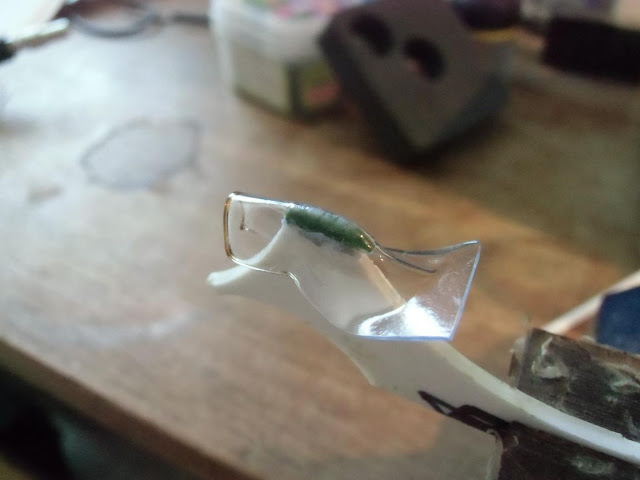 The missiles are magnetised; in the actual game (now dead) the veritechs could be given different missile loadouts and so the model comes with several different missile types. I only actually magnetized the one type though, so it's kind of pointless. 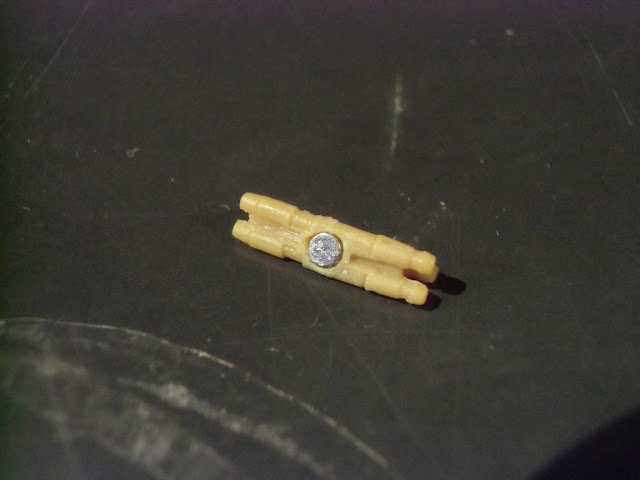 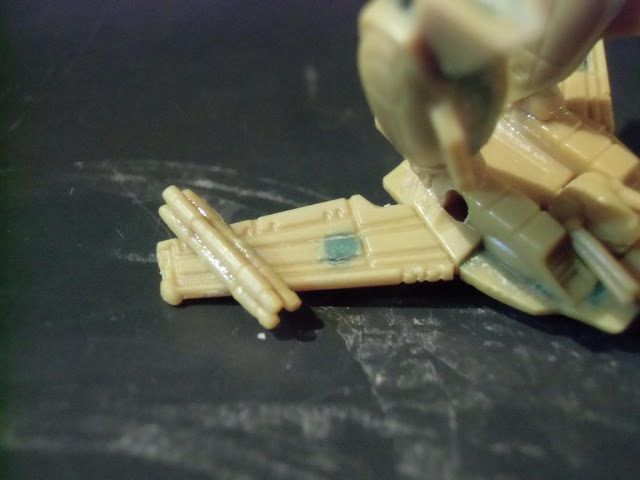 Someday I'll go back and finish a veritech in each of the two other modes (the idea is to paint one as Roy's Veritech, one as Max's and one as Miriya's - Rick can go die in a fire, and Ben's colour scheme is boring). Well, I guess that's it for this thread for the time being. Thanks for reading. |
|
|
|
Post by tapecrawler on Jun 10, 2018 16:52:10 GMT
This is wonderful stuff Soul! The range of your conversions is really impressive. Each one seems to be unique to the character you are trying to convey. I totally understand about hobby burnout. Been there and haven’t left yet. I hope you get your mojo back because this stuff is inspiring and should be shared.
|
|
|
|
Post by Soul Samurai on Jun 10, 2018 18:27:52 GMT
This is wonderful stuff Soul! The range of your conversions is really impressive. Each one seems to be unique to the character you are trying to convey. Thanks! I totally understand about hobby burnout. Been there and haven’t left yet. I hope you get your mojo back because this stuff is inspiring and should be shared. Funny you should say that. I only just (as in, less than 10 minutes ago) managed to put the Freebooter back together again:  FreebooterBroken_02.JPG (393.01 KB) FreebooterBroken_02.JPG (393.01 KB)Luckily the LED was still working and I was able to wriggle it back into place without having to rip the whole model apart. More or less - I don't think it's aligned as well as before so I think it doesn't look as bright, but I'll take it! I still need to re-attach one arm and maybe bend the other a little to get it back into position, an perhaps some other minor touch-ups, but those are all easy enough to do. So yeah, I'm really happy about that. Now I'm still not going to be going at this stuff full steam, but I don't think I'll completely walk away just yet. |
|
|
|
Post by fallenexile on Jun 11, 2018 0:15:17 GMT
Cushioned floors and aircraft-carrier-type nets at all table edges, stat!
That freebooter looks awesome. Maybe it'll be finished just in time for the Talion CID.
|
|
mazog
Junior Strategist
Walking and talking
Posts: 748
|
Post by mazog on Jun 13, 2018 15:33:02 GMT
I read somewhere about attaching the bottom of a kitchen apron to your work area so anything you drop will get caught. That won't help if you move from one area to another, but it can reduce the risk she at least help you feel less helpless.
|
|
|
|
Post by nyarlathotep333 on Jul 21, 2018 21:44:52 GMT
Damn, I'm out of the loop for a bit and all sorts of great stuff gets posted in the painting/conversion forums!
I love the LED stuff, that Freebooter especially should look pretty nifty when it's finished. Please do post final photos if you can!
Love the Veritech too, I was a huge Robotech fan a while back - watched the series, read the books, tried at one point to get a Palladium Robotech RPG going (actually RIFTS with Robotech PC's that got sucked in through a rift) though that campaign really never took off. What was the idea behind the car on the base? Burned with red hot glowing metal? Headlights/tail lights on?
|
|
|
|
Post by Soul Samurai on Jul 22, 2018 4:13:01 GMT
Damn, I'm out of the loop for a bit and all sorts of great stuff gets posted in the painting/conversion forums! I love the LED stuff, that Freebooter especially should look pretty nifty when it's finished. Please do post final photos if you can! Love the Veritech too, I was a huge Robotech fan a while back - watched the series, read the books, tried at one point to get a Palladium Robotech RPG going (actually RIFTS with Robotech PC's that got sucked in through a rift) though that campaign really never took off. What was the idea behind the car on the base? Burned with red hot glowing metal? Headlights/tail lights on? Thanks! The VF1 is still my all-time favourite mecha design. We used to watch tons of robot anime when we were kids; Voltron, Grandizer, etc (not sure of all their names in English). Robotech was a revelation in that the mechs actually looked liked something a military would actually build. The lights in the car are meant to be head and tail lights; once the body is painted and the lights are tinted I'm hoping it will look right. I kinda want it to look like the car is trying to swerve out of the way as the veritech is swooping down onto the road, or something along those lines at least. |
|
|
|
Post by Soul Samurai on Aug 28, 2018 6:17:58 GMT
For stupid reasons that I won't go into (unless anyone is curious for some morbid reason...) I've decided I want to try a list with four Destroyers and a Rager. At the moment I only have two (magnetised) Destroyers and no Rager. I have no desire to assemble two more Destroyers or a Rager at this time. So instead I'm trying to modify some of my existing magnetised warjacks. I started by magnetising a Destroyer hand to fit on my unfinished Torch. The problem here is that Torch is only magnetised at the wrists, so I couldn't just magnetise a Destroyer cannon to replace his left arm. Instead, I came up with a... less conventional solution: 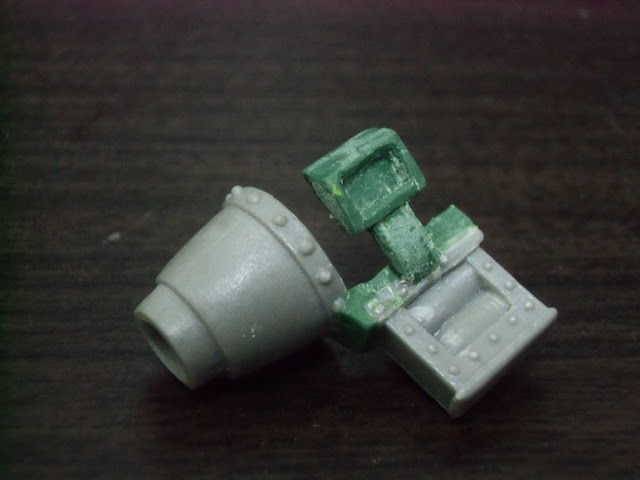  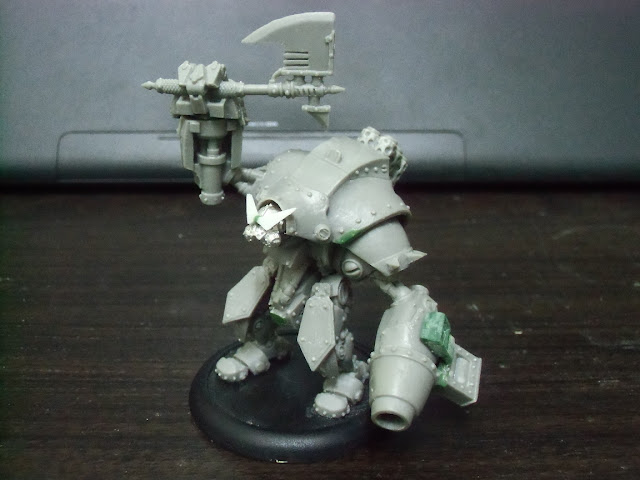 It's silly, but it gets the job done. For the Rager I decided to try to put together some add-ons for my Spriggan. It won't be tourney-legal, but it should be readable for my local games. What I found was that a "cannon hand" I'd already made ages back for my Freebooter (the idea being to run him as Rocinante) fit my Spriggan well enough: 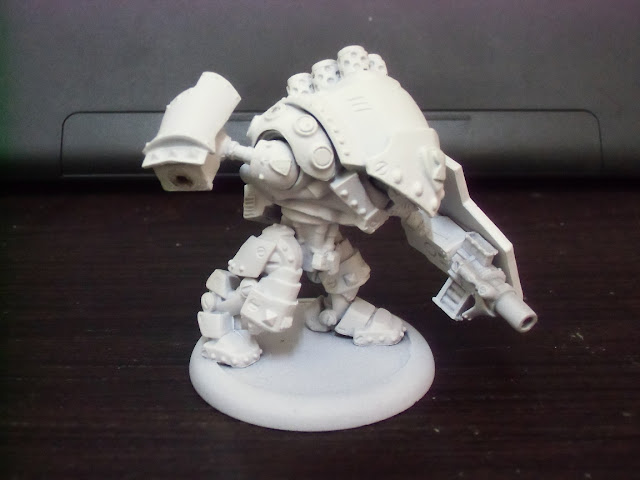 So that takes care of the shield/cannon arm. Now I just need a hand with a small sword (my "Nomad" sword from the Freebooter chassis fits but is too long). I do have some spare Ironclad hands that I could use, and of course I could put together a sword from greenstuff and plasticard, but I'm thinking about trying to 3D print either just the sword or the whole hand. That will undoubtedly end up taking me far longer than assembling/sculpting one, but the idea has kind of caught my fancy so I'm might give it a try. |
|
|
|
Post by Soul Samurai on Sept 1, 2018 9:26:34 GMT
The 3D printed sword hand came out quite well: 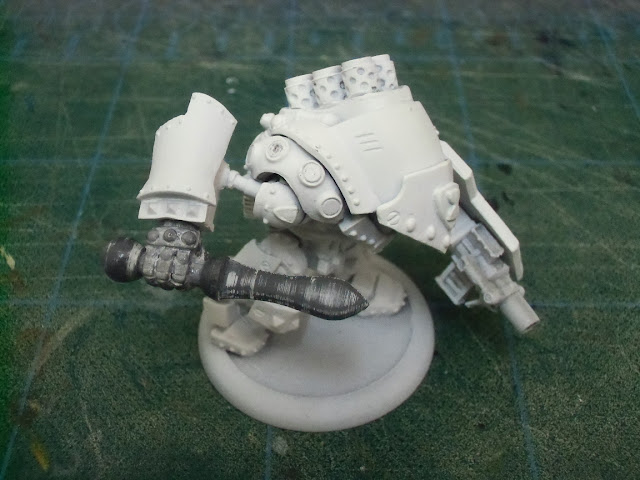 I modeled the sword in Blender; it's nothing special but it took several tries to get a blade shape I was happy with. The robot hand was modified from a model by "jibicoco". |
|
|
|
Post by marxlives on Sept 26, 2018 21:27:22 GMT
Very solid and cool conversion here.
|
|
|
|
Post by Soul Samurai on Dec 13, 2018 7:57:36 GMT
A hammer I modelled (using patterns taken from Qbatronix's Celtic jewelry box) and 3D printed for converting my Khador multijack into a Grolar:   The resin 3D printer is new, I'm still learning how to get good results with it. The knotwork in this hammer is not as sharp as I would like; the gaps between the overlapping "threads" didn't print up too well, for example. Still, I did manage to print a 2mm medallion with a recognizable Khador logo, so I would say the detail is pretty good. I think it still falls a little bit short of the kind of detail you can get in high quality miniatures, but it's not far behind; certainly good enough to make nice warjack-scale weapons. |
|
|
|
Post by Charistoph on Dec 13, 2018 17:11:42 GMT
Hey, it's MewMew! All and all, it looks a lot better than many other 3D printer jobs I've seen, and those required less detail. |
|