gmonkey
Junior Strategist
 I, for one, welcome our Infernal Overlords.
Posts: 313 
|
Post by gmonkey on Mar 20, 2018 16:50:40 GMT
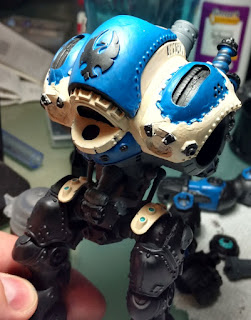
So I started assembling my Stormwall / Hurricane over the weekend, and I'm already hitting a few issues. Mostly, I'm wishing that I hadn't assembled the right and left torso sections yet, as magnetizing would be easier if I hadn't. Still, I'm optimistic and now having assessed what I might need in terms of magnets, I'm probably going to order them within the next couple days. Any advice or commentary is welcome. I've described the situation more thoroughly with photos here: casualty-wmh.blogspot.com/2018/03/magnetizing-stormwall-hurricane-part-1.html |
|
|
|
Post by Soul Samurai on Mar 20, 2018 18:47:50 GMT
One thing I've started doing when magnetising is making sure two magnets on the two pieces to be attached don't make direct contact, but have a thin layer of plasticard or greenstuff between them to stop them from smashing together. That helps protect them from chipping; neodymium magnets seem to have a strong but brittle coating, when that's gone they seem to be vulnerable to crumbling away. I also try to make sure they are fully protected against the elements, by paint or superglue or greenstuff.
Another thing is that I try to combine magnets with some mechanical connection as well, like a pin and socket or something, depending on the parts being magnetised of course.
I'm not saying that either step are neccessary though; I do have a tendancy to go overboard on things sometimes. I happen to think it's worth the extra time and effort considering how long it takes me to assemble, convert, and paint minis anyway.
|
|
gmonkey
Junior Strategist
I, for one, welcome our Infernal Overlords.
Posts: 313
|
Post by gmonkey on Mar 20, 2018 20:39:18 GMT
I can see the pin and socket especially on something like an arm you may not want to rotate. I'd actually been considering putting three smaller magnets on the colossal arm so that it could be attached at multiple positions, but your pin-and-socket thought gives me another idea: perhaps a pin with multiple sockets! This is simpler than multiple magnets, and will allow for posable arms with no unintentional rotation. Thanks for the idea.
|
|
|
|
Post by W0lfBane on Mar 20, 2018 21:06:00 GMT
Replace shoulder with giant ball magnet. Replace socket with curved metal plate.
#profit
|
|
|
|
Post by Soul Samurai on Mar 21, 2018 3:32:04 GMT
Replace shoulder with giant ball magnet. Replace socket with curved metal plate. #profit What I did with one Khador jack was stick a steel ball bearing in each shoulder and a ring magnet at the top of each arm. Basically the same result. |
|
|
|
Post by W0lfBane on Mar 21, 2018 5:07:08 GMT
Replace shoulder with giant ball magnet. Replace socket with curved metal plate. #profit What I did with one Khador jack was stick a steel ball bearing in each shoulder and a ring magnet at the top of each arm. Basically the same result. Same result easier implementation |
|
|
|
Post by Octantis on Mar 23, 2018 19:16:18 GMT
Some thoughts. First the depth of plastic for the hard plastic kids is rather thin. Before you assemble the model drill out the holes you want for the magnets, use an Epoxy Putty or Green stuff to back fill the hole, and then glue in the magnet. Once you're happy with the fit and finish then glue that piece together.
Super glue tends to remove sharpie if that's how you are going to mark your magnets polarity. I drag my magnet pairs against a file so the whole thing is scuffed / scratched except where the two parts meet. That way when I glue in the magnet I should always be seeing the shiny side and not the scuffed sides.
|
|
|
|
Post by Soul Samurai on Mar 23, 2018 19:50:22 GMT
Super glue tends to remove sharpie if that's how you are going to mark your magnets polarity. Ah yes, good that you brought this up! I have a system for polarity (the same pole always points away from the model), but at the end of the day the important thing is to keep testing and double-checking before gluing, because it tends to be very hard to remove a magnet once it's glued in place. Measure twice cut once and all that. |
|
gmonkey
Junior Strategist
I, for one, welcome our Infernal Overlords.
Posts: 313
|
Post by gmonkey on Mar 23, 2018 20:39:58 GMT
Some thoughts. First the depth of plastic for the hard plastic kids is rather thin. Before you assemble the model drill out the holes you want for the magnets, use an Epoxy Putty or Green stuff to back fill the hole, and then glue in the magnet. Once you're happy with the fit and finish then glue that piece together. The whole trick is that I've already assembled & glued all the colossal parts together, and I'm expecting the magnets to arrive in the mail in a few days. I'll certainly be using green stuff and glue when the time comes. |
|
gmonkey
Junior Strategist
I, for one, welcome our Infernal Overlords.
Posts: 313
|
Post by gmonkey on Apr 25, 2018 13:56:18 GMT
|
|
gmonkey
Junior Strategist
I, for one, welcome our Infernal Overlords.
Posts: 313
|
Post by gmonkey on May 15, 2018 18:41:20 GMT
|
|
midas
Read Page 5

Posts: 24
|
Post by midas on Jan 29, 2019 18:52:37 GMT
|
|